How do I setup Quickbooks account in EyeOnTask?
The integration of QuickBooks with EyeOnTask enables you to keep your Clients, Payments and Invoices Up to date and in sync,
You can import your existing Clients from Quickbooks into EyeOnTask
Go to the main menu and you will see the Settings option. Select it.
After selecting the Settings option Select Integrations here, you will find five options to integrate with Quickbooks, Paypal, Xero, Strip and Zapier.
Go to the first option.
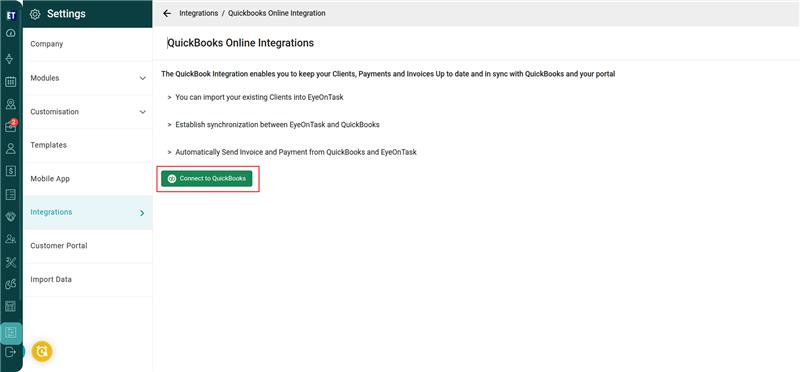
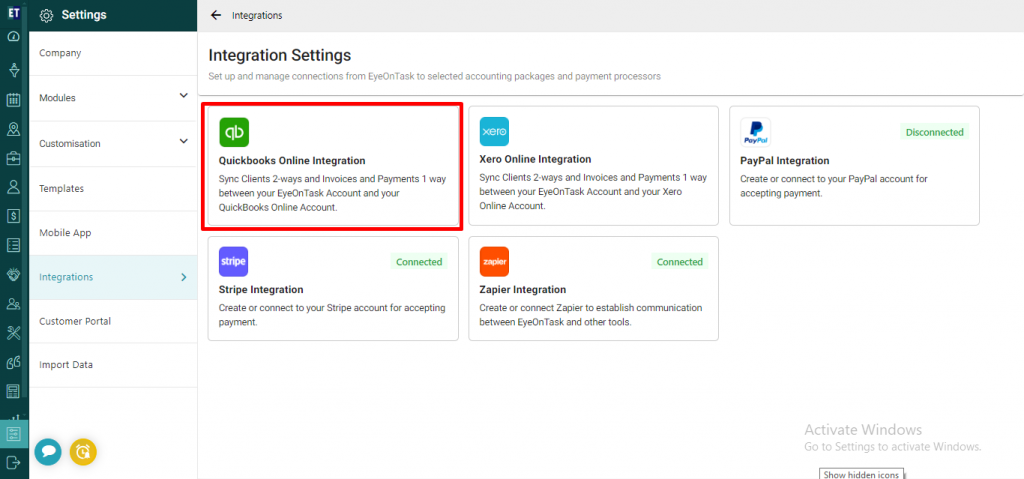 After selecting first option you will have to click on the button Connect To Quickbooks
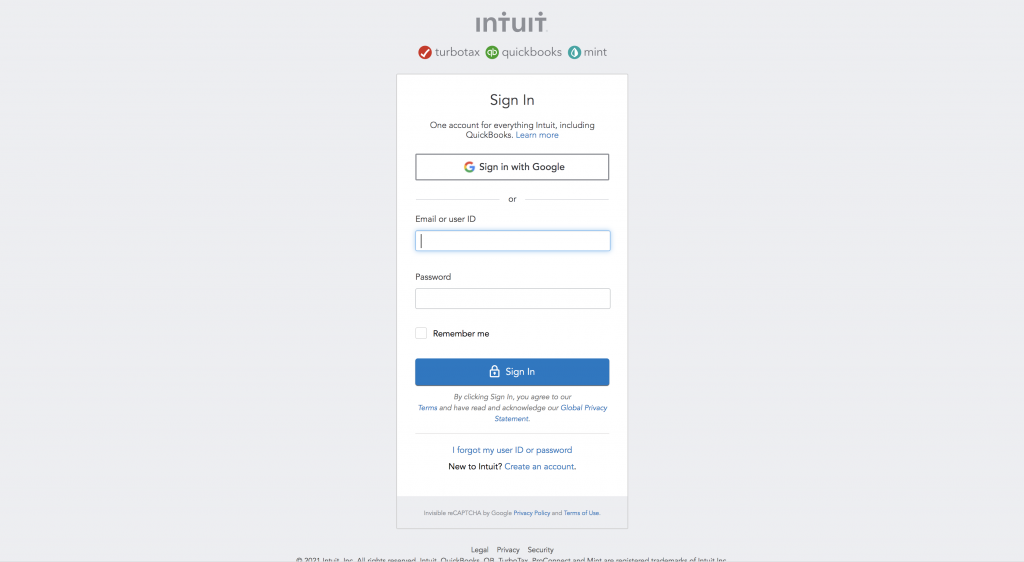
 Clicking on Connect to Quickbooks button will take you to the login page of Quickbooks
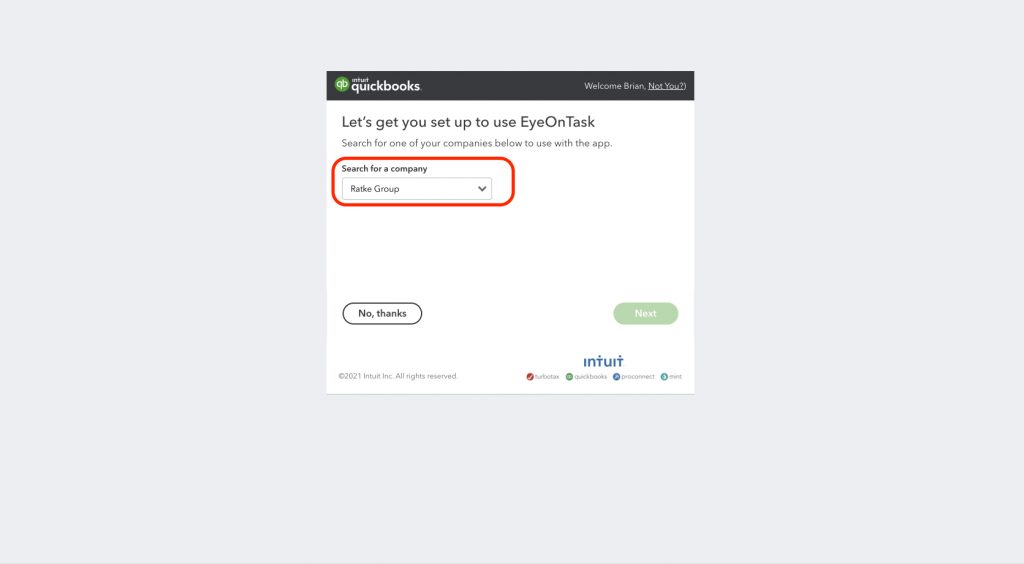
 After successful login you will be redirected to the quickbooks select company page where you have to select the company for which you need to sync the data to and from Quickbooks.
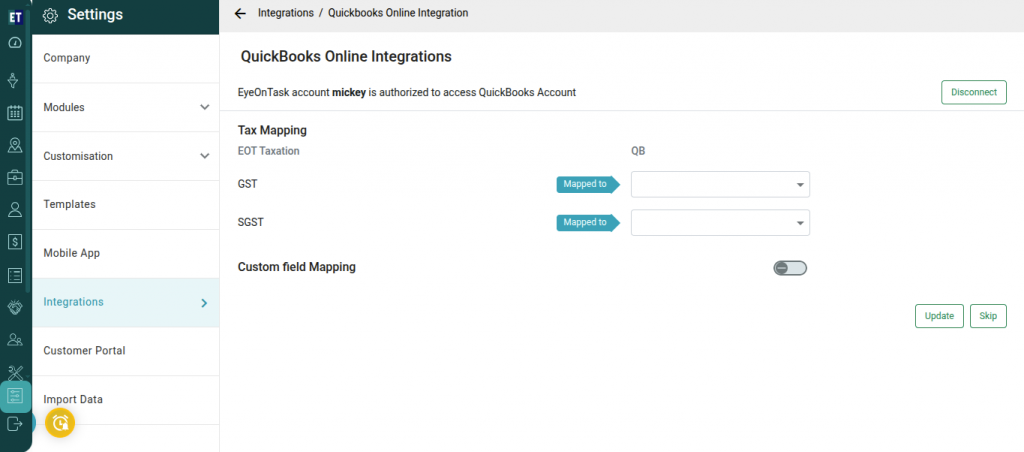
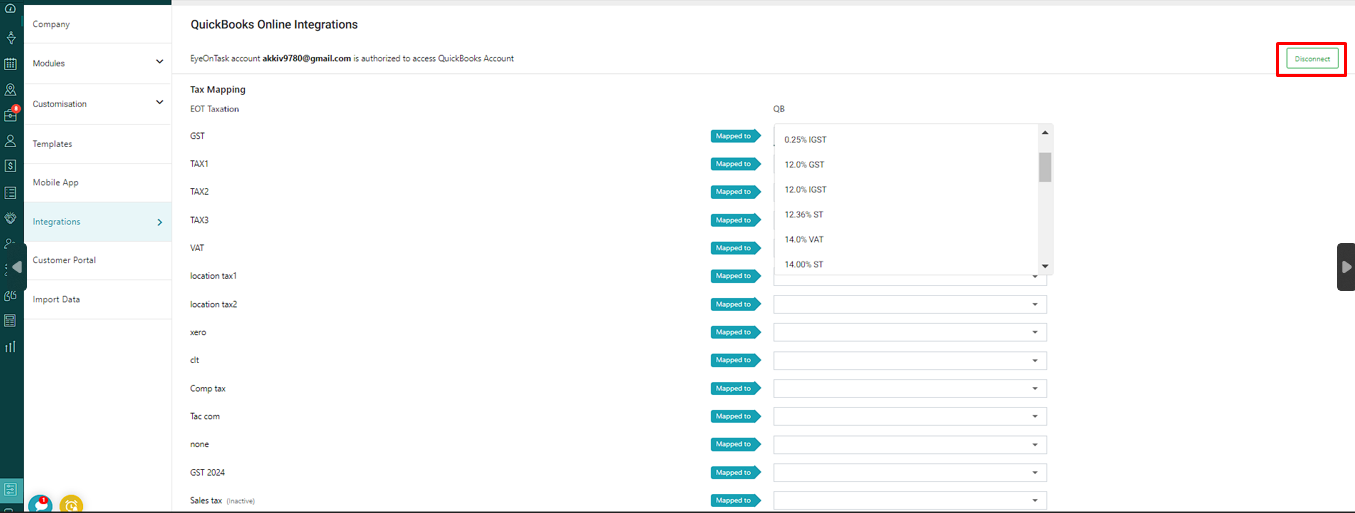
 After selecting the company you will be redirected to the EyeOnTask's Mapping page where you will see the Mapping Screen, which allows you to map data such as Taxes and Custom Fields. This ensures that the mapped data is accurately reflected in QuickBooks (QB), making synchronization easy and consistent.
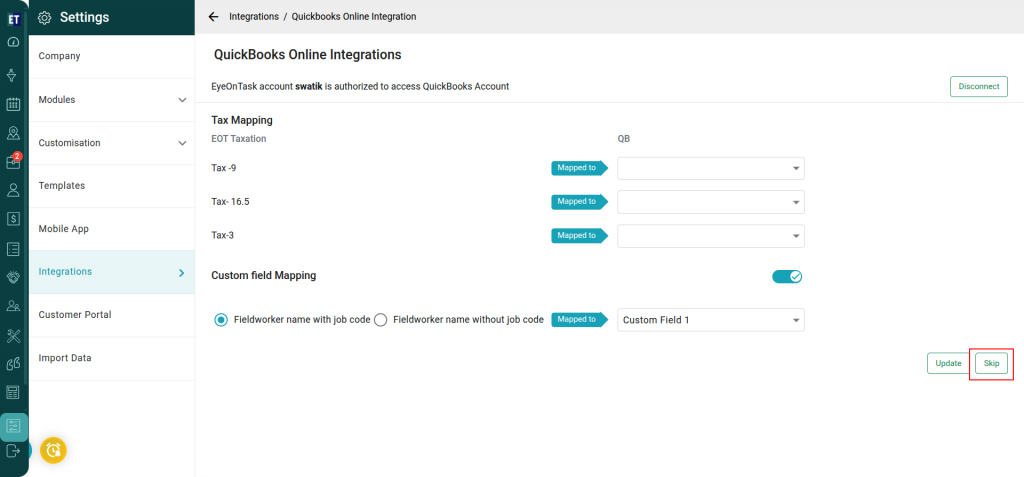
 After updating the mapping data we can click on the skip button then it will take you to the screen where you will have options to Sync your clients, your Invoices, Payments and Inventory.
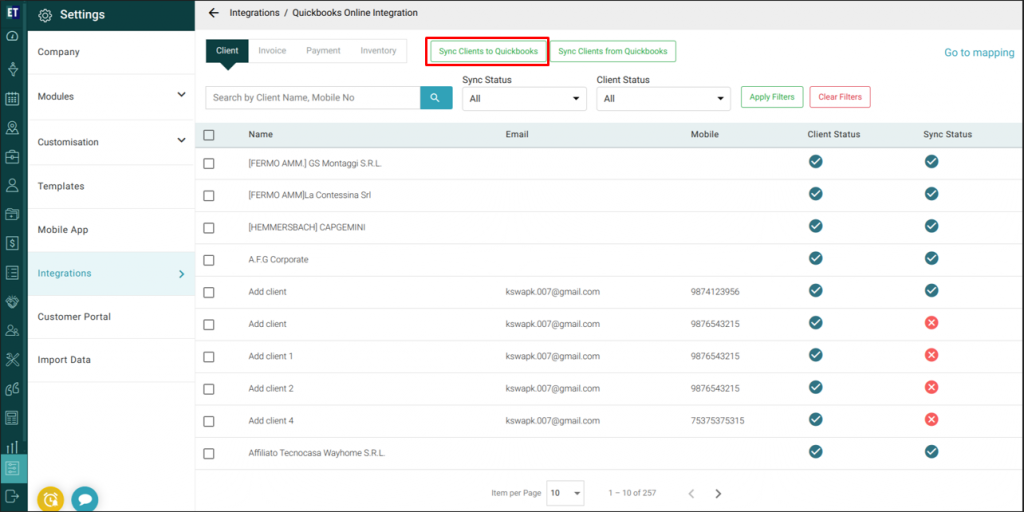
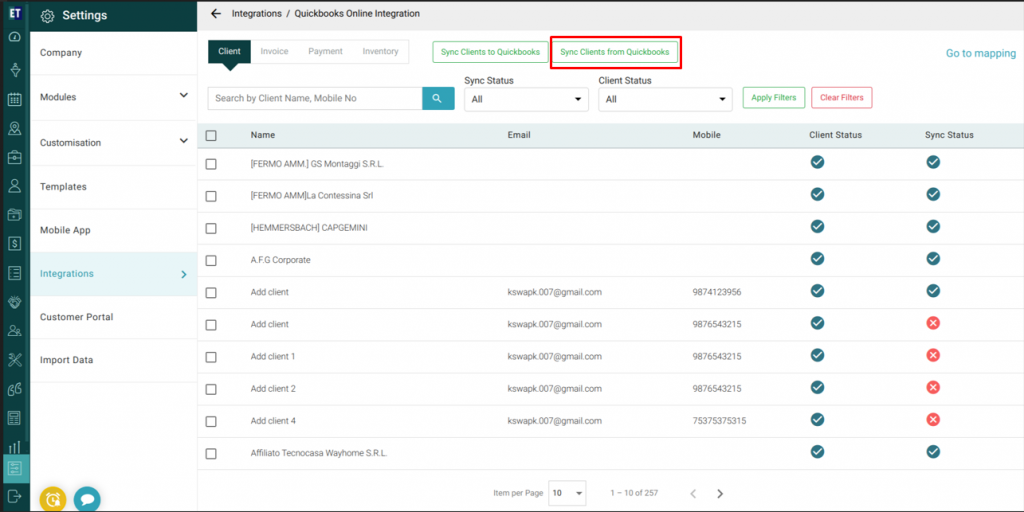
 Syncing of clients is a two way process wherein you can sync the clients of EyeOnTask to Quickbooks and from Quickbooks to EyeOnTask
 Syncing of Invoice is a one way process i.e you can Sync your Invoices from EyeOnTask to Quickbooks only.
Note: Firstly you need to sync your clients from EyeOnTask to Quickbooks, only then you will have the invoices and payments of that client available in the Invoice and Payment tabs to sync to Quickbooks, otherwise you will not see any invoice or payments listed in the respective tabs
Sync your invoices from EyeOnTask to Quickbooks
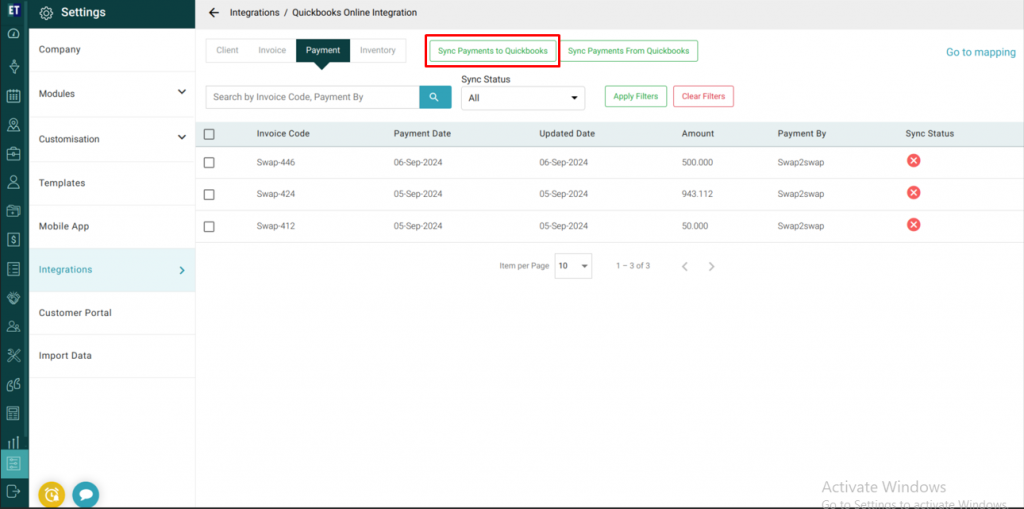
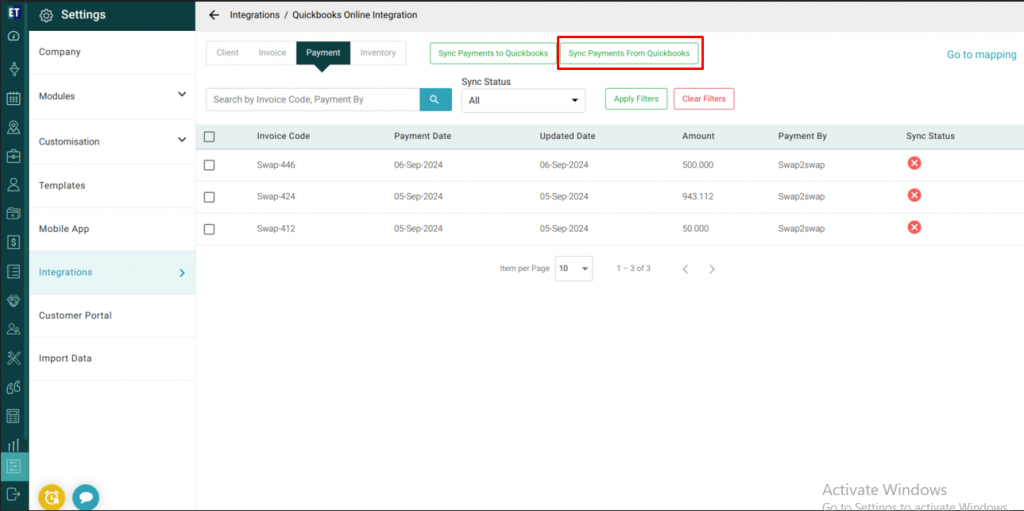
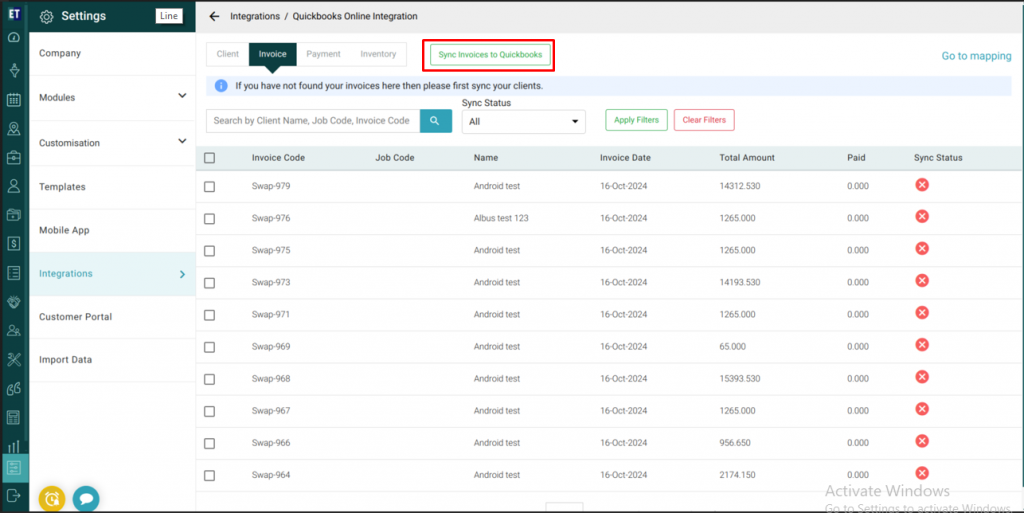 Sync your payment made for invoices from EyeOnTask to Quickbooks and from Quickbooks to EyeonTask
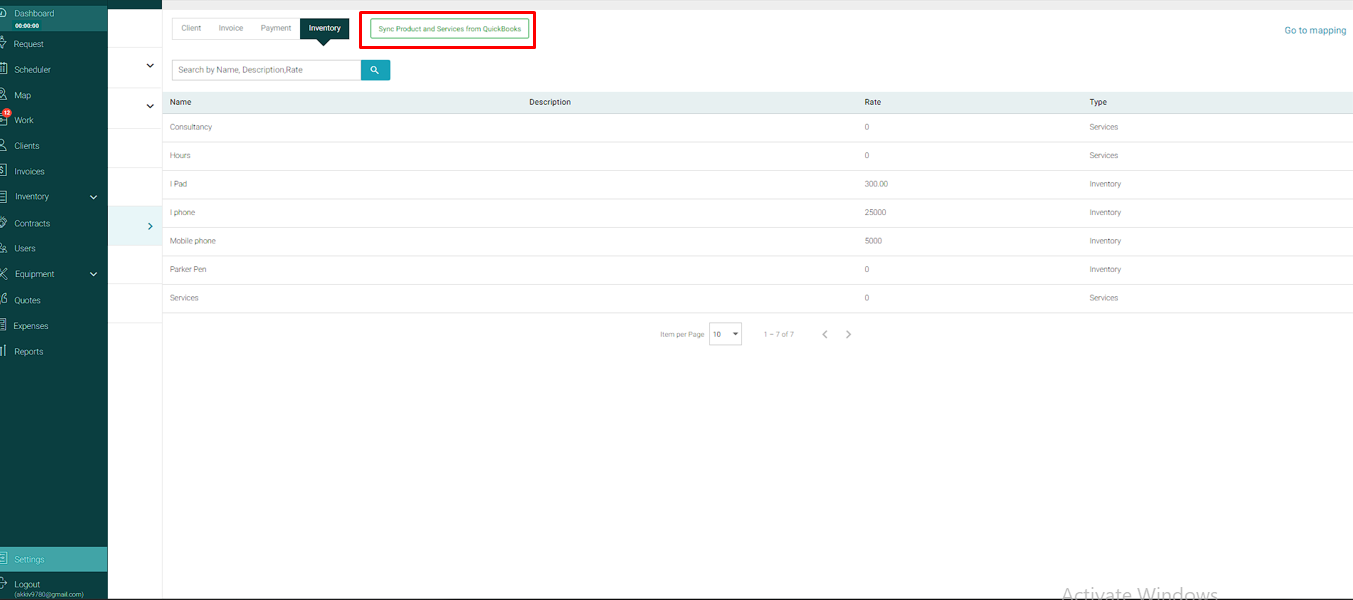
 Syncing of Inventory is also a one way process but we can just import inventory items added in our Quickbooks account to EyeOnTask
 After the syncing process is over for one company you can press the back arrow and go to the previous Mapping page where you can press the Disconnect button and move on to sync the clients, invoices, payments and inventories of another company or close the syncing process.
 After selecting first option you will have to click on the button Connect To Quickbooks
 Clicking on Connect to Quickbooks button will take you to the login page of Quickbooks
 After successful login you will be redirected to the quickbooks select company page where you have to select the company for which you need to sync the data to and from Quickbooks.
 After selecting the company you will be redirected to the EyeOnTask's Mapping page where you will see the Mapping Screen, which allows you to map data such as Taxes and Custom Fields. This ensures that the mapped data is accurately reflected in QuickBooks (QB), making synchronization easy and consistent.
 After updating the mapping data we can click on the skip button then it will take you to the screen where you will have options to Sync your clients, your Invoices, Payments and Inventory.
 Syncing of clients is a two way process wherein you can sync the clients of EyeOnTask to Quickbooks and from Quickbooks to EyeOnTask

 Syncing of Invoice is a one way process i.e you can Sync your Invoices from EyeOnTask to Quickbooks only.
Note: Firstly you need to sync your clients from EyeOnTask to Quickbooks, only then you will have the invoices and payments of that client available in the Invoice and Payment tabs to sync to Quickbooks, otherwise you will not see any invoice or payments listed in the respective tabs
Sync your invoices from EyeOnTask to Quickbooks
 Sync your payment made for invoices from EyeOnTask to Quickbooks and from Quickbooks to EyeonTask

 Syncing of Inventory is also a one way process but we can just import inventory items added in our Quickbooks account to EyeOnTask
 After the syncing process is over for one company you can press the back arrow and go to the previous Mapping page where you can press the Disconnect button and move on to sync the clients, invoices, payments and inventories of another company or close the syncing process.
