How do I create an invoice inside jobs section?
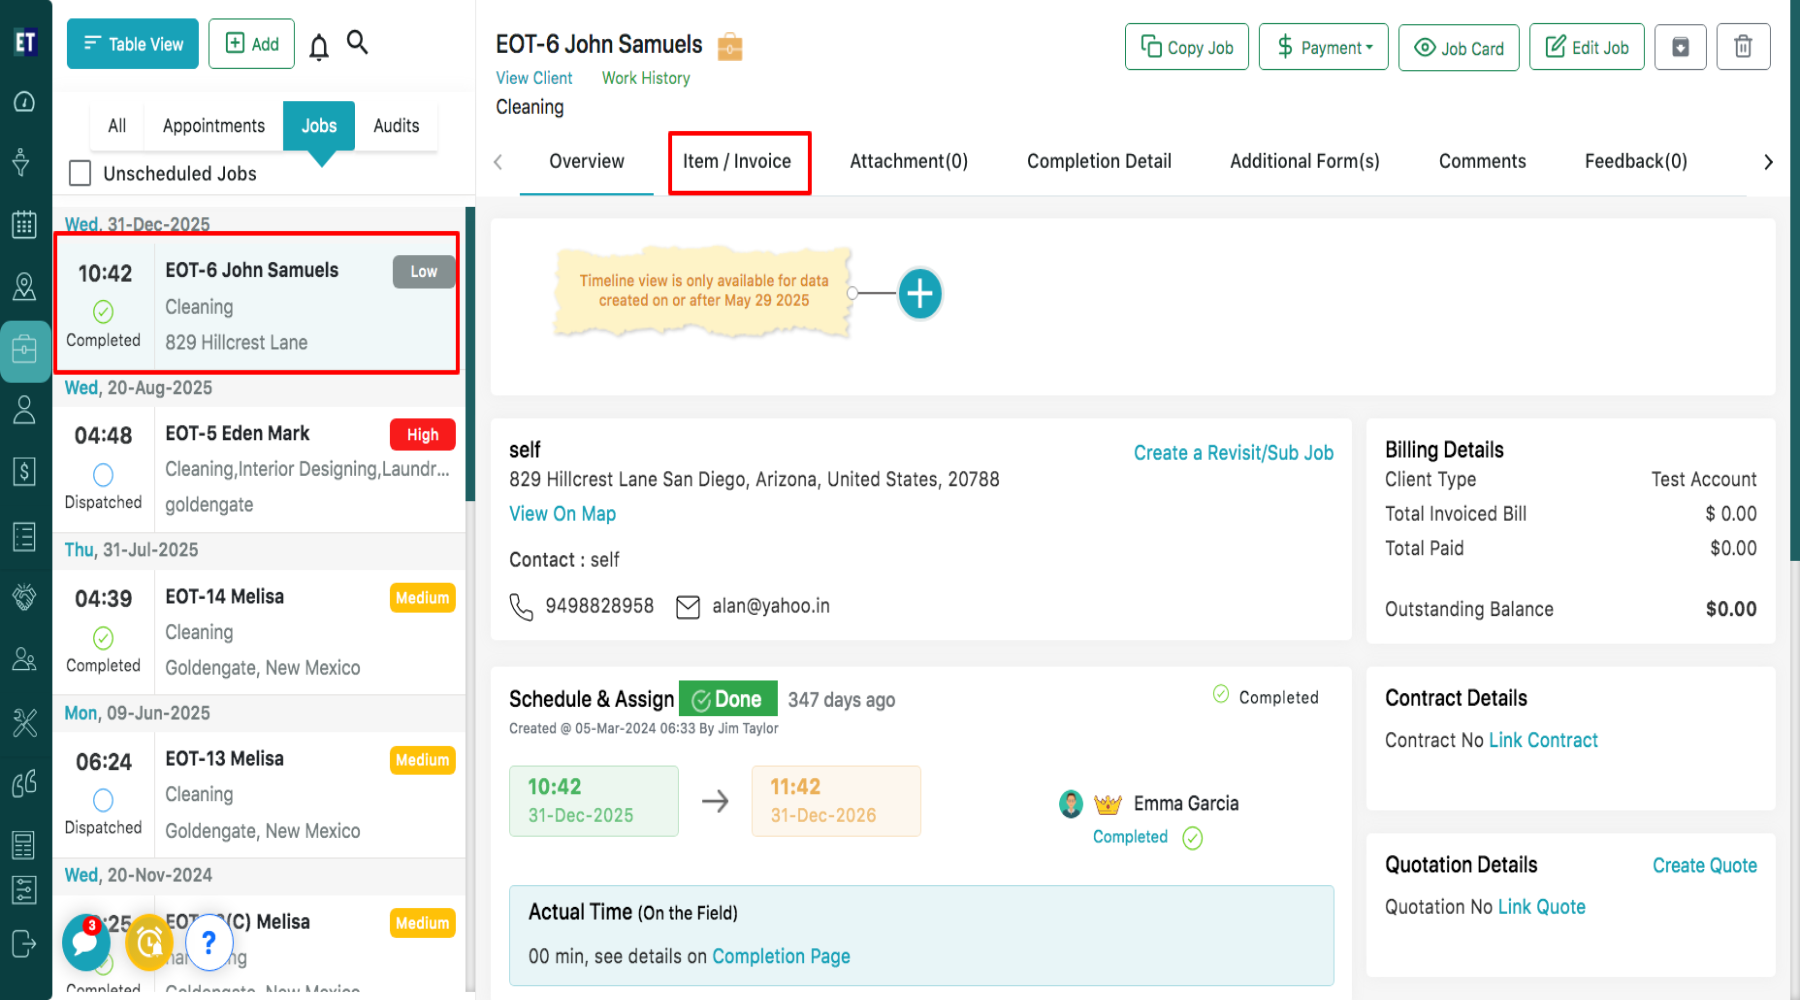
Select the Job under which you want to create an invoice, then from the overview select Item/Invoice.
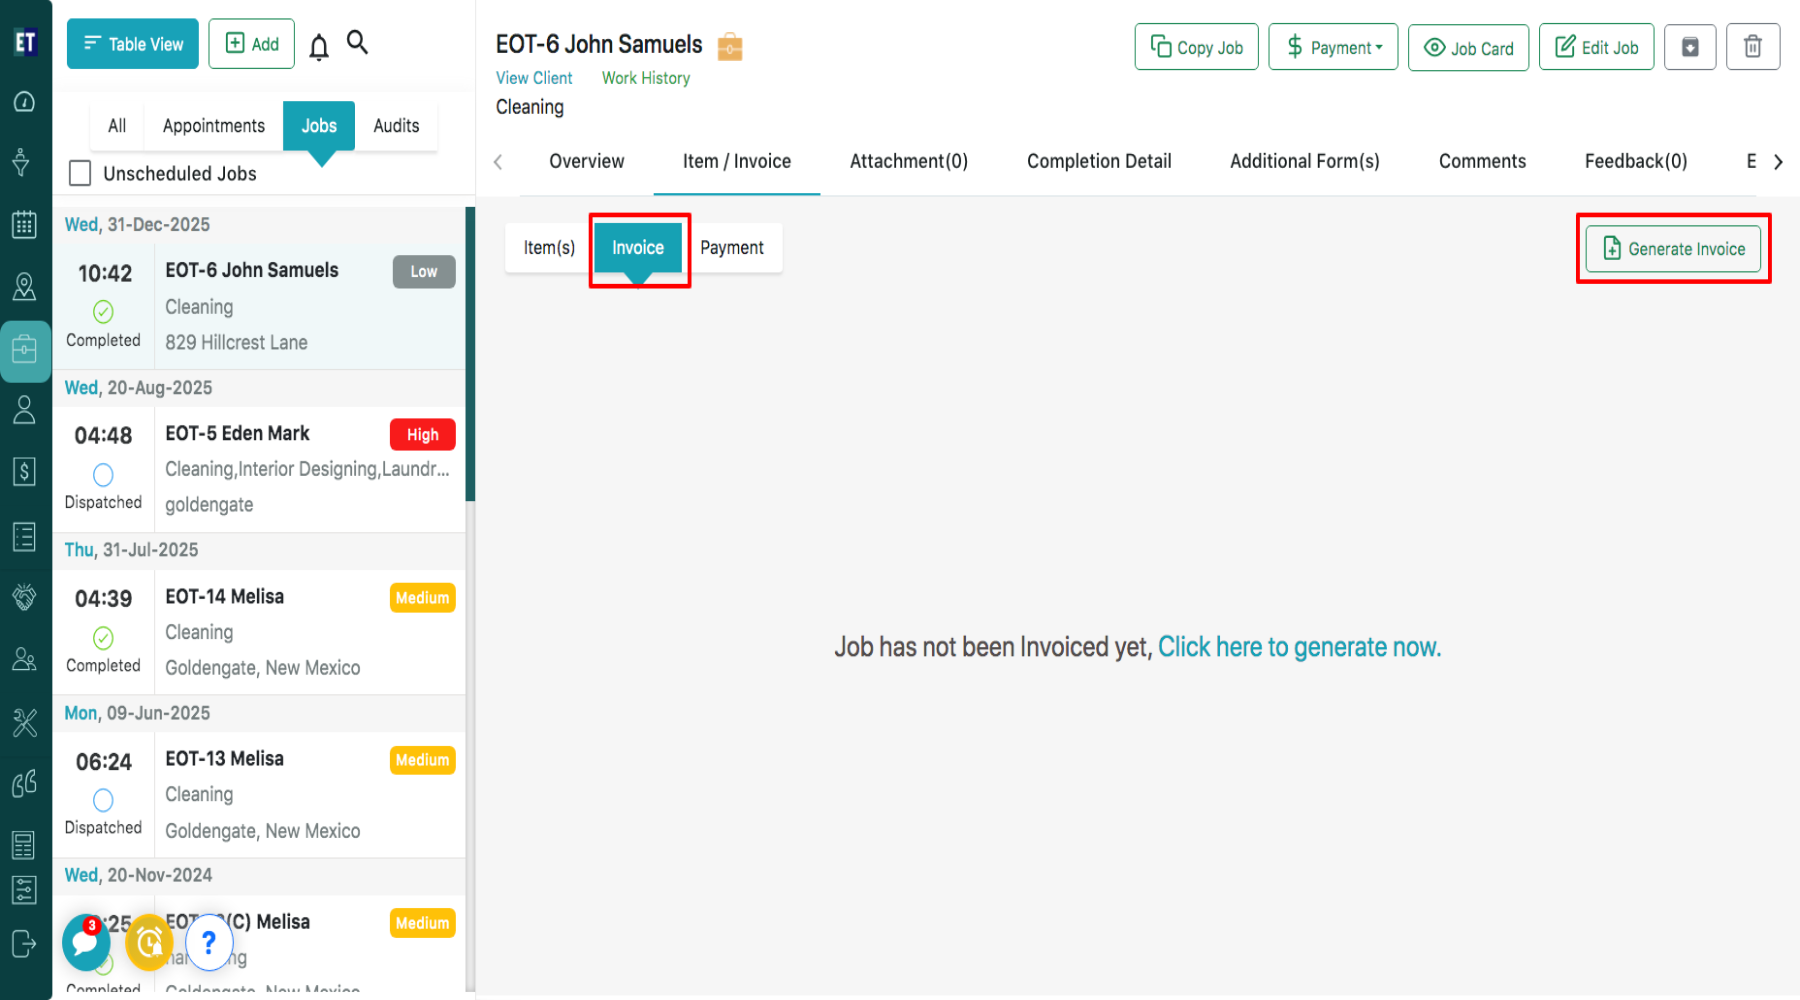
 Then in the Invoice tab, select the Generate Invoice button on the top right corner of the screen.
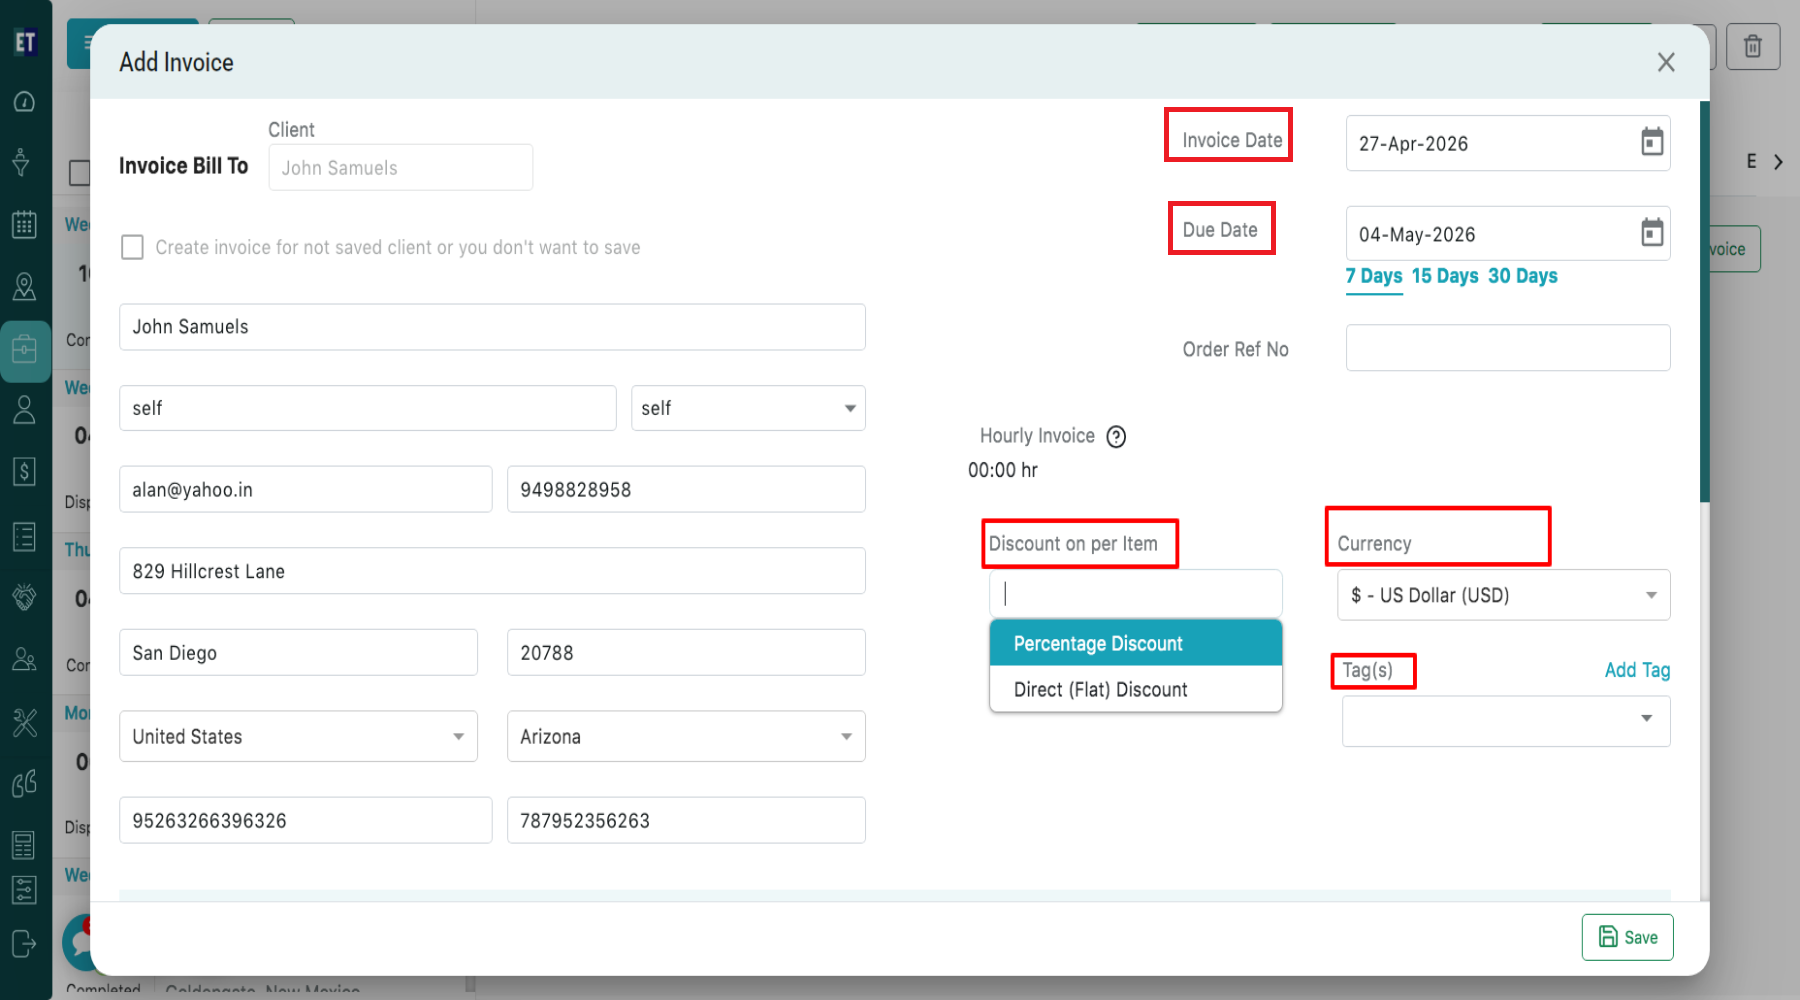
 Clicking on Generate Invoice will open a pop-up with auto-filled details, including Client Name, Client Address, Client Email ID, Contact details and Bill To information.
 The invoice details such as Invoice Date, Due Date, Order Reference No, Discount Type, Currency, and Tags can be added or updated as needed before generating the invoice.
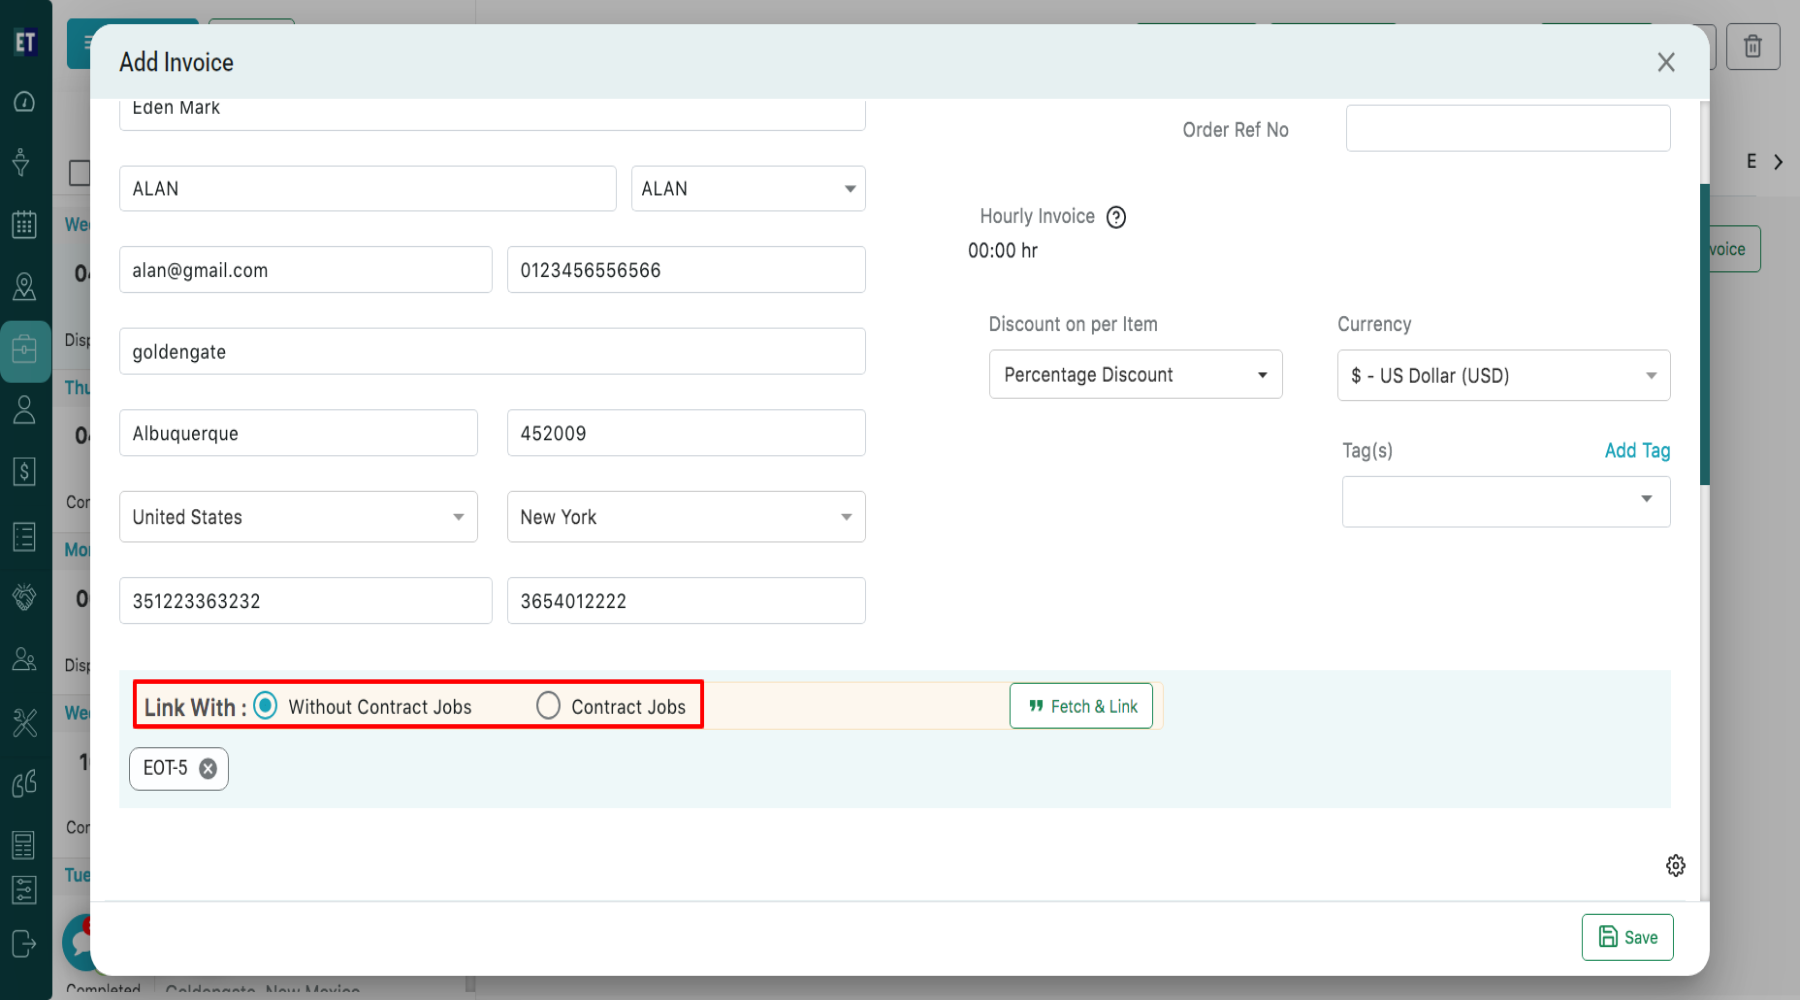
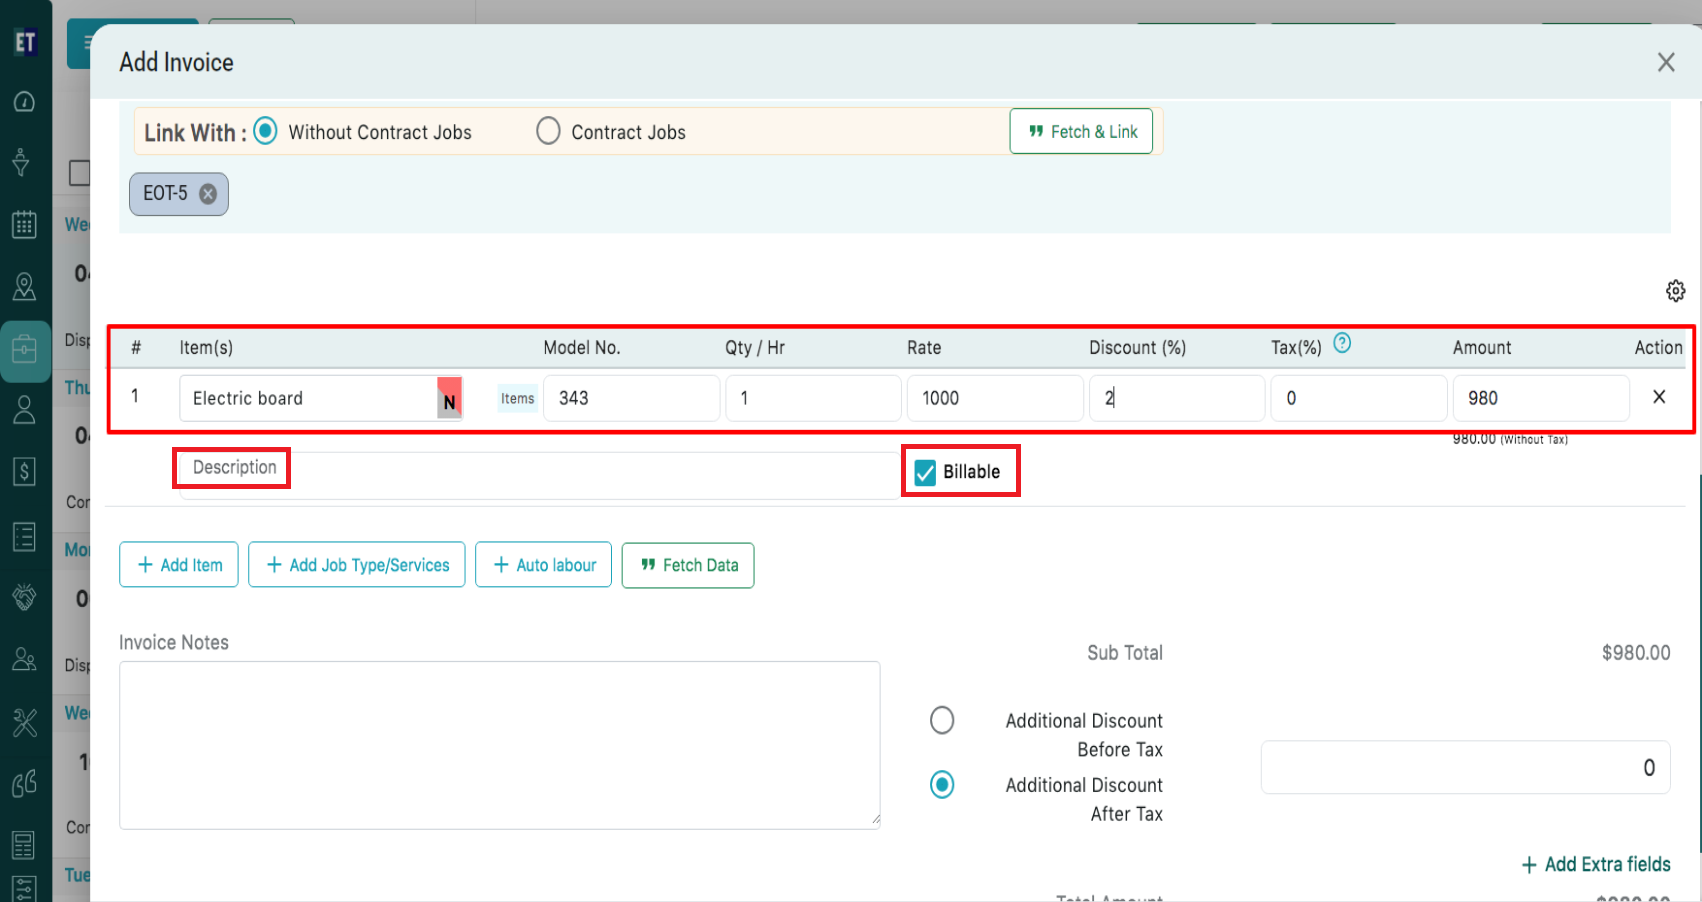
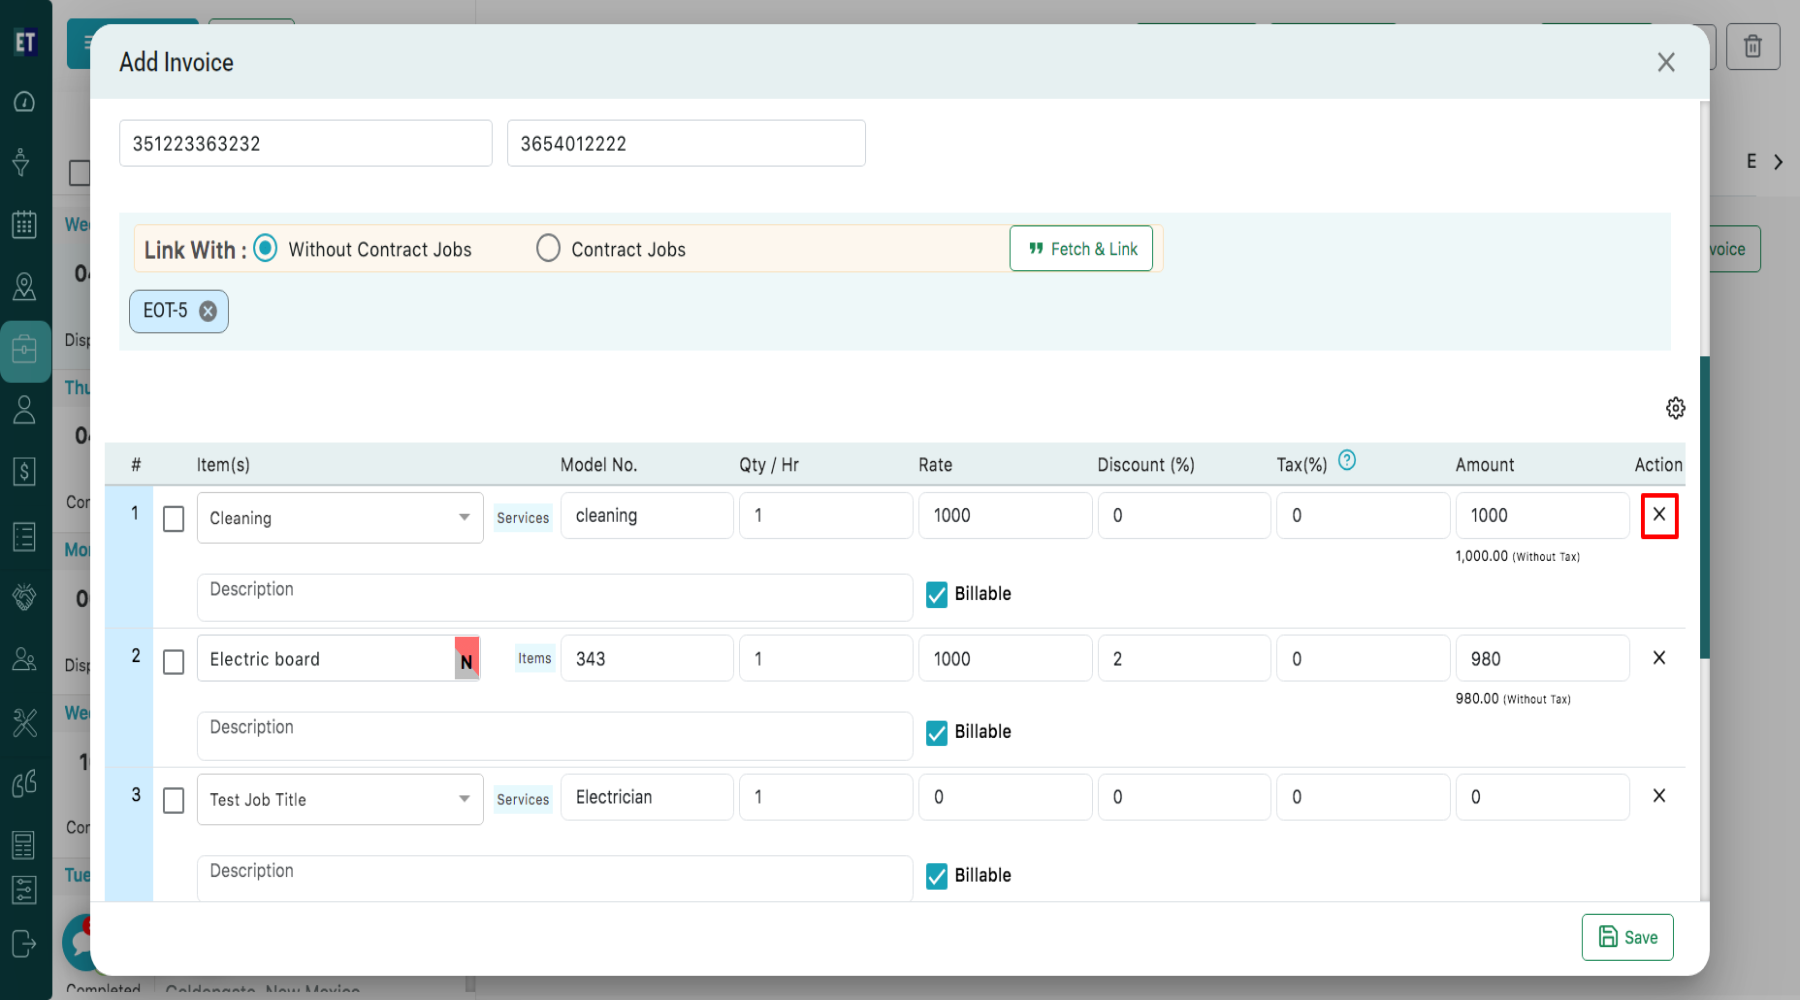
 You can also link the invoice with : Without Contract Jobs and Contract Jobs
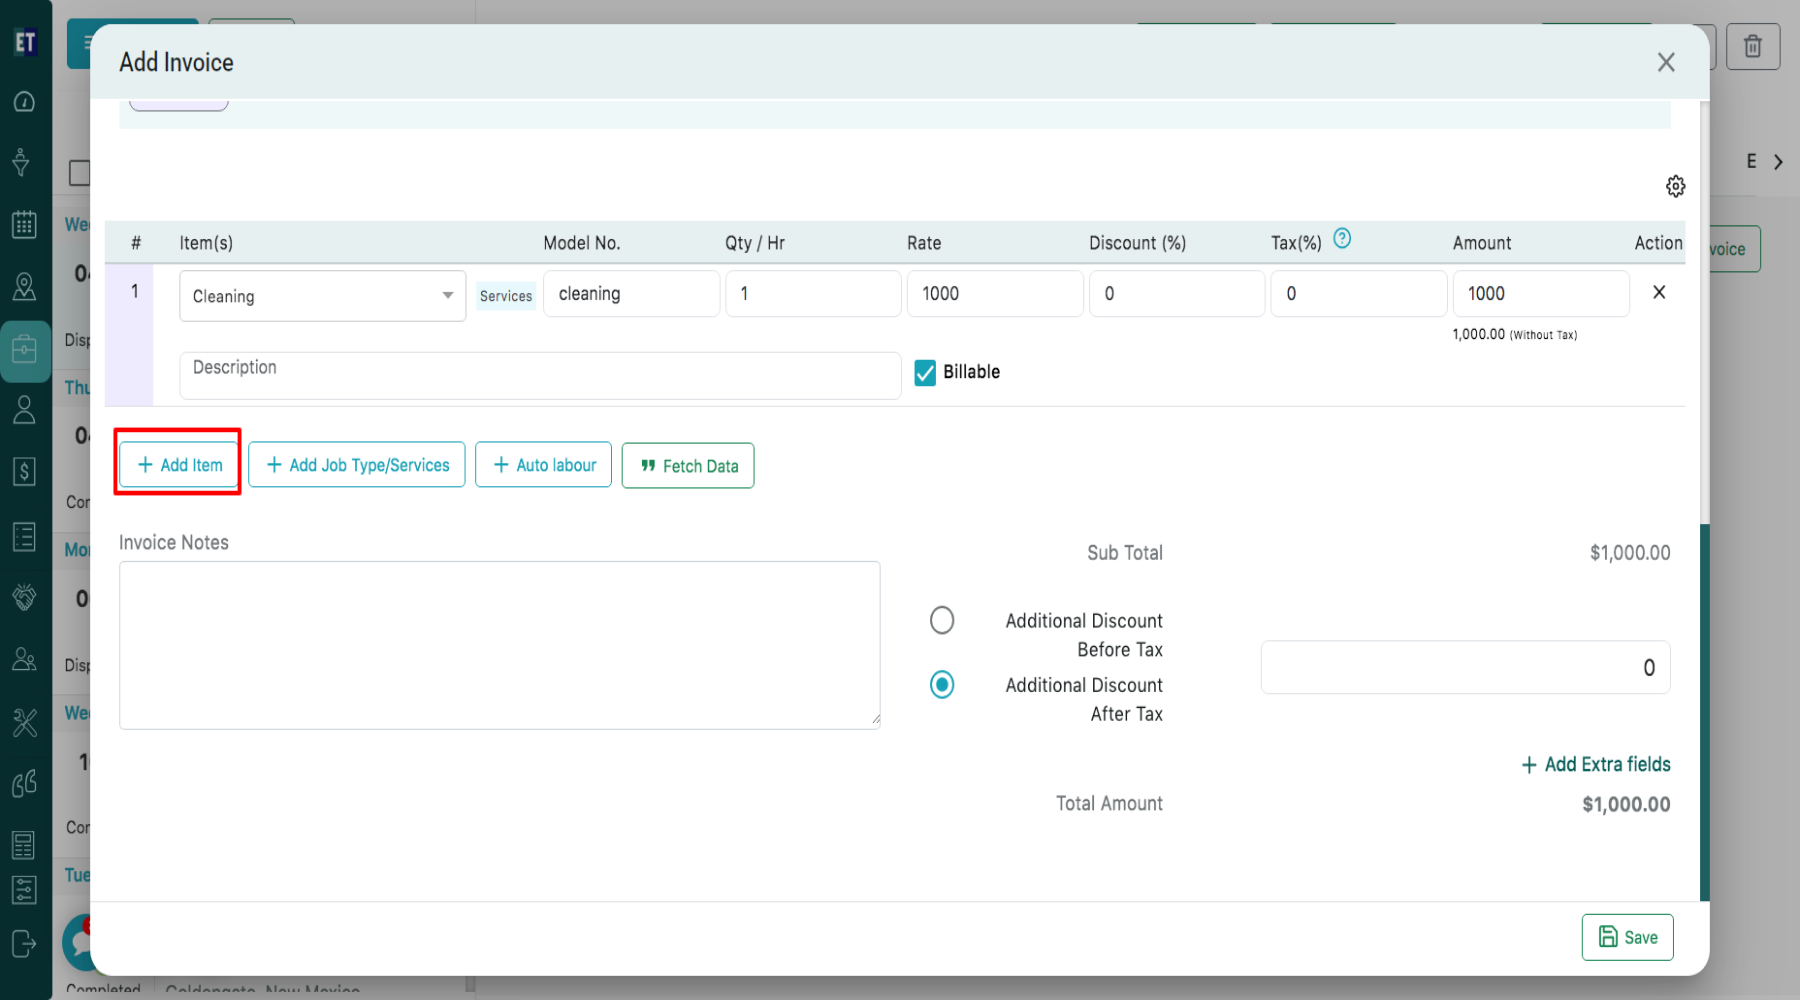
 Clicking on Add Item allows you to add invoice line item details such as Item(s), Model No., Quantity/Hour, Rate, Discount (%), Tax (%), and amount will be automatically calculated in the Amount field. You can also update the item description and mark the item as Billable, if required.
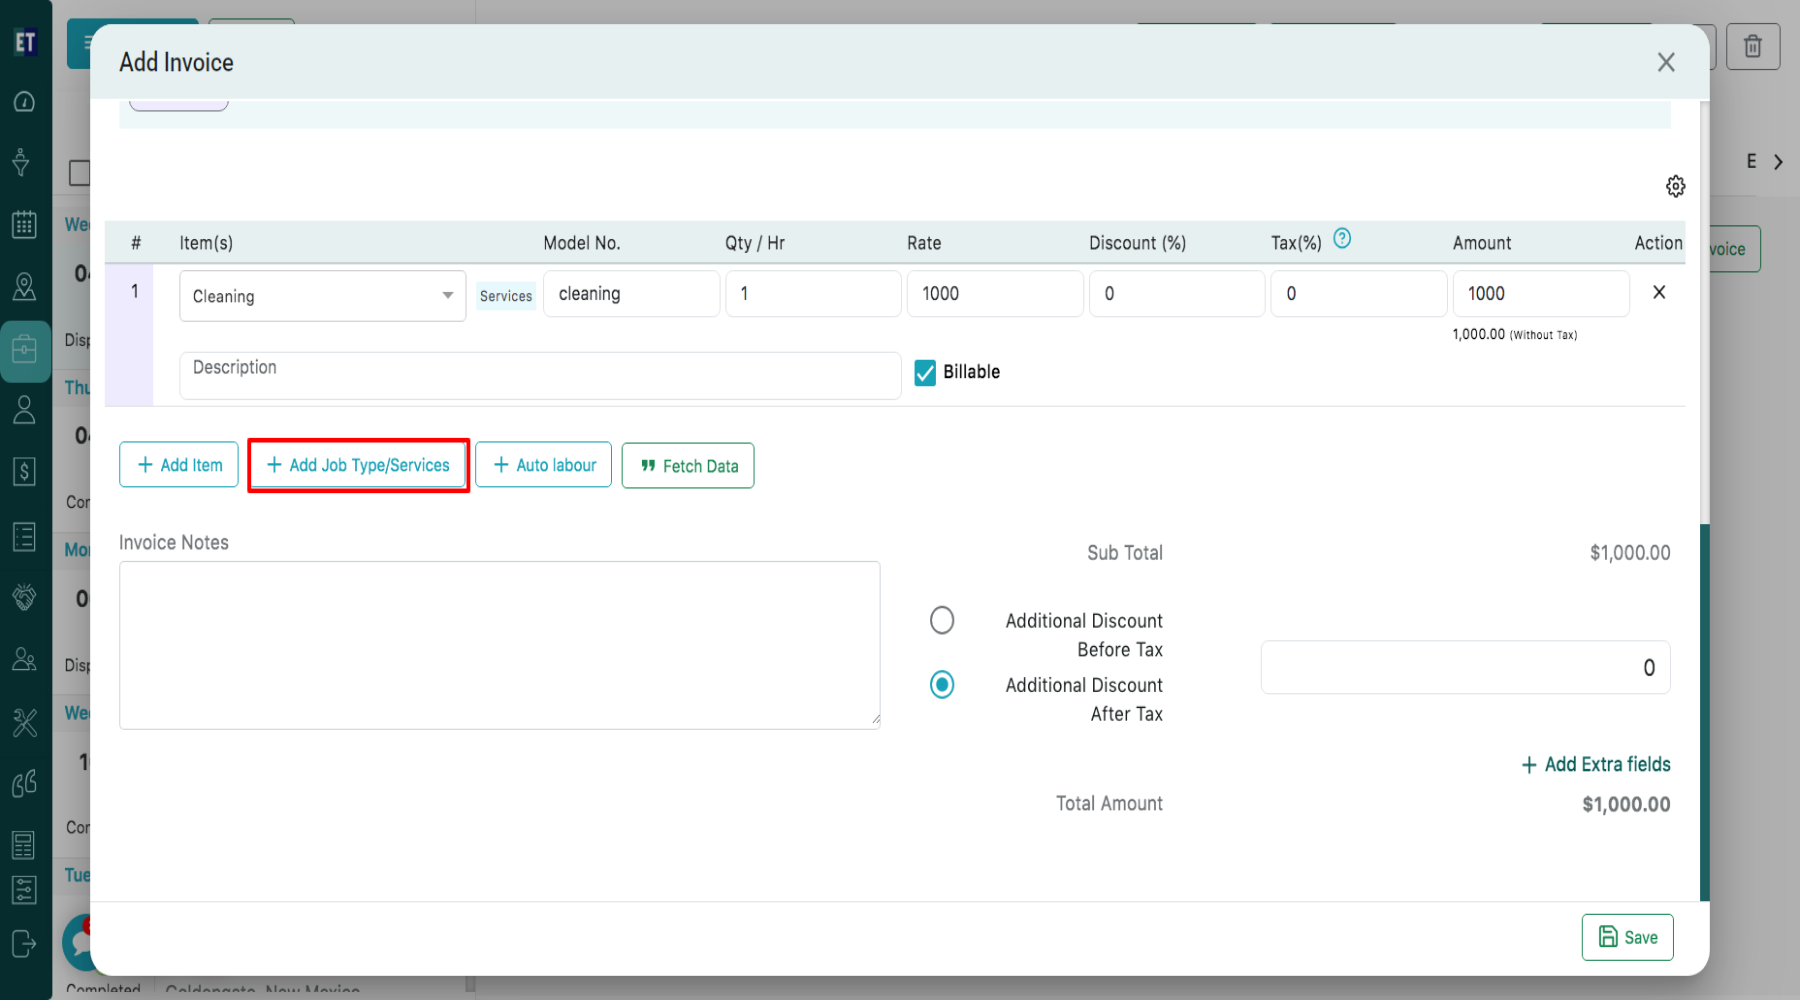
 Click Add Job Type/Services to add service-related entries to the invoice.
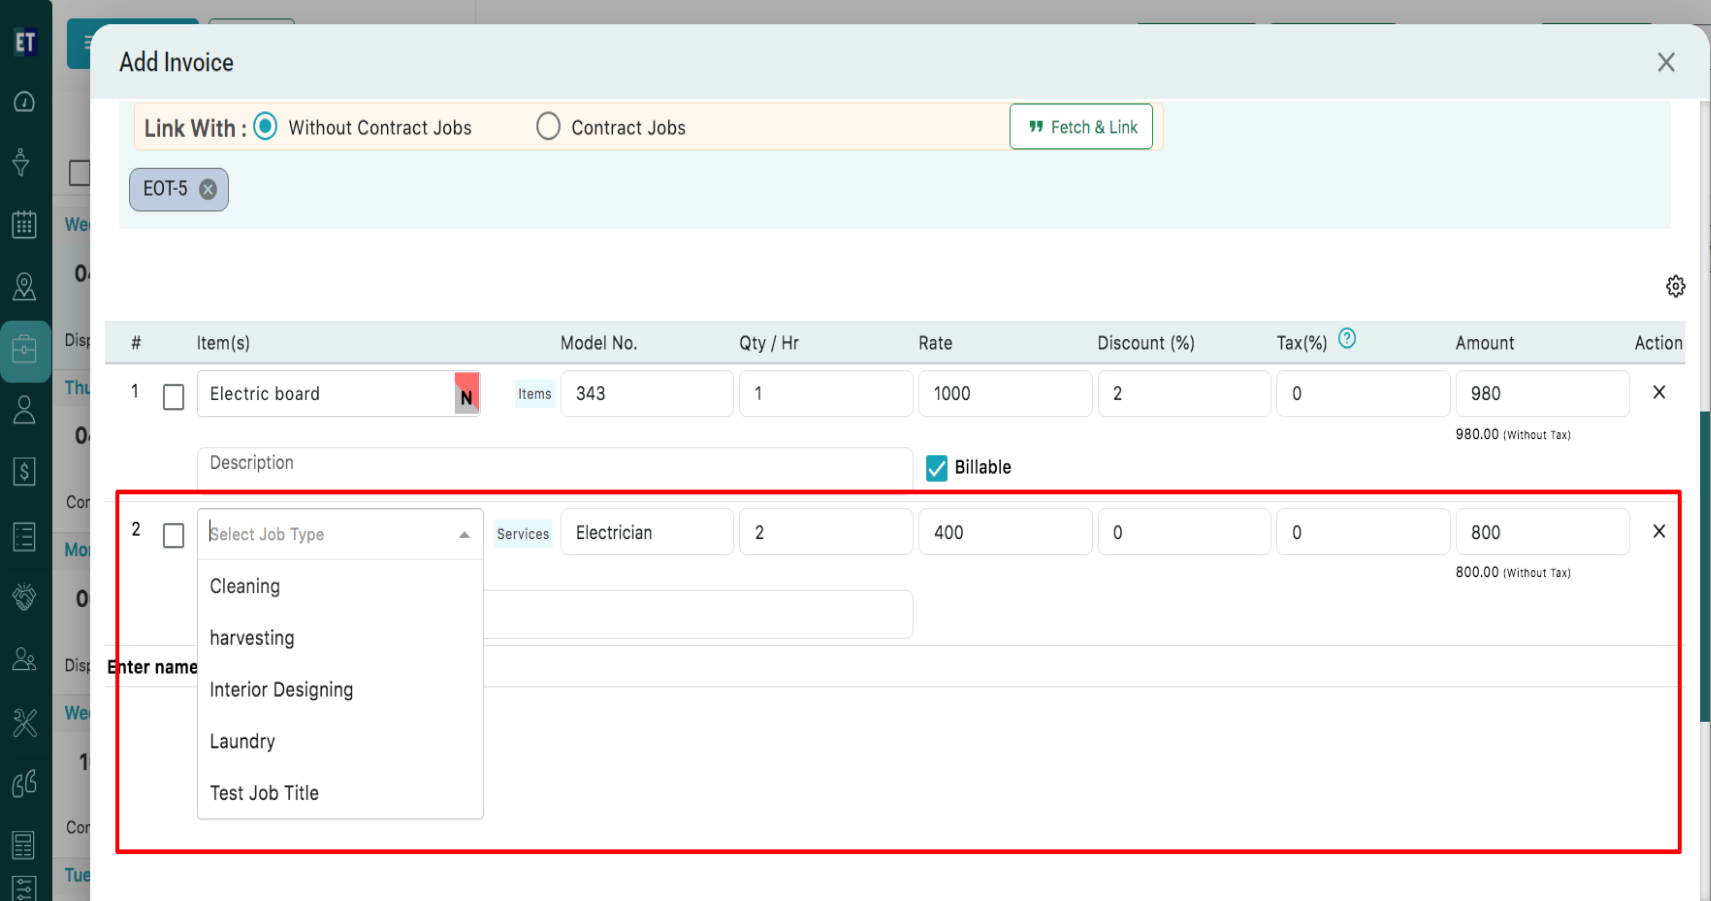
 Select the required job type from the drop down, and enter the relevant details in the editable fields such as Services, Qty/Hr, Rate, discount and tax %, the amount will be calculated automatically.
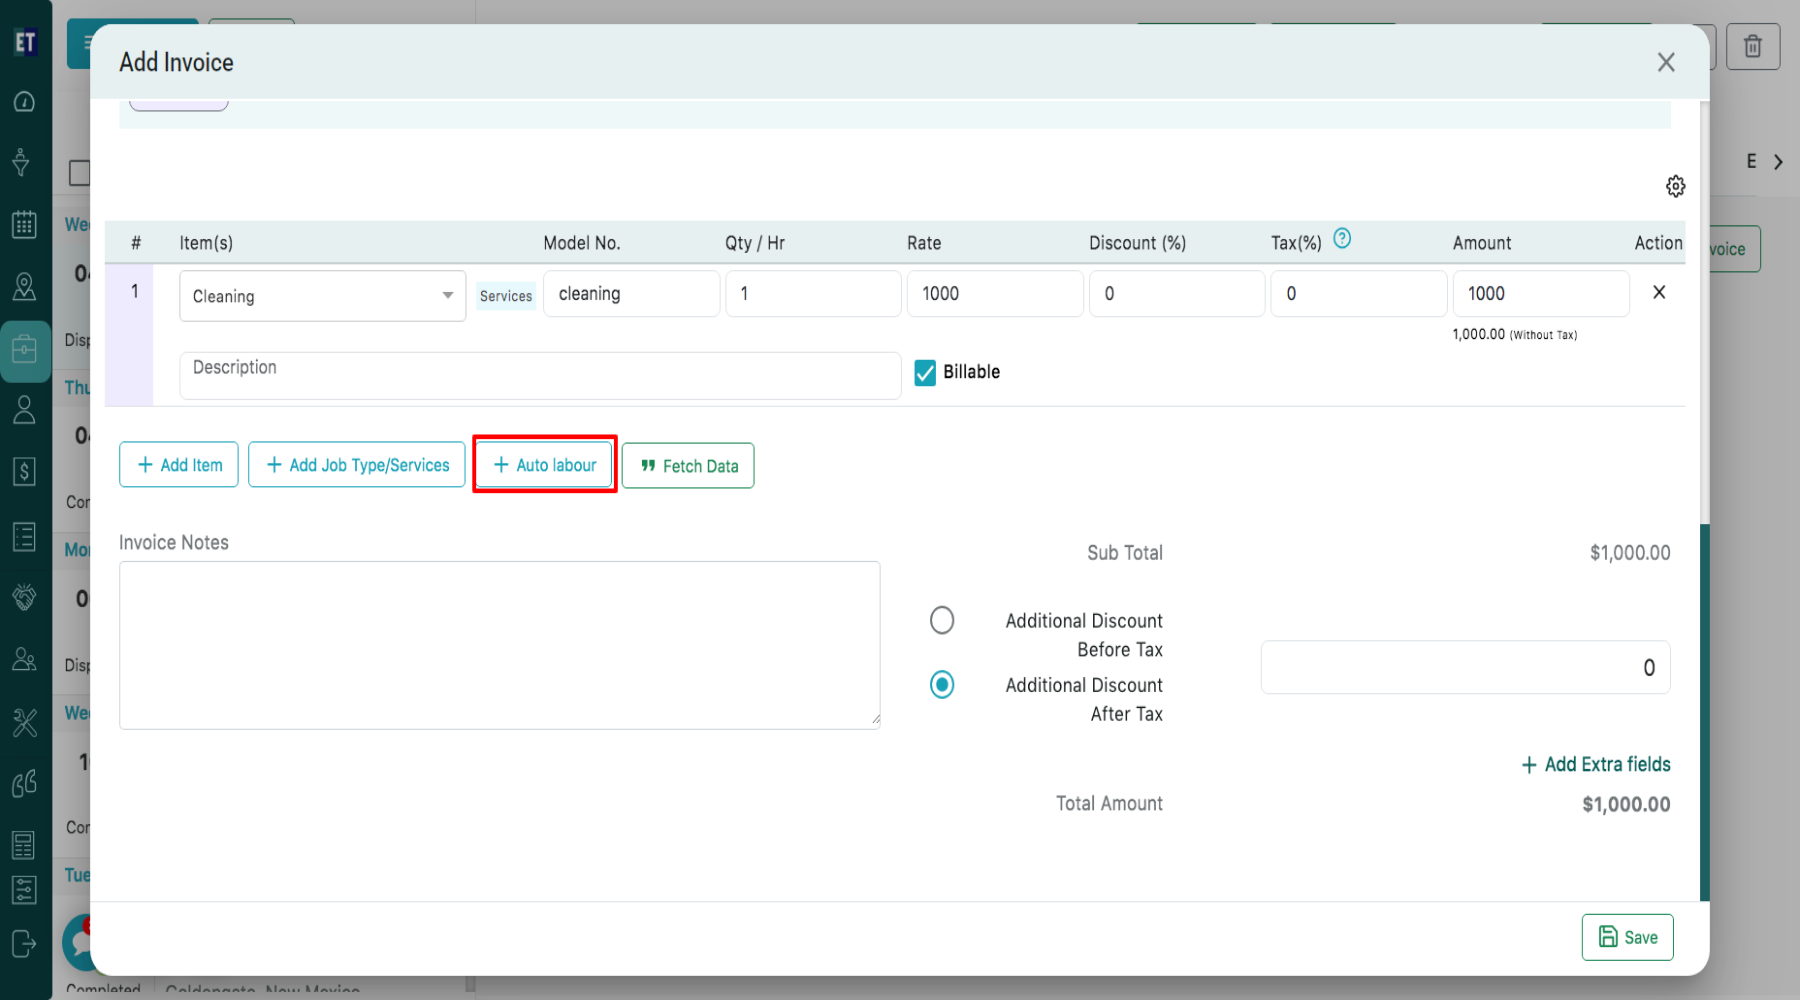
 Click on Auto labour to add labor charges to the invoice.
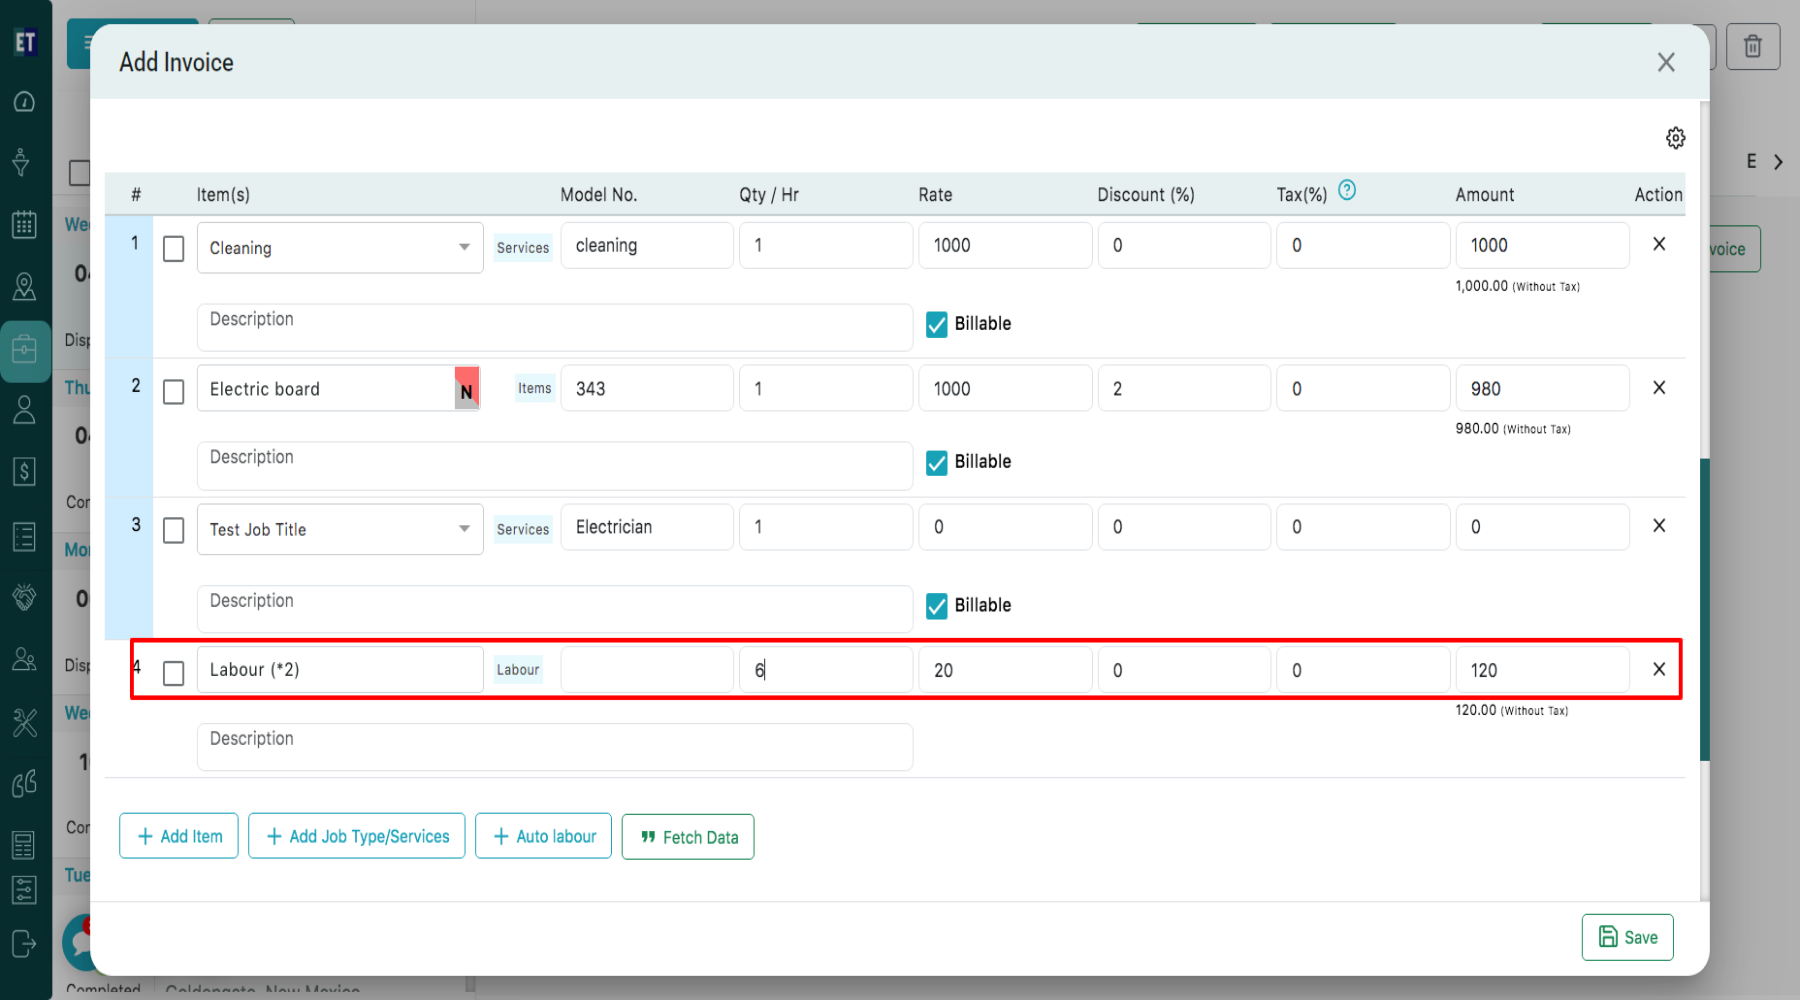
 Clicking on Auto labour will open a Labour pop-up, select Custom Rate and enter the hourly rate and taxation details. Choose the applicable billing basis, such as Actual Job Time, Including Travel Time, Including Break Time, or Including Travel Break Time. After configuring the labor details, click Add Line Item to include the labor entry in the invoice line items.
 To remove any line item, click the cross icon available under the Action column.
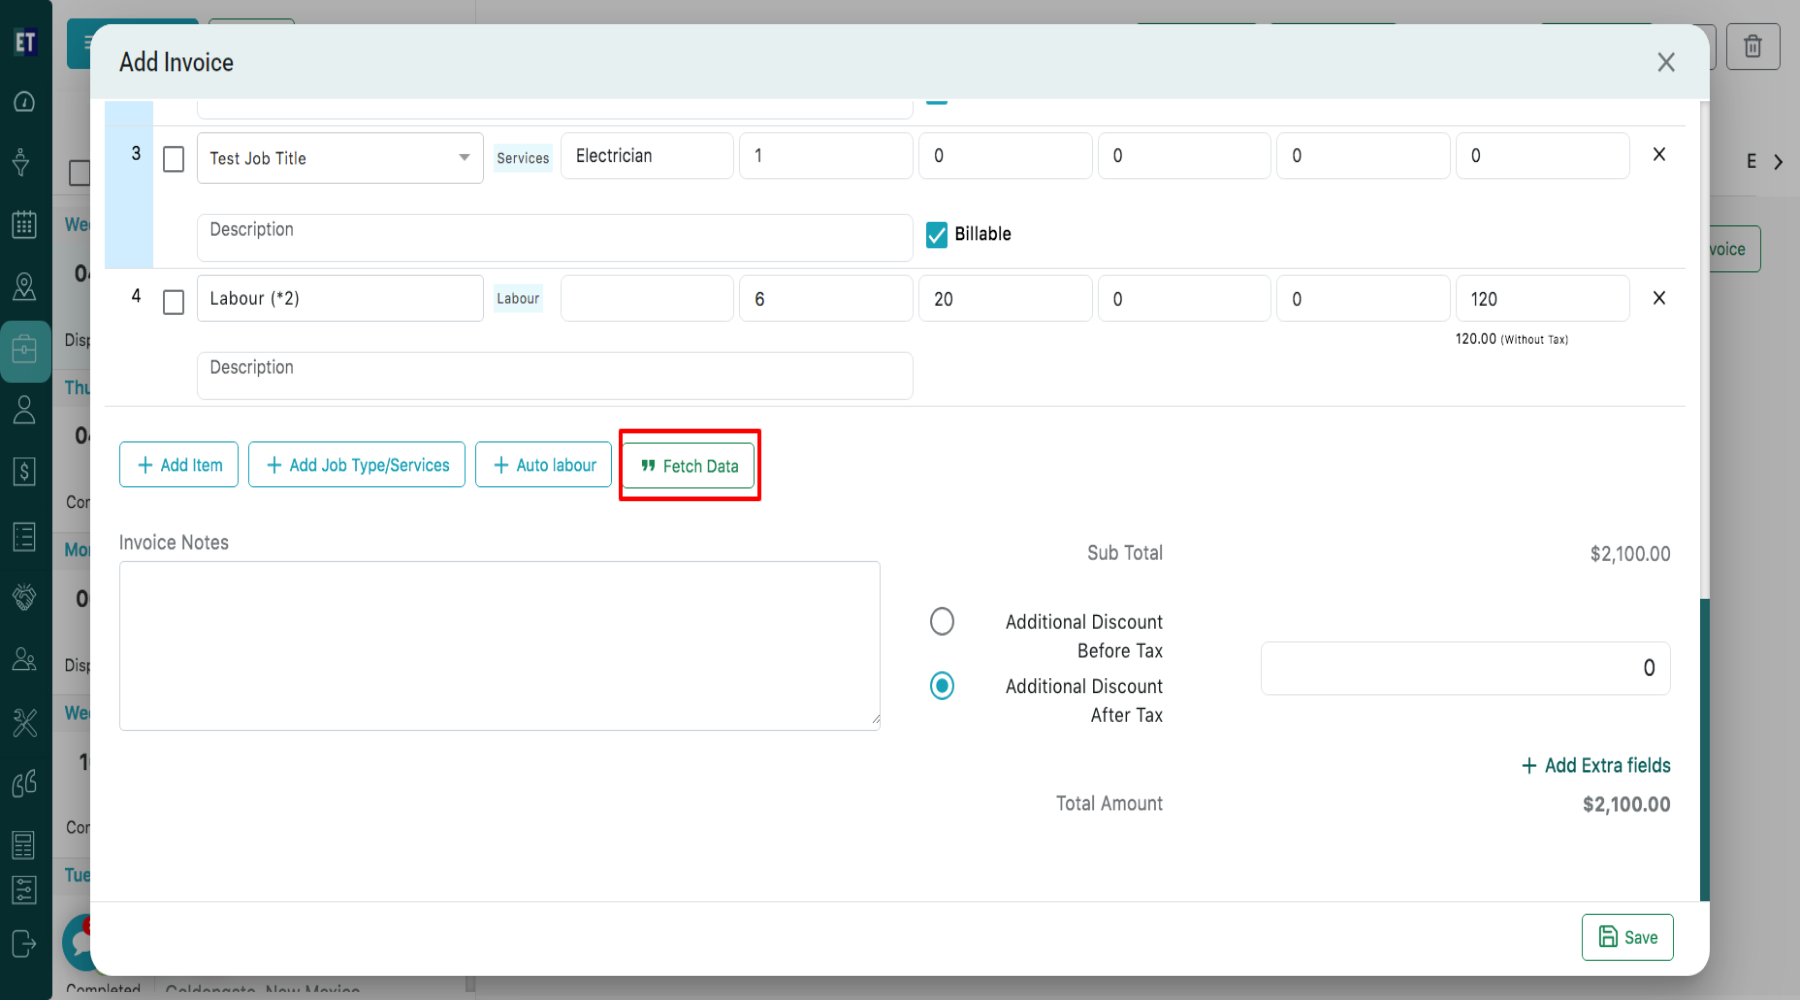
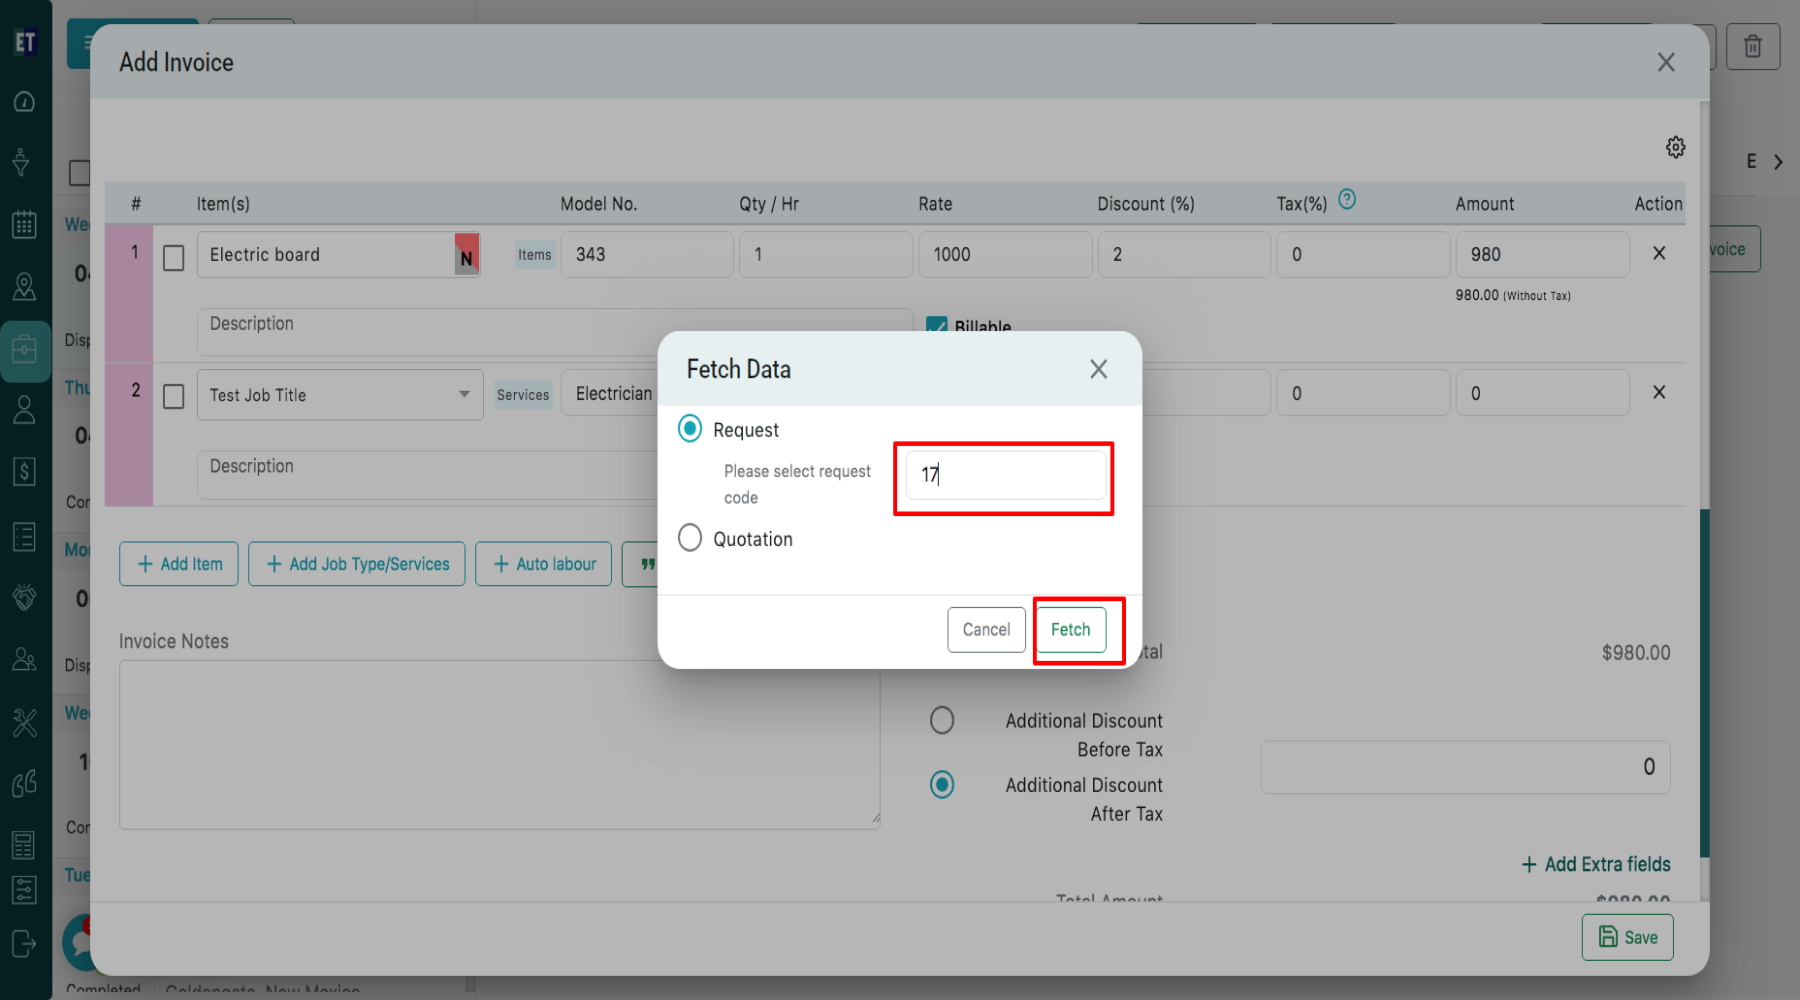
 Clicking on “Fetch Data will open a pop up where you can retrieve the data from any existing Request or Quotation.
 Enter the Request name or Quotation name and click on the Fetch button.
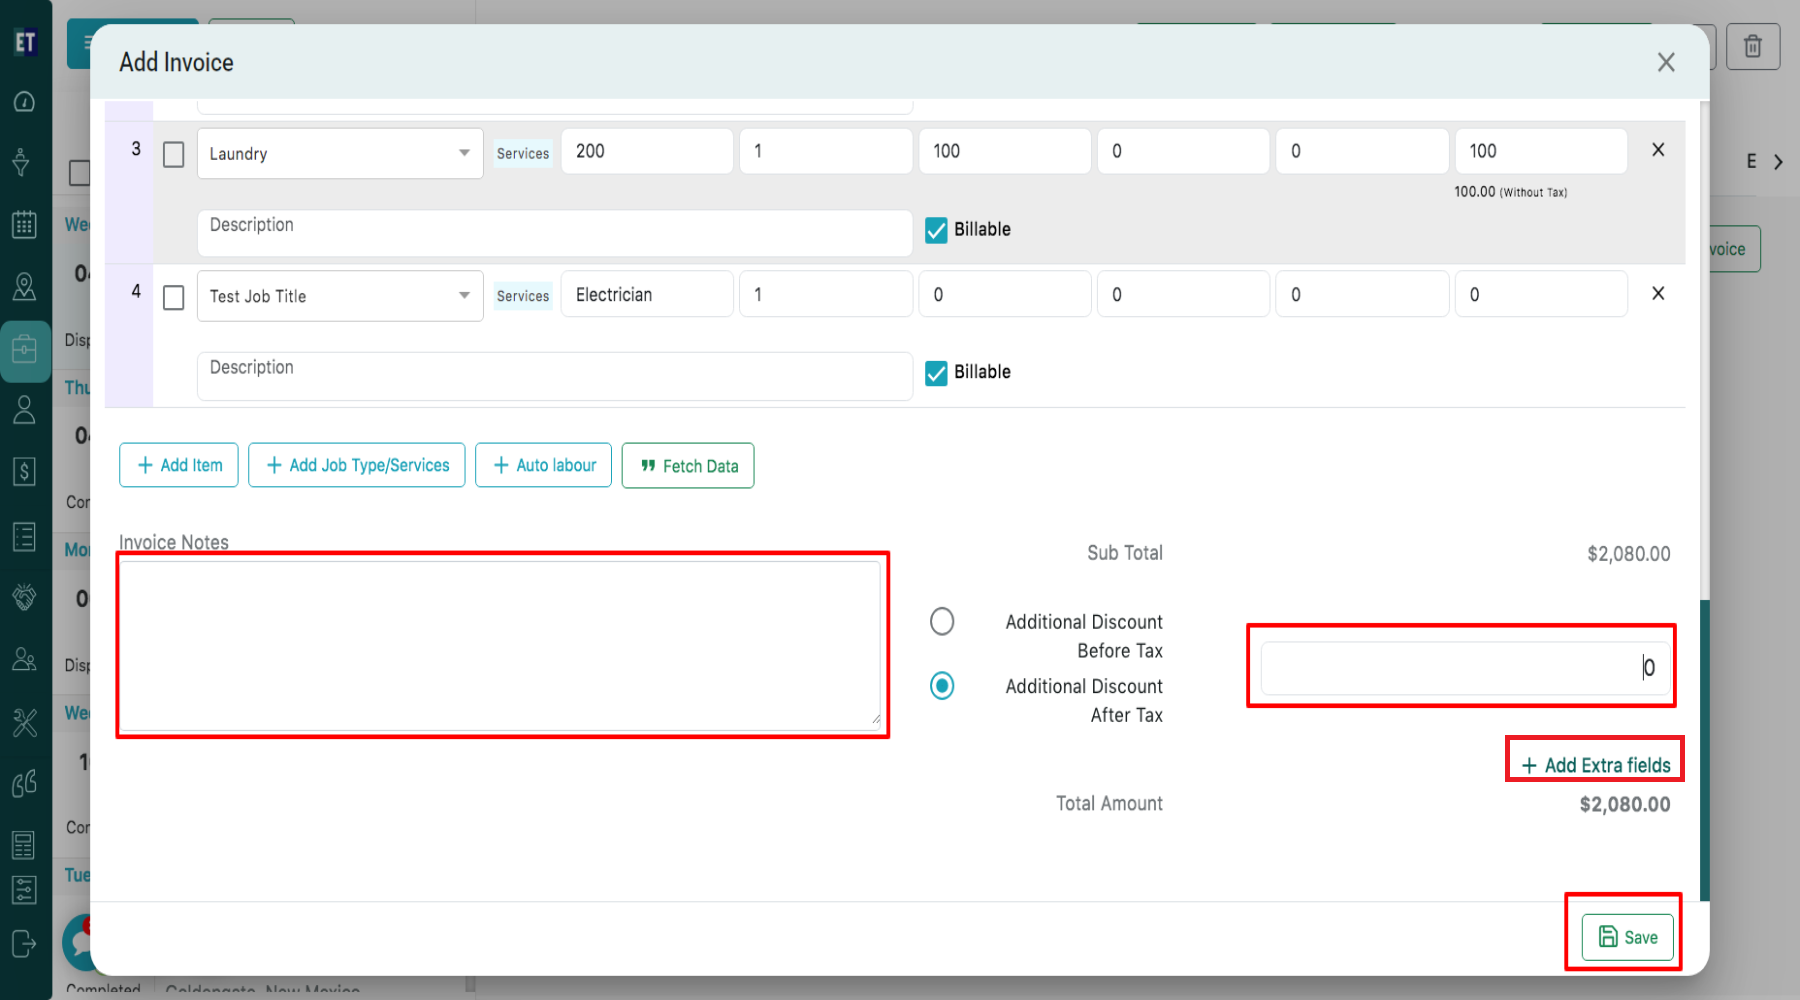
 You can enter notes in the Invoice Notes section and can apply an Additional Discount either Before Tax or After Tax and use Add Extra Fields to include any additional invoice details, if required and you will get the automatic calculated amount of invoice. Once all the details are added, click Save to create the invoice successfully.
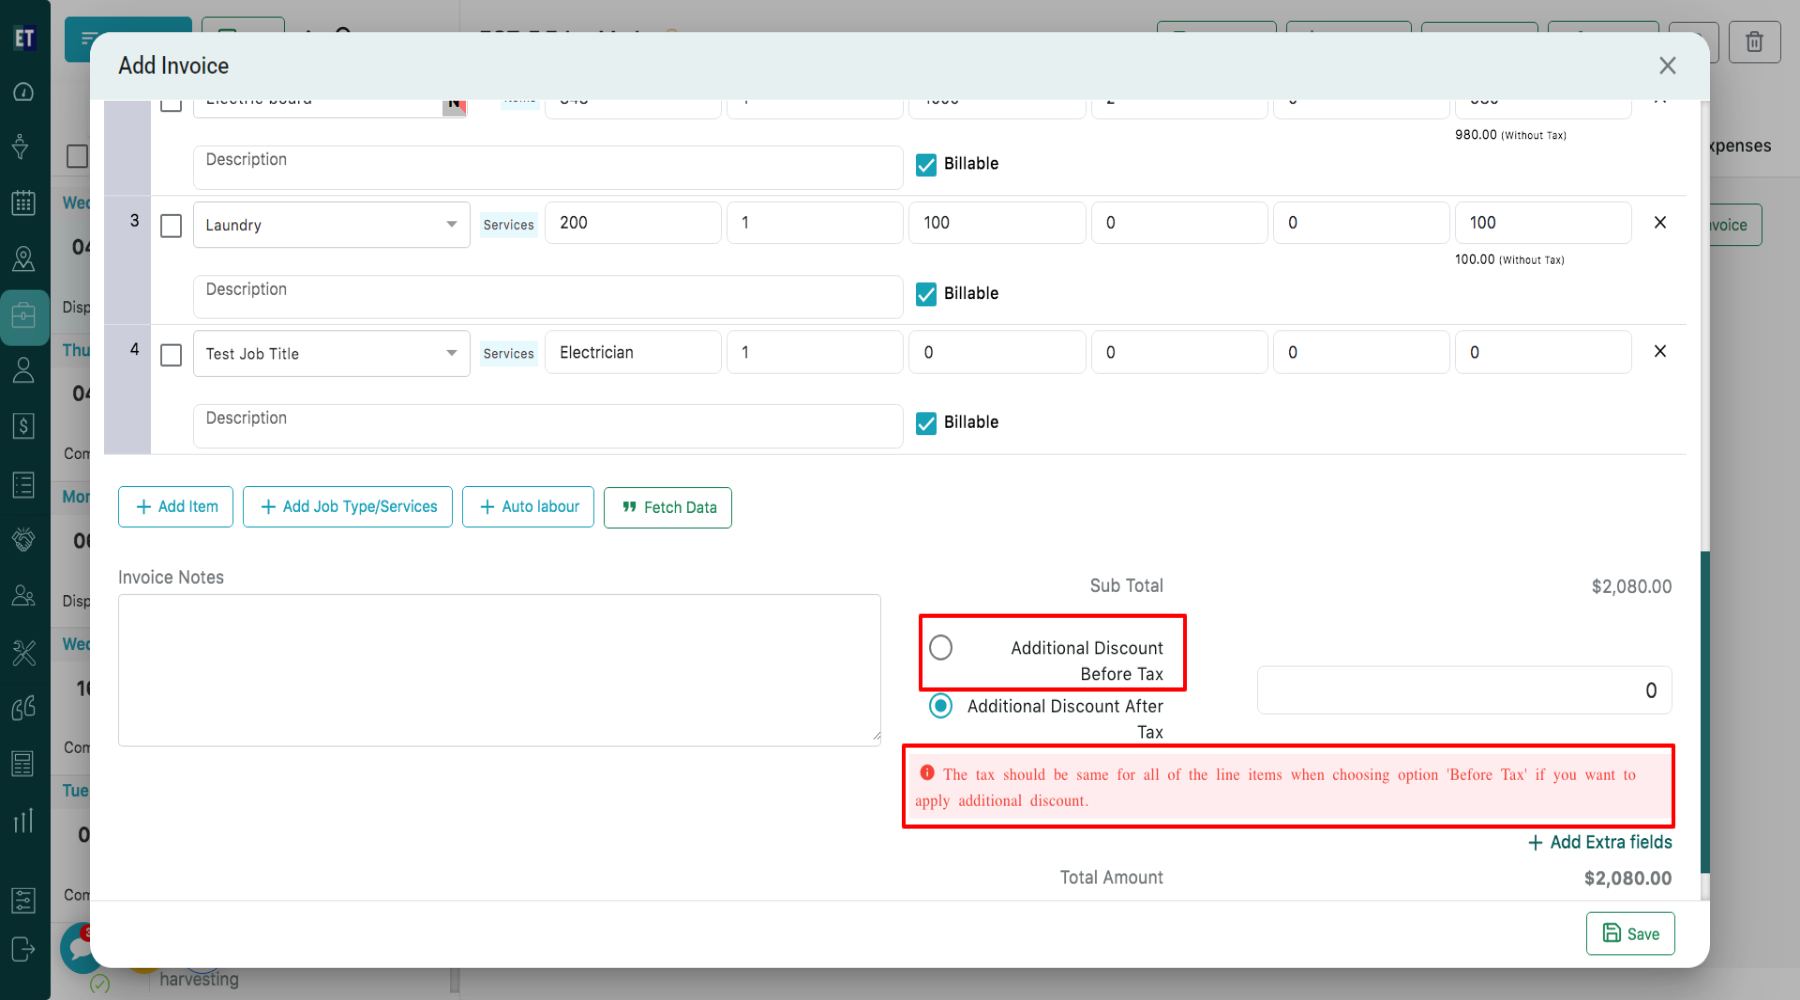
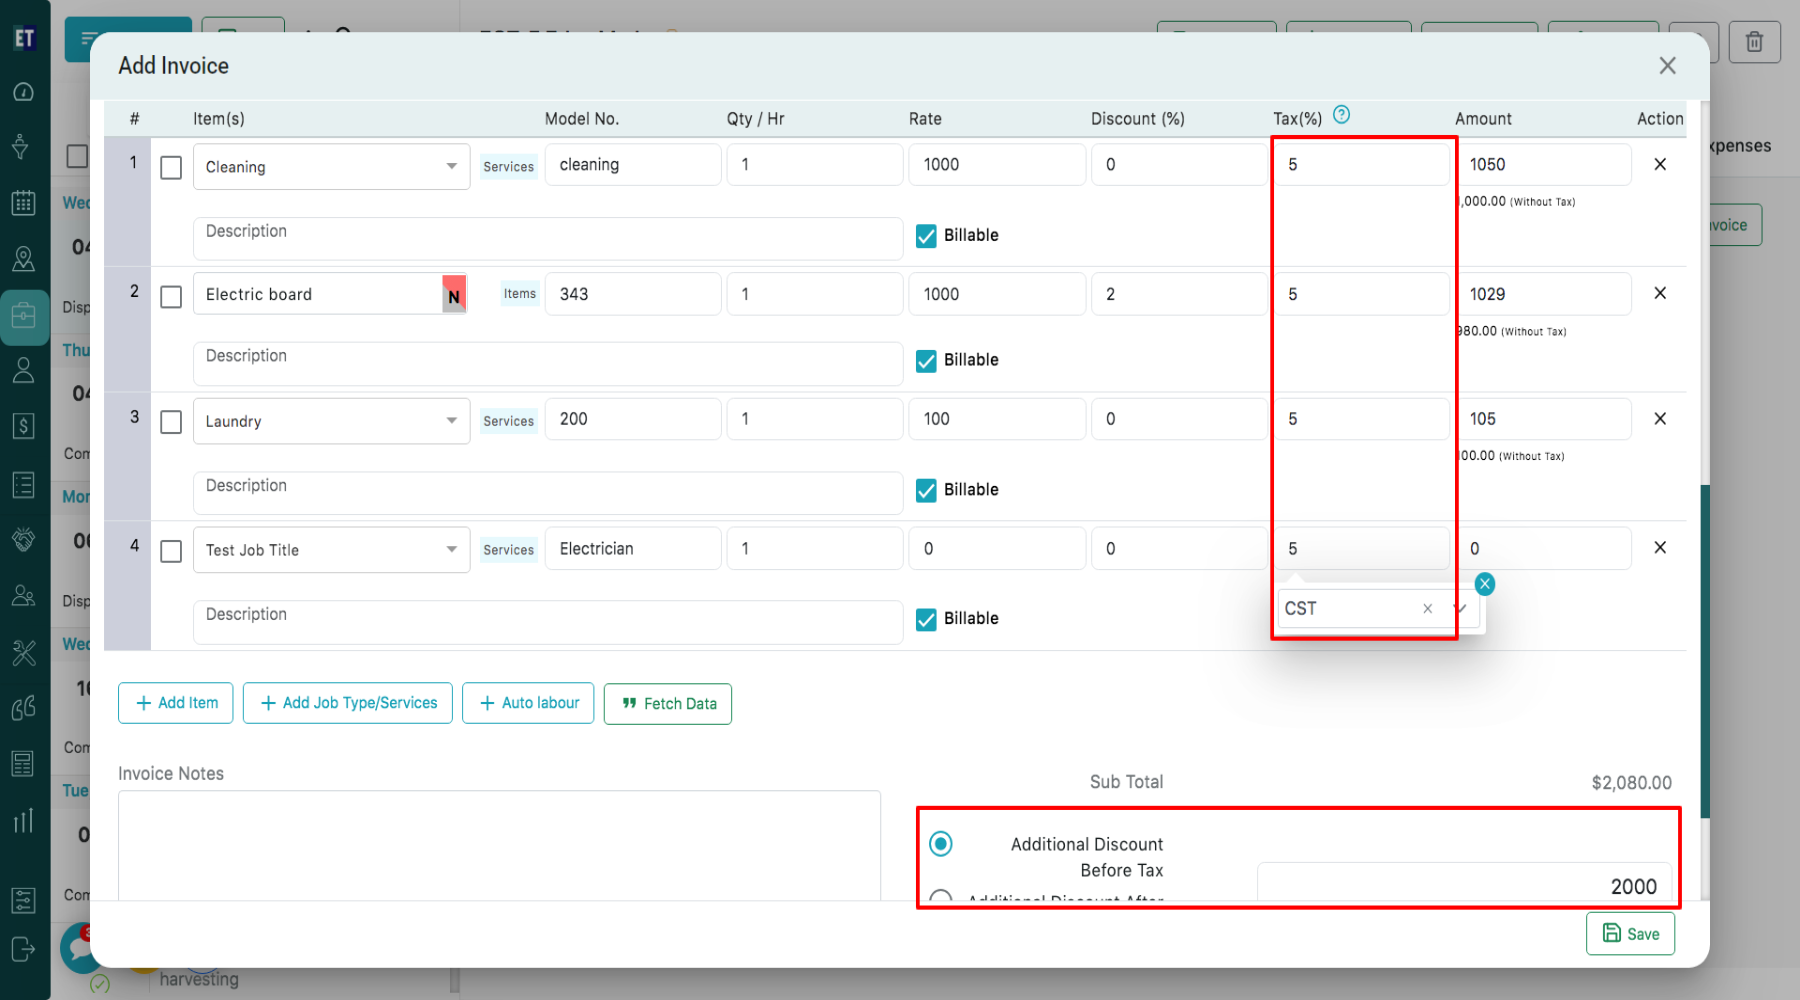
 Note : If you want to apply Additional Discount Before tax, you need to keep the tax % same for all of the line items.
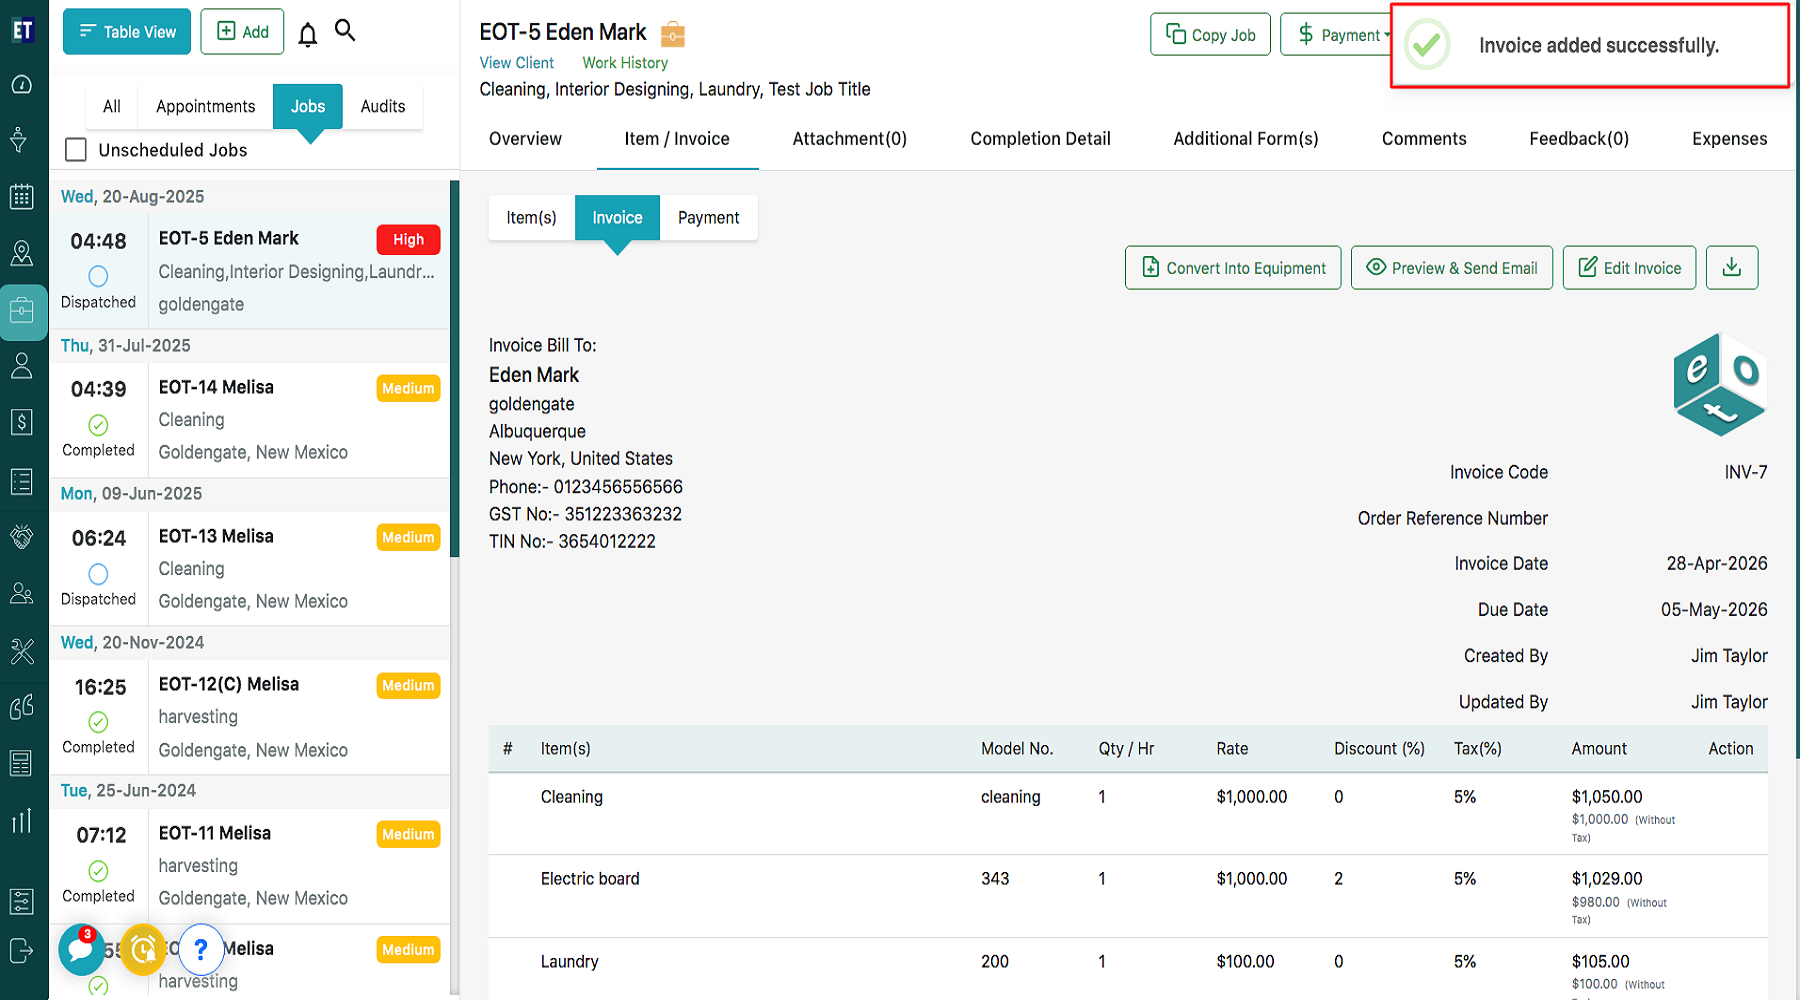
 On saving the invoice, you will get a success alert “Invoice added successfully”.
Then in the Invoice tab, select the Generate Invoice button on the top right corner of the screen.
Clicking on Generate Invoice will open a pop-up with auto-filled details, including Client Name, Client Address, Client Email ID, Contact details and Bill To information.
The invoice details such as Invoice Date, Due Date, Order Reference No, Discount Type, Currency, and Tags can be added or updated as needed before generating the invoice.
You can also link the invoice with : Without Contract Jobs and Contract Jobs
Clicking on Add Item allows you to add invoice line item details such as Item(s), Model No., Quantity/Hour, Rate, Discount (%), Tax (%), and amount will be automatically calculated in the Amount field. You can also update the item description and mark the item as Billable, if required.
Click Add Job Type/Services to add service-related entries to the invoice.
Select the required job type from the drop down, and enter the relevant details in the editable fields such as Services, Qty/Hr, Rate, discount and tax %, the amount will be calculated automatically.
Click on Auto labour to add labor charges to the invoice.
Clicking on Auto labour will open a Labour pop-up, select Custom Rate and enter the hourly rate and taxation details. Choose the applicable billing basis, such as Actual Job Time, Including Travel Time, Including Break Time, or Including Travel Break Time. After configuring the labor details, click Add Line Item to include the labor entry in the invoice line items.
To remove any line item, click the cross icon available under the Action column.
Clicking on “Fetch Data will open a pop up where you can retrieve the data from any existing Request or Quotation.
Enter the Request name or Quotation name and click on the Fetch button.
You can enter notes in the Invoice Notes section and can apply an Additional Discount either Before Tax or After Tax and use Add Extra Fields to include any additional invoice details, if required and you will get the automatic calculated amount of invoice. Once all the details are added, click Save to create the invoice successfully.
Note : If you want to apply Additional Discount Before tax, you need to keep the tax % same for all of the line items.
On saving the invoice, you will get a success alert “Invoice added successfully”.