How do I create a Job?
Select Work from the hamburger menu and you will see two options on the top "Table View" and "Add", select Add here.
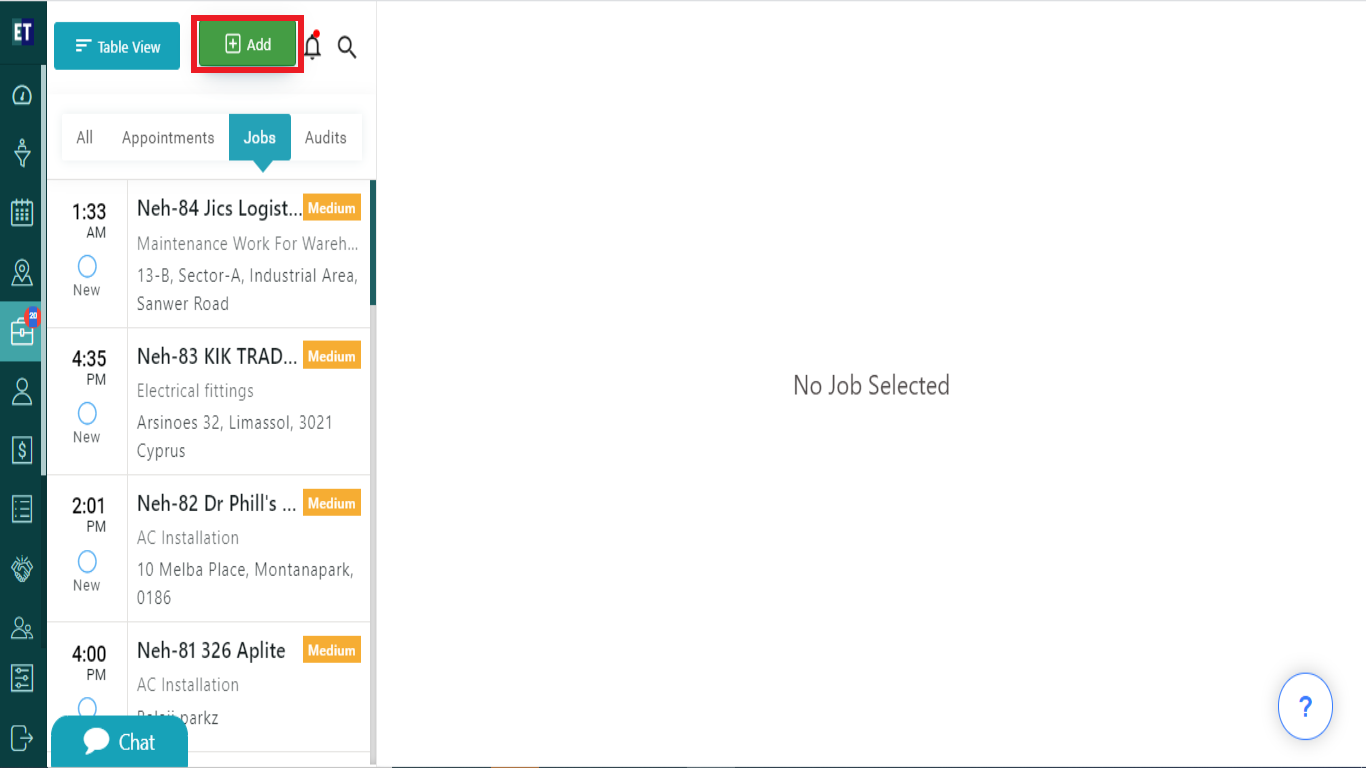
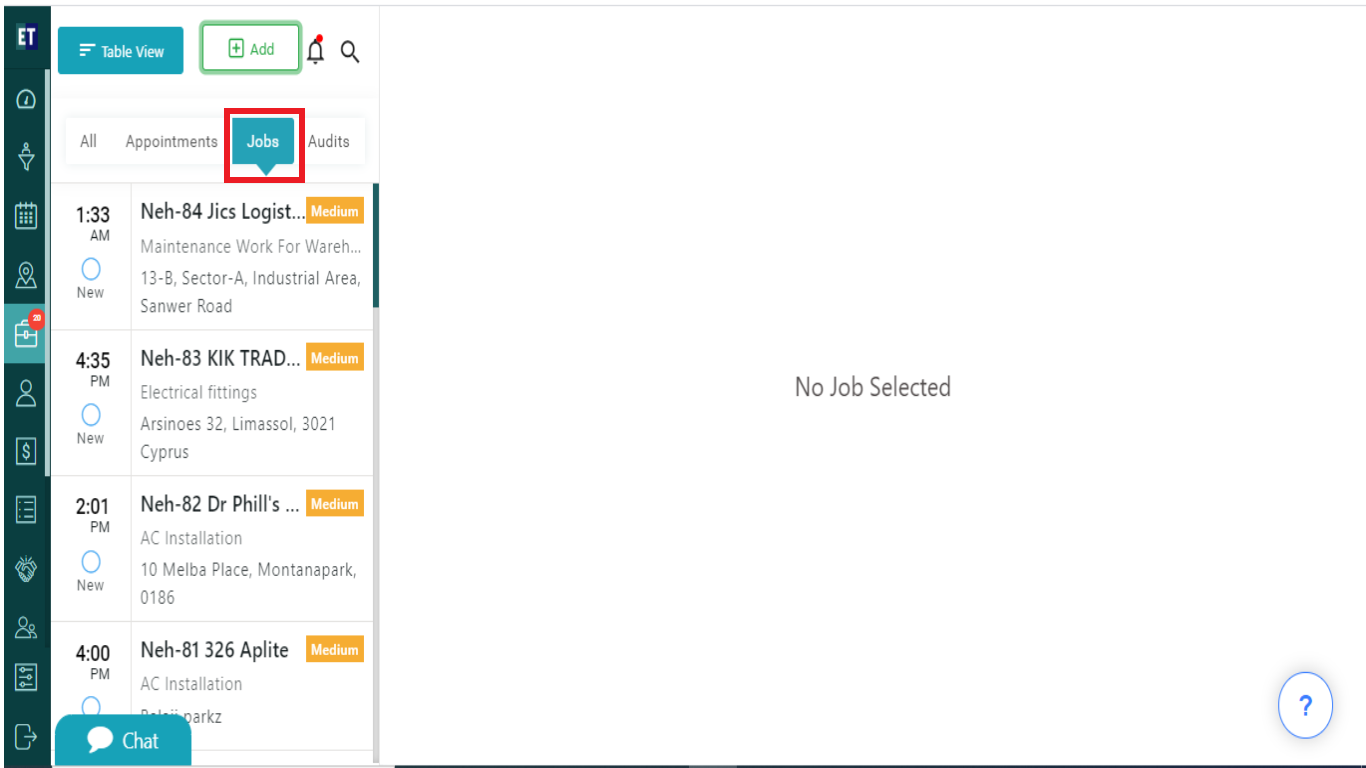
You will see Jobs below the the Add button and it is by default selected.
Clicking on Add button will display a Create New pop up.
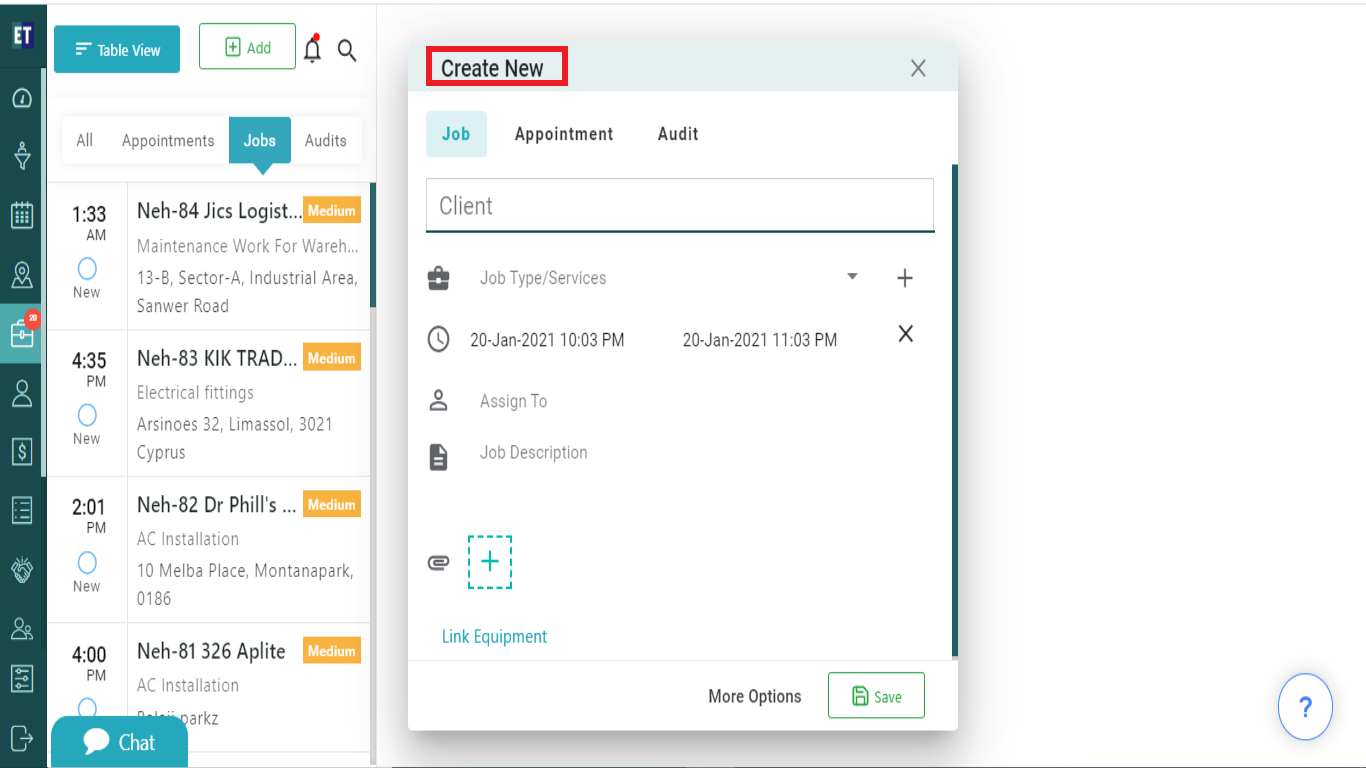
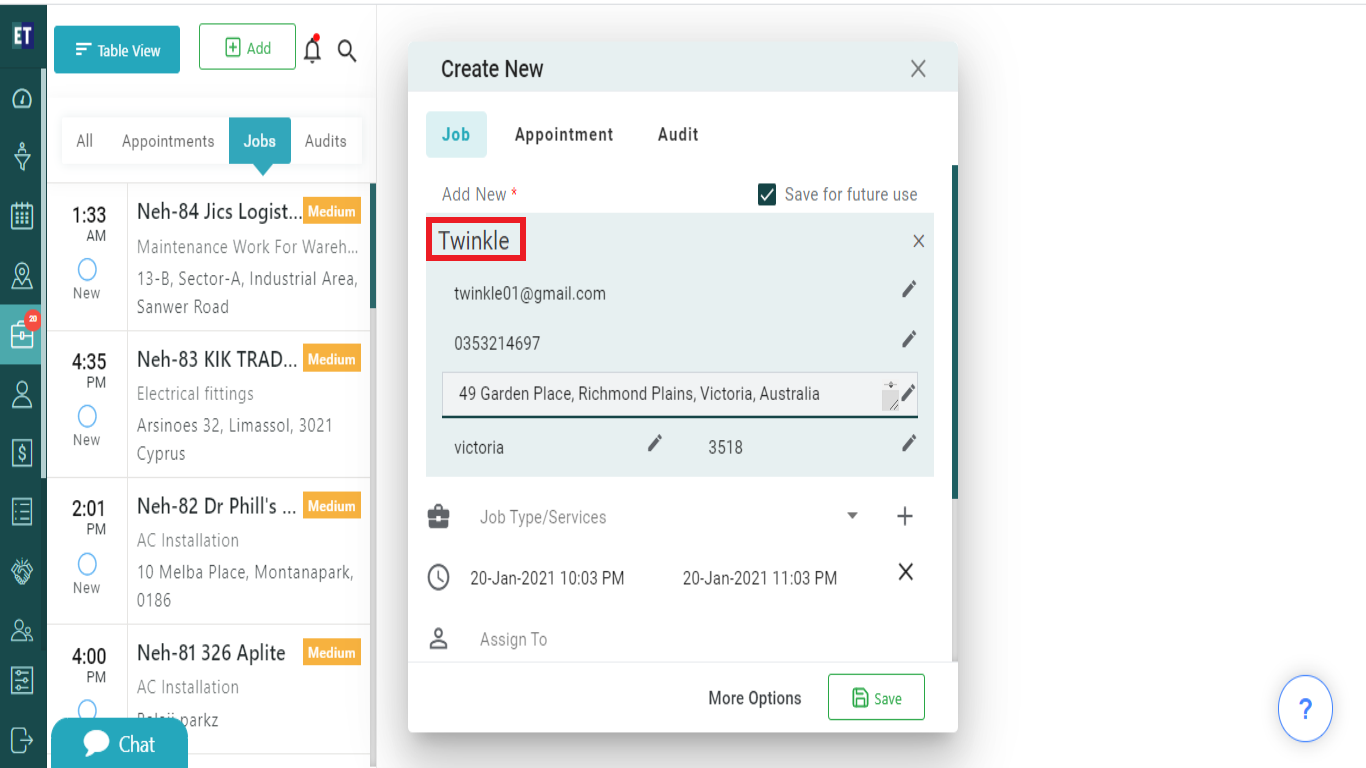
Fill out all the details required in the form start with the Client Name, after filling the name you will see a drop down for additional client details such as Email ID, Mobile No, Address, City.
Select the JobType/Services from the dropdown field. You can select more than one JobType/Services from here.

*Note: You must fill out all fields marked with an asterisk before saving
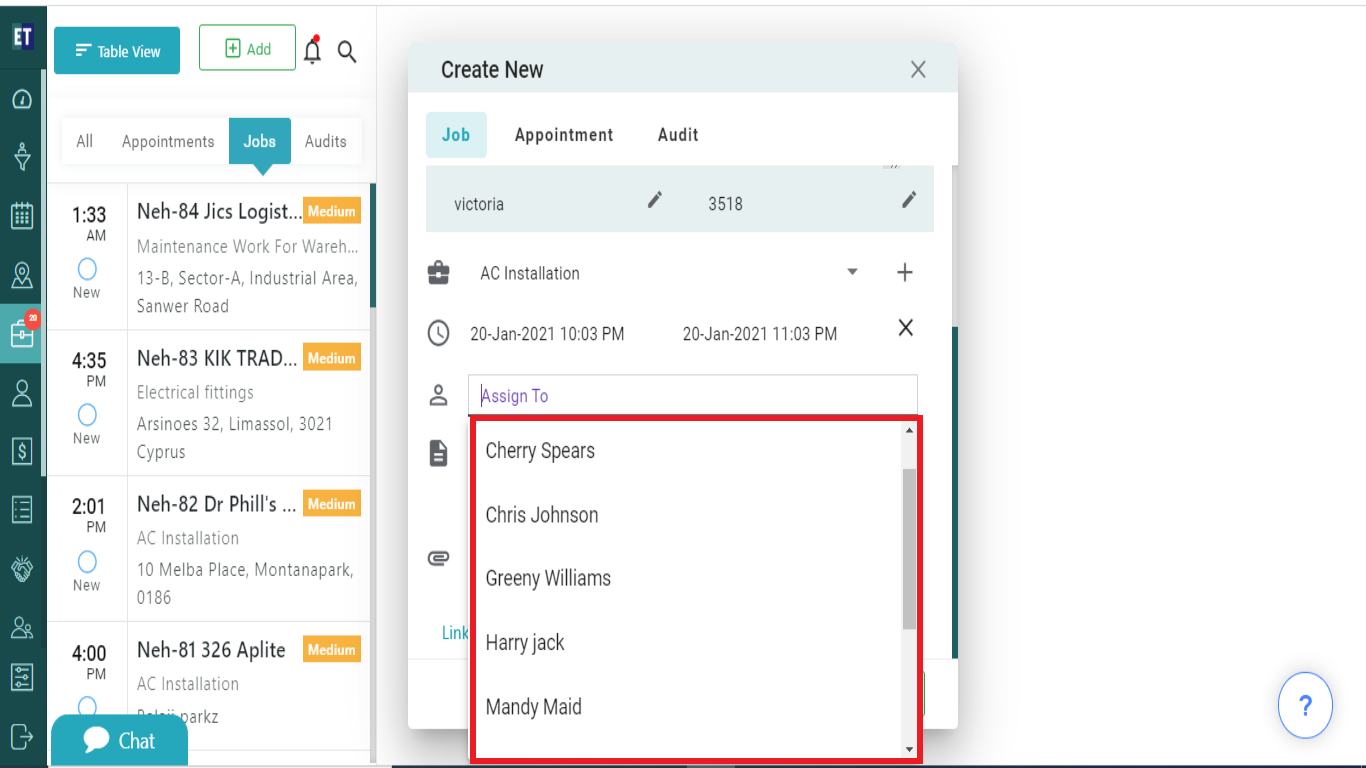
Click on Assign To field, it will open a dropdown. From the dropdown you can select the fieldworkers to assign the job.
You can also attach the related job document.
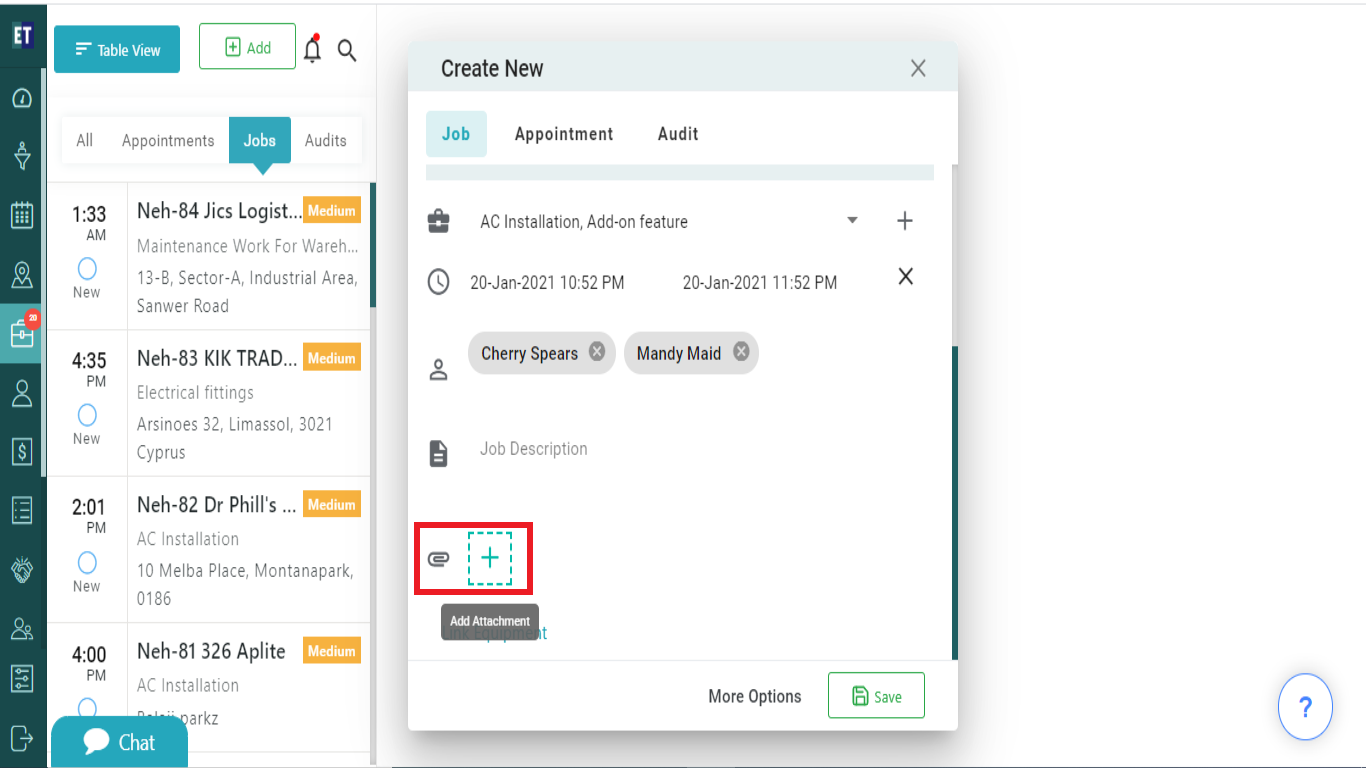
For adding more details, Click on the More Options button.
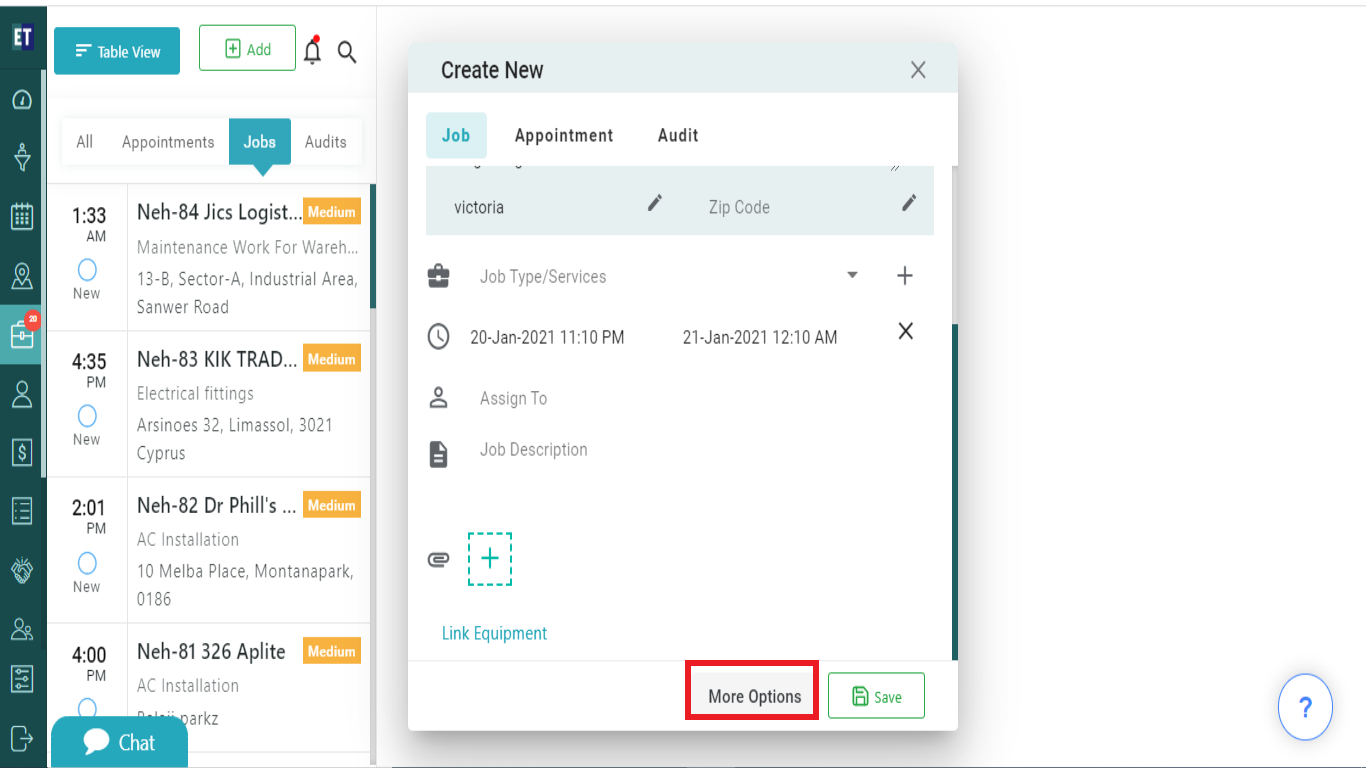
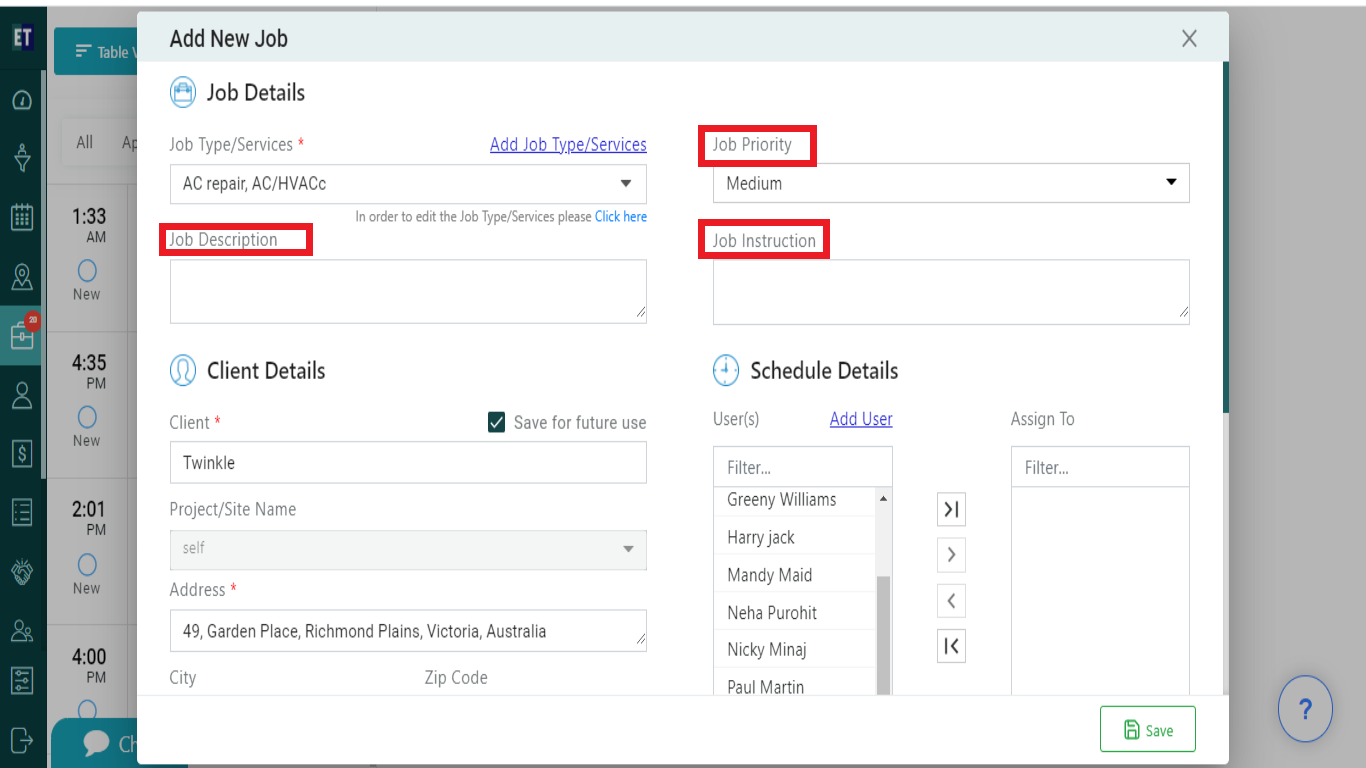
Clicking on the More options will open a form with more Job Details and Client Details fields.
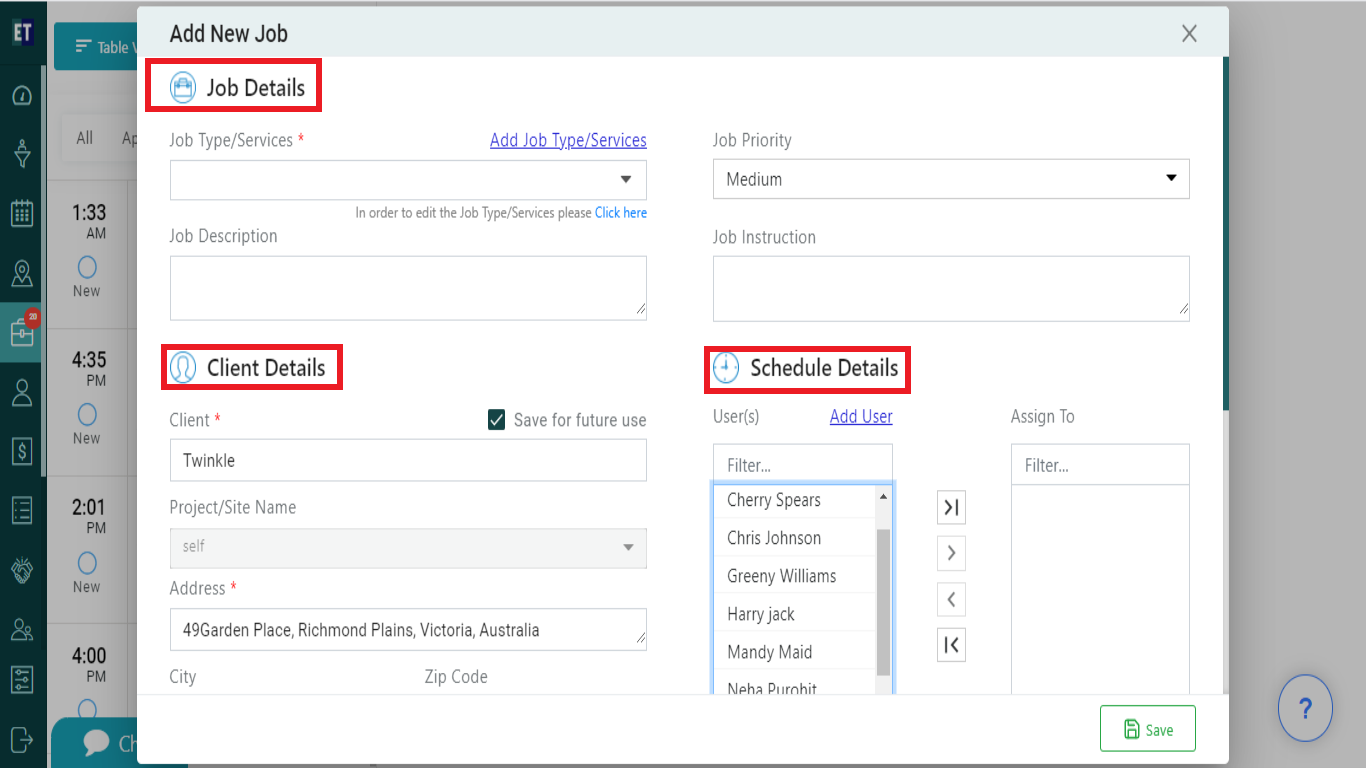
You can edit the Job Type/Services by clicking on the "In order to edit the Job Type/Services please click here" URL
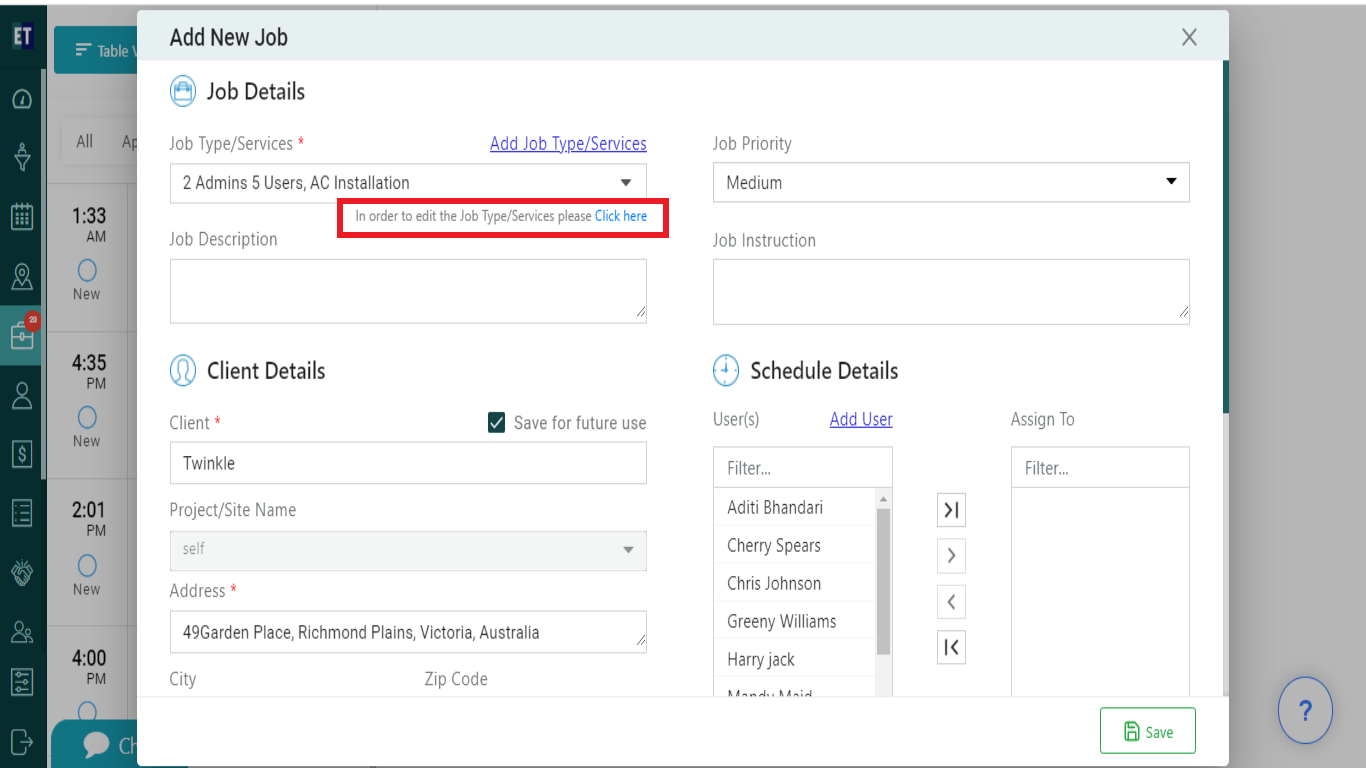
Click on the "click here" hyperlink, it will redirect you to the already added Job Type/Services with Add Job Type/Services button
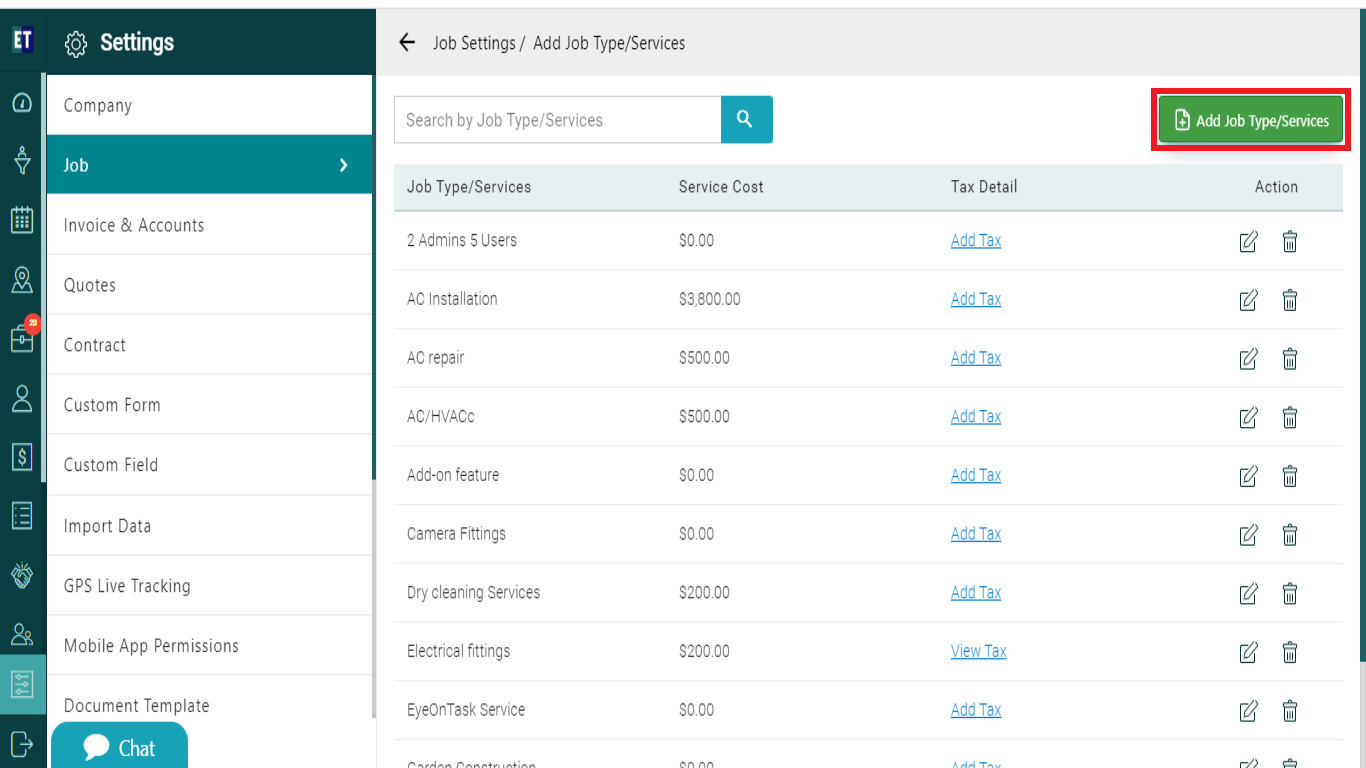
Click on Add Job Type/Services, it will open a pop up to fill Job type/Services and Cost.
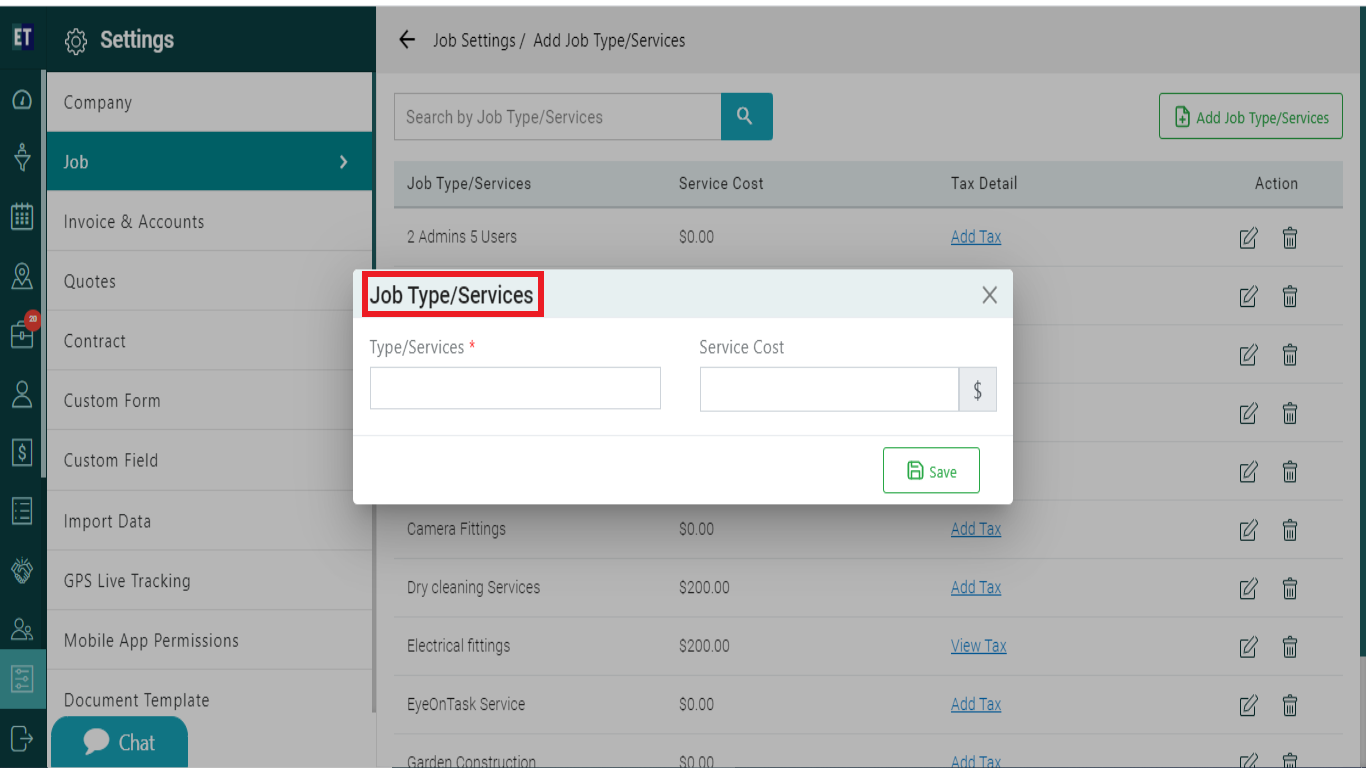
*Note: You must fill out all fields marked with an asterisk before saving
Select Save and it will display success alert.
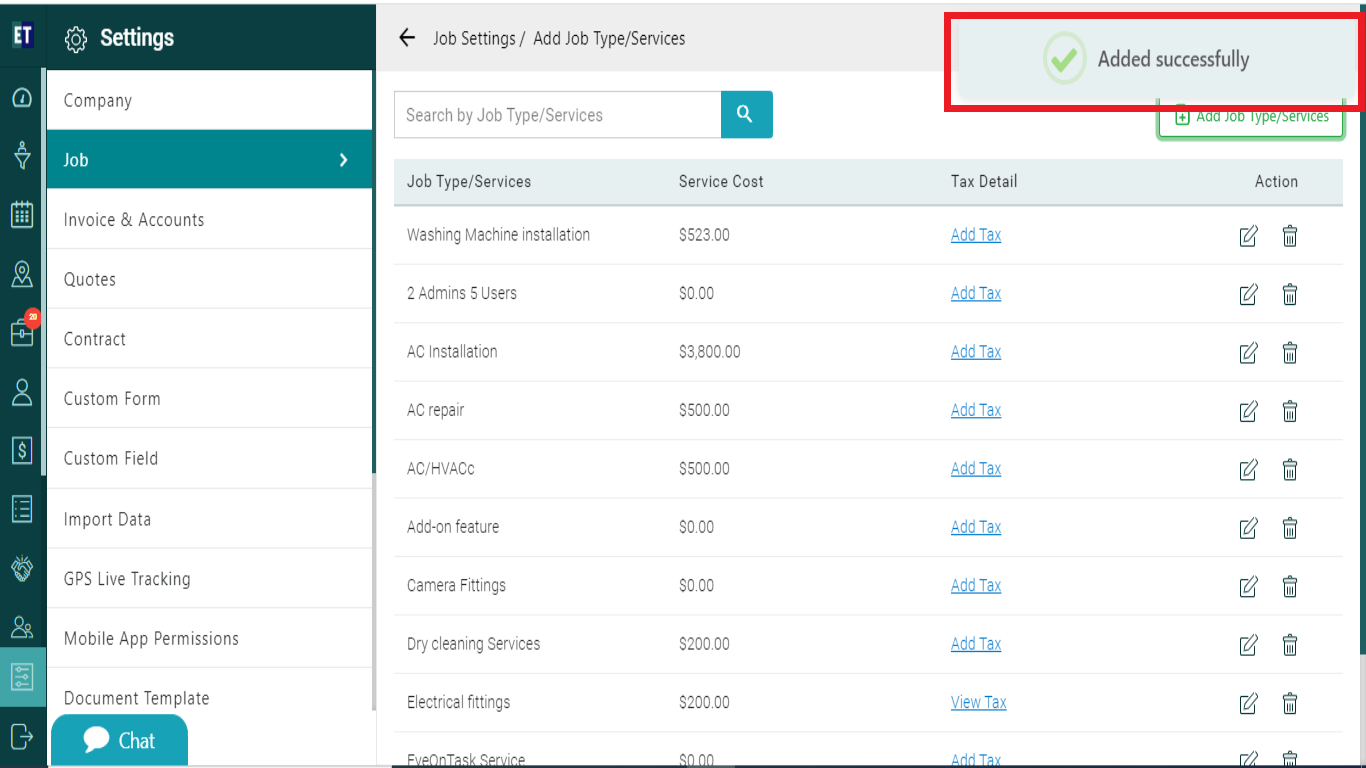
Success Alert means job type has been added, and getting displayed on the Job Type/Services drop down in Add new job popup.
You can also set the Priority of the job, Add Job description and Job instruction within the job details section.
Now, you can also select any Job Type/Services from the drop down.
Once the job details are filled fill the client details.
Click on any field it will become editable that means you can change any of the client details here as well and select the check Save for future use check box after selecting any field. That detail will be saved in that specific client or for new client.
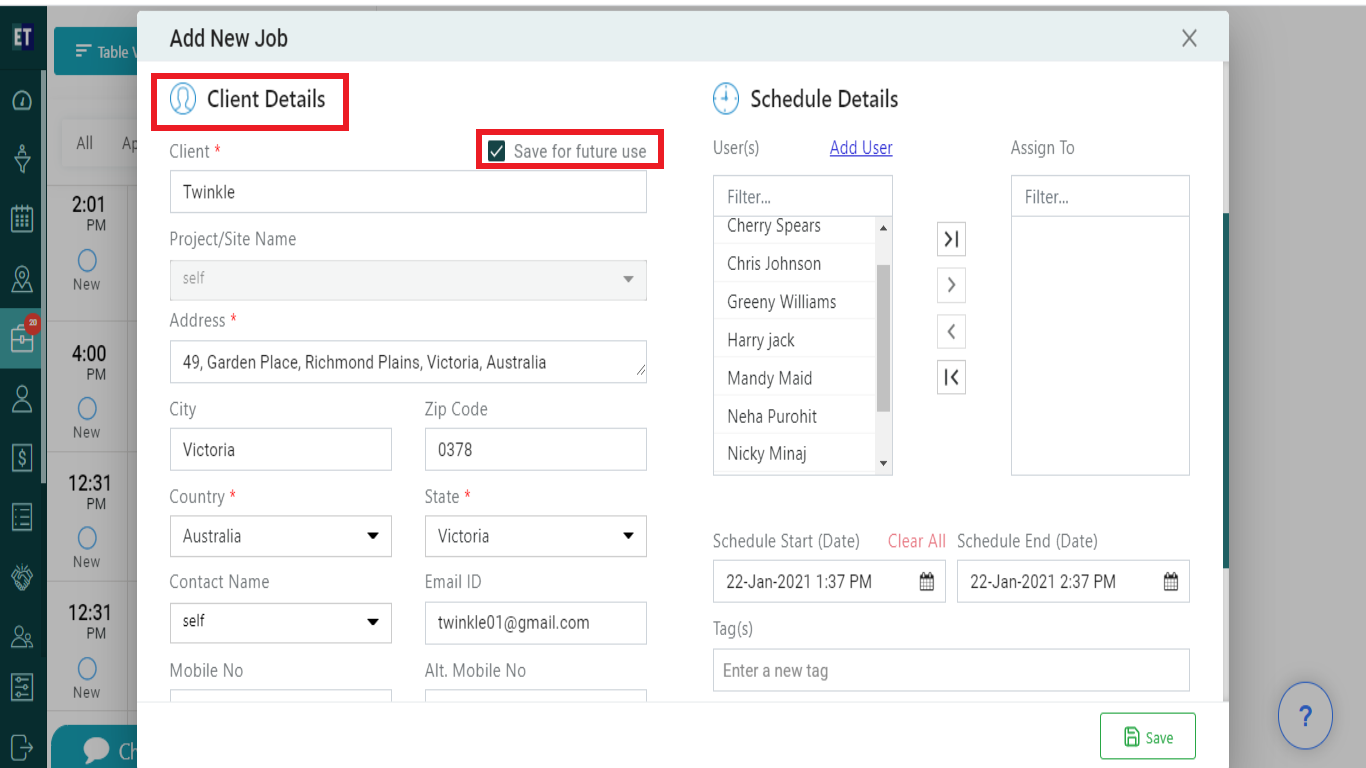
If you want the details of previously added client, you have to type minimum three characters of client name and the Client field will suggest already added clients list.
Once you select the client, rest of the details such as: Site name, Address, City, Zip code, Country, State, Contact Name, Email id, Mobile No will be auto filled.
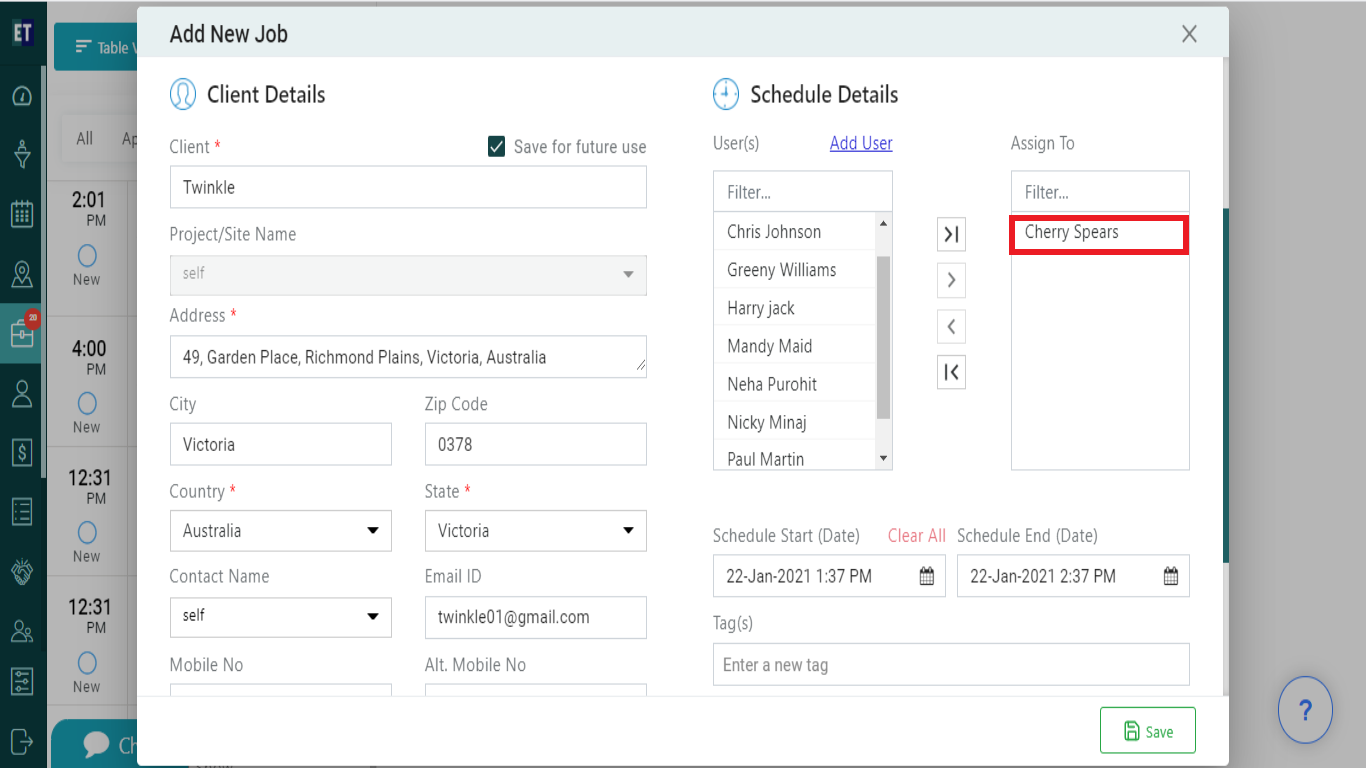
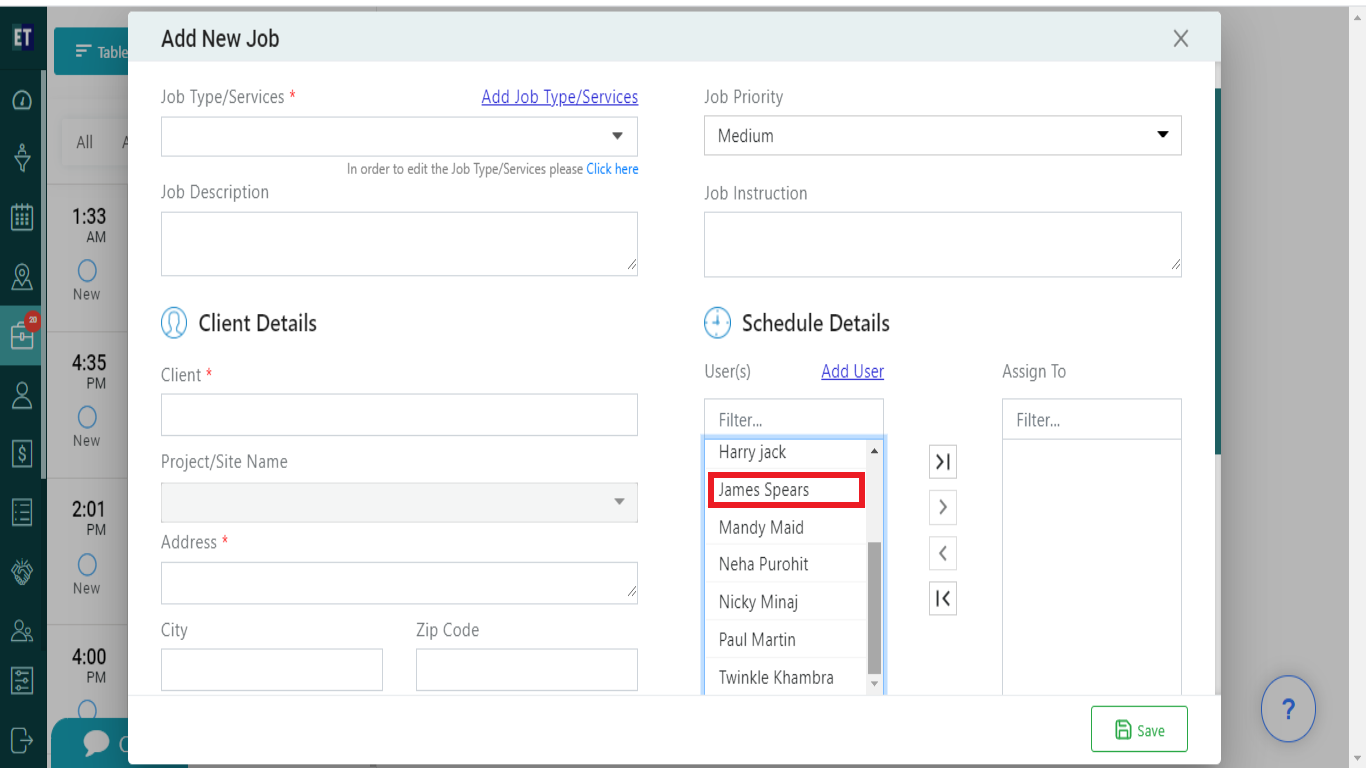
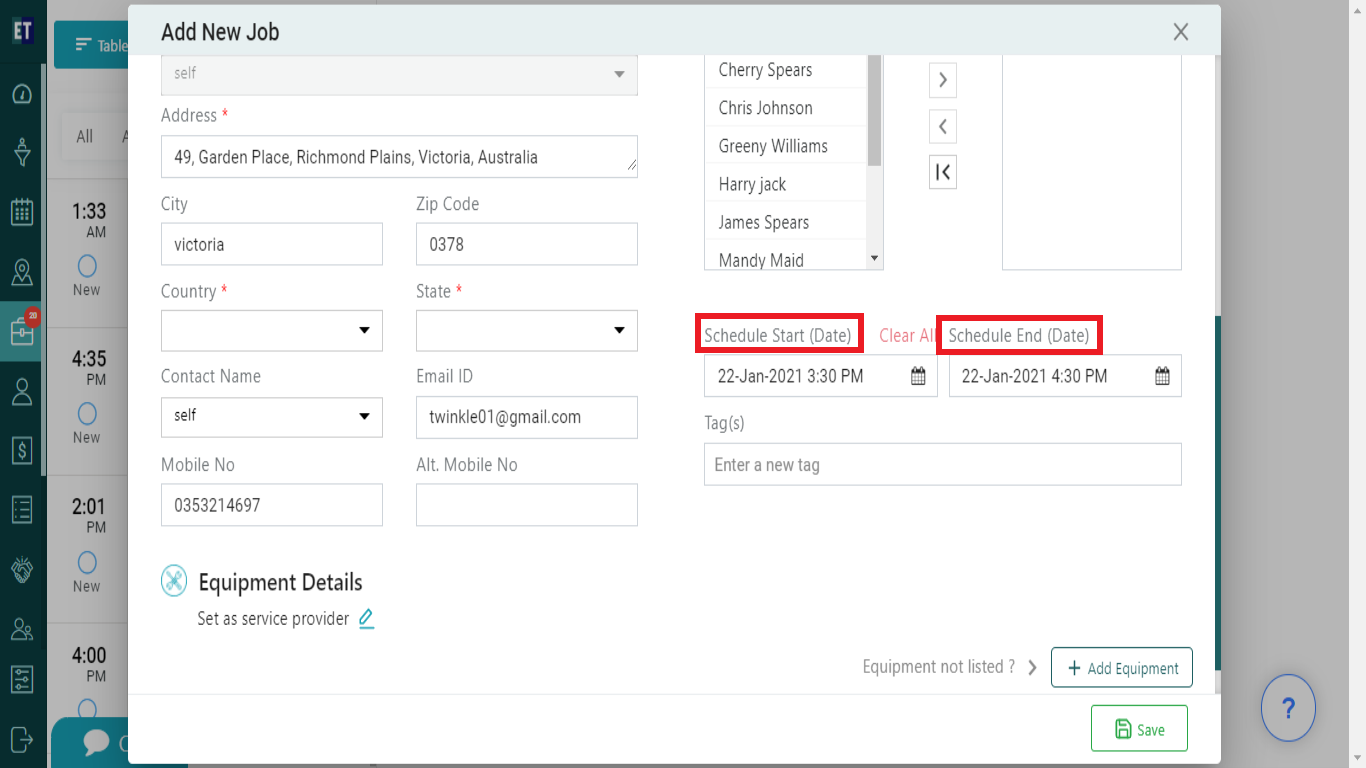
Fill the Schedule Details for fieldworkers. Select the name of the User(s) from the list.
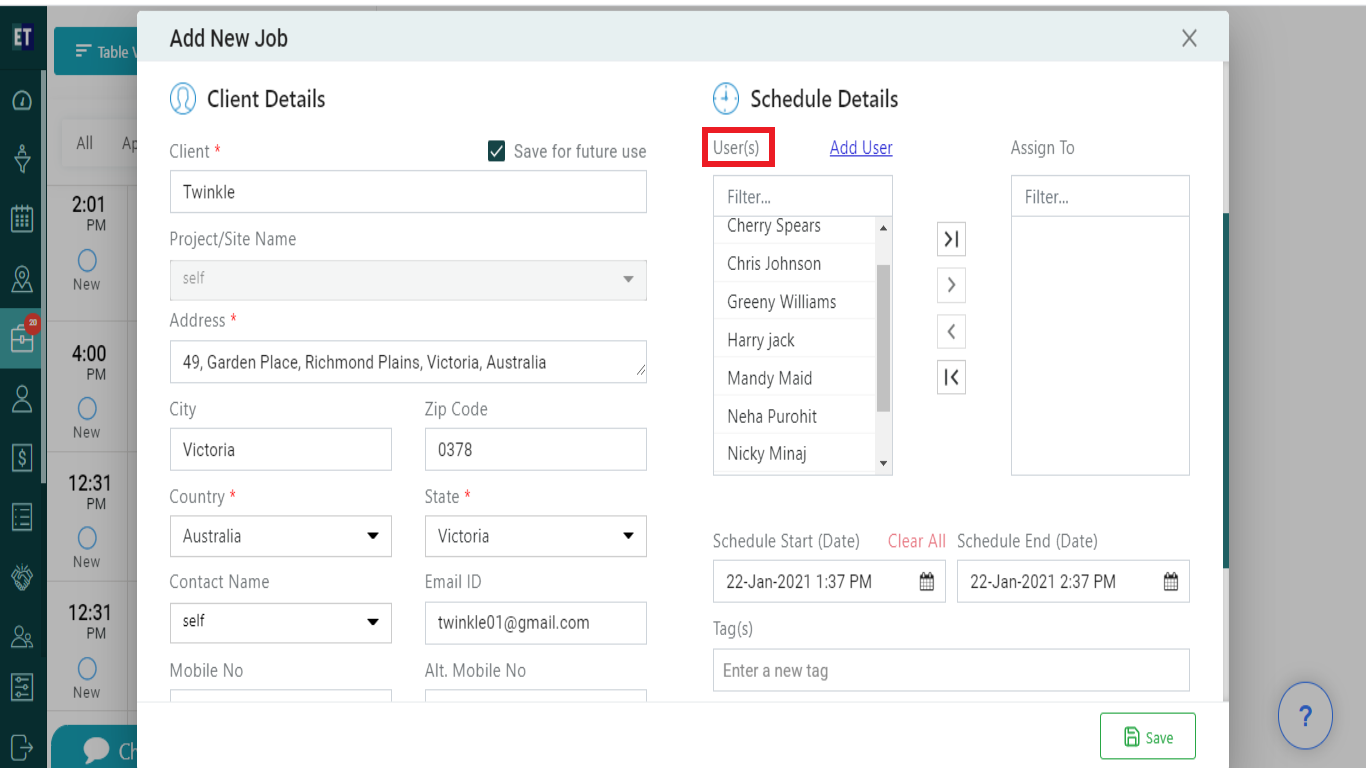
To assign single User in the job select any fieldworker from the list and click on the single right angled arrow, which will be highlighted once you select an individual fieldworker.
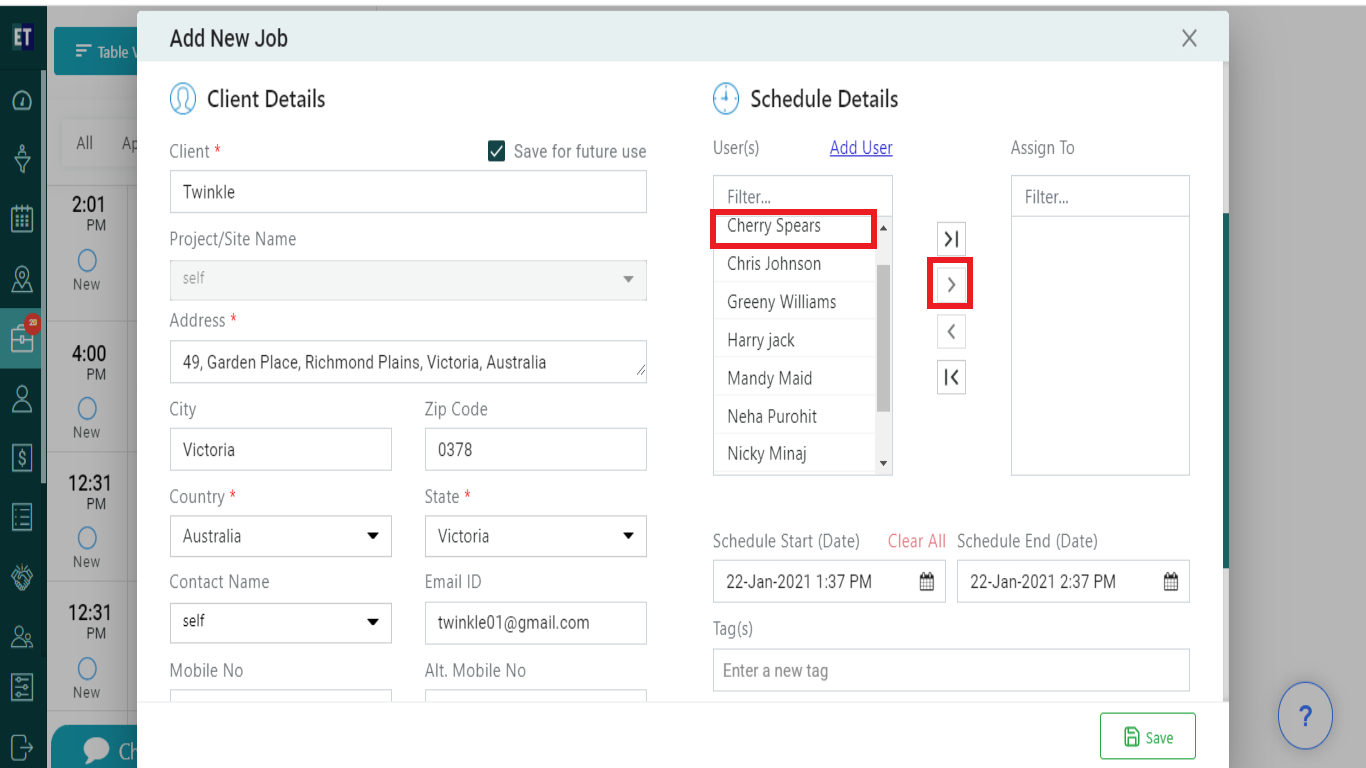
As soon as you click on the arrow, the field worker will be added on the Assign To list.
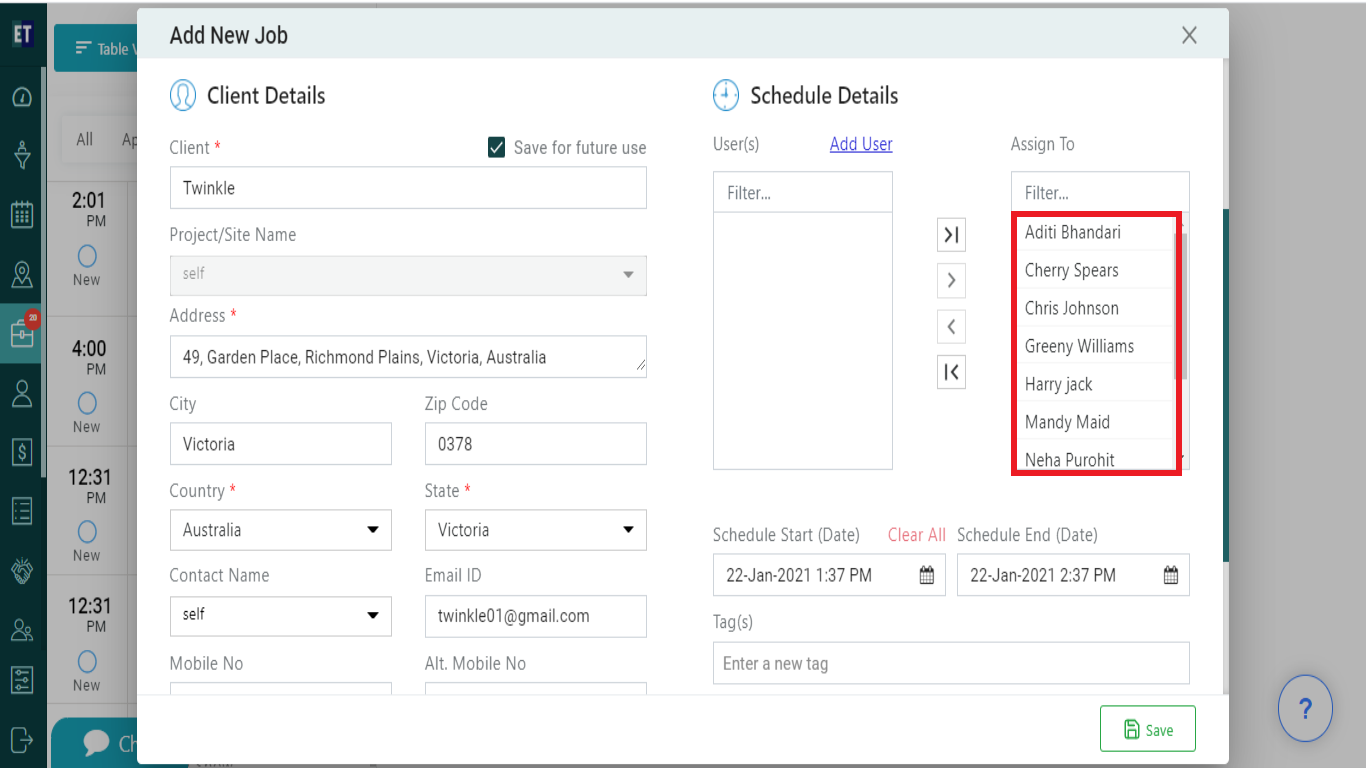
To assign multiple/all users in the job select users from the list and click on the right angled arrow.
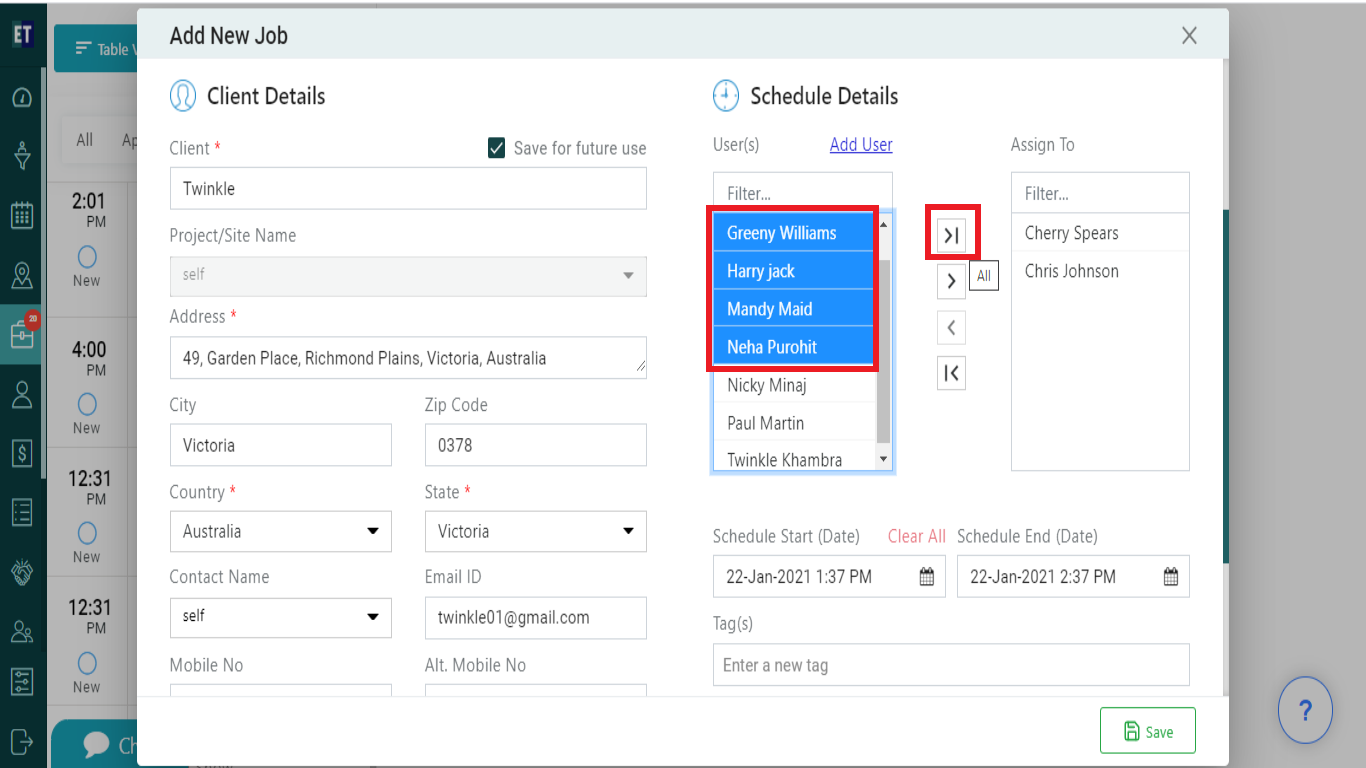
As soon as you click on the arrow, the users will be added on the Assign To list.
You can also add new Users using Add User hyperlink.
*NOTE:Only if you are an Admin.
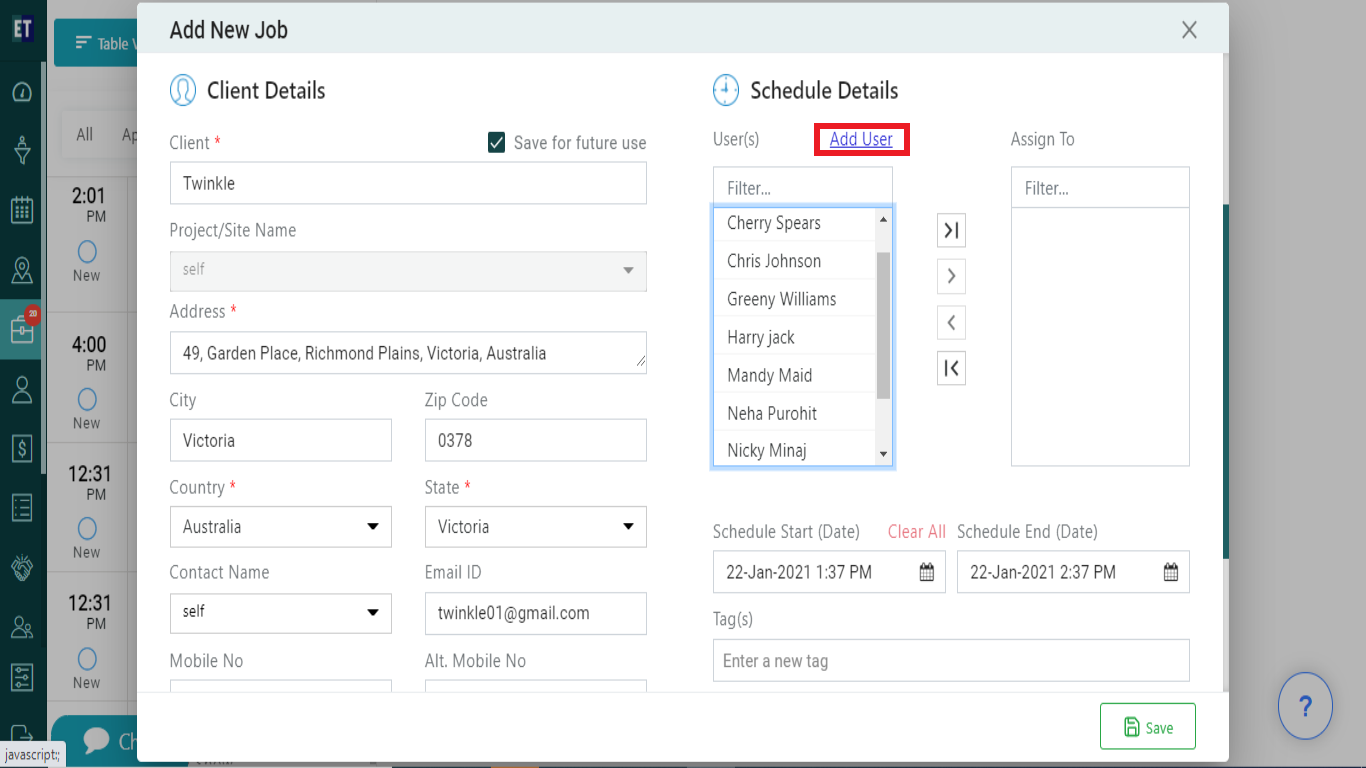
Click on User it will redirect you to the Add User pop up.
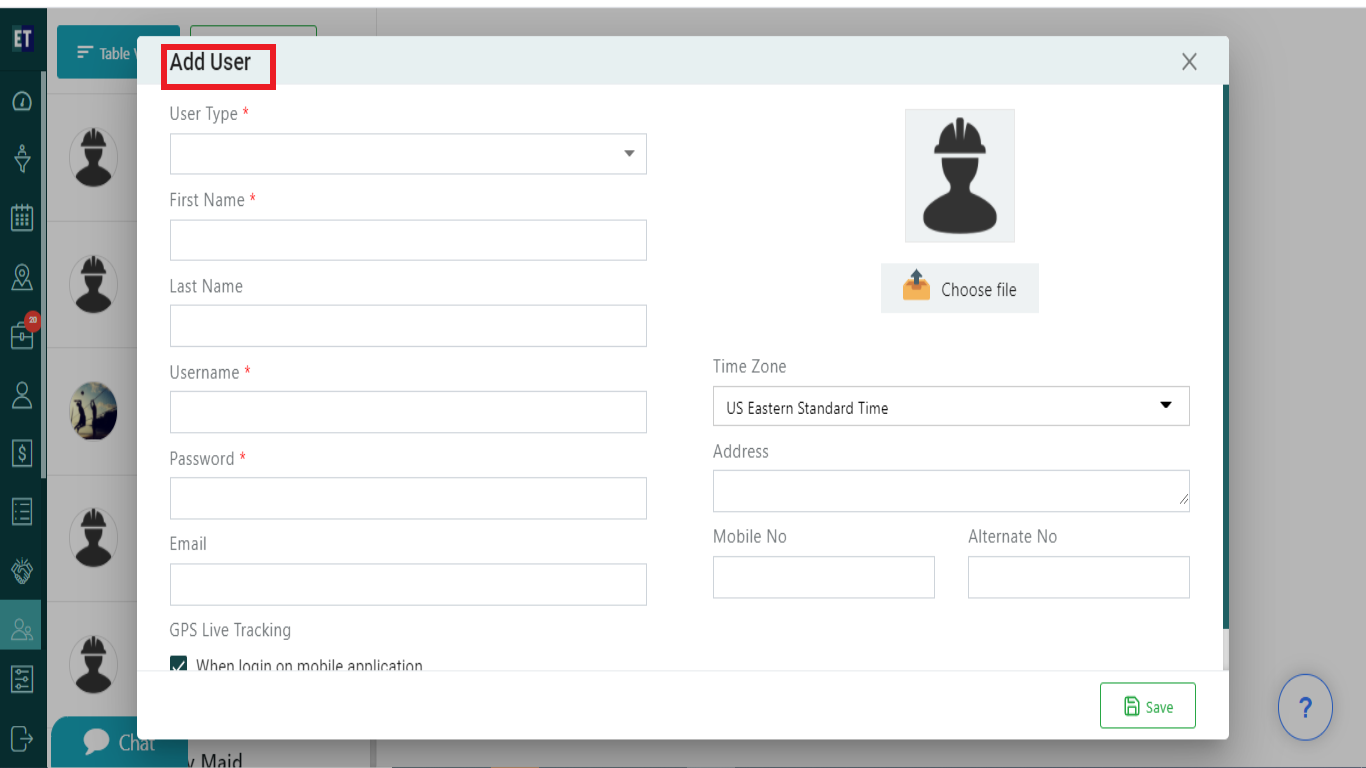
Select User type from the drop down.

Fill the details in the form and click Save.
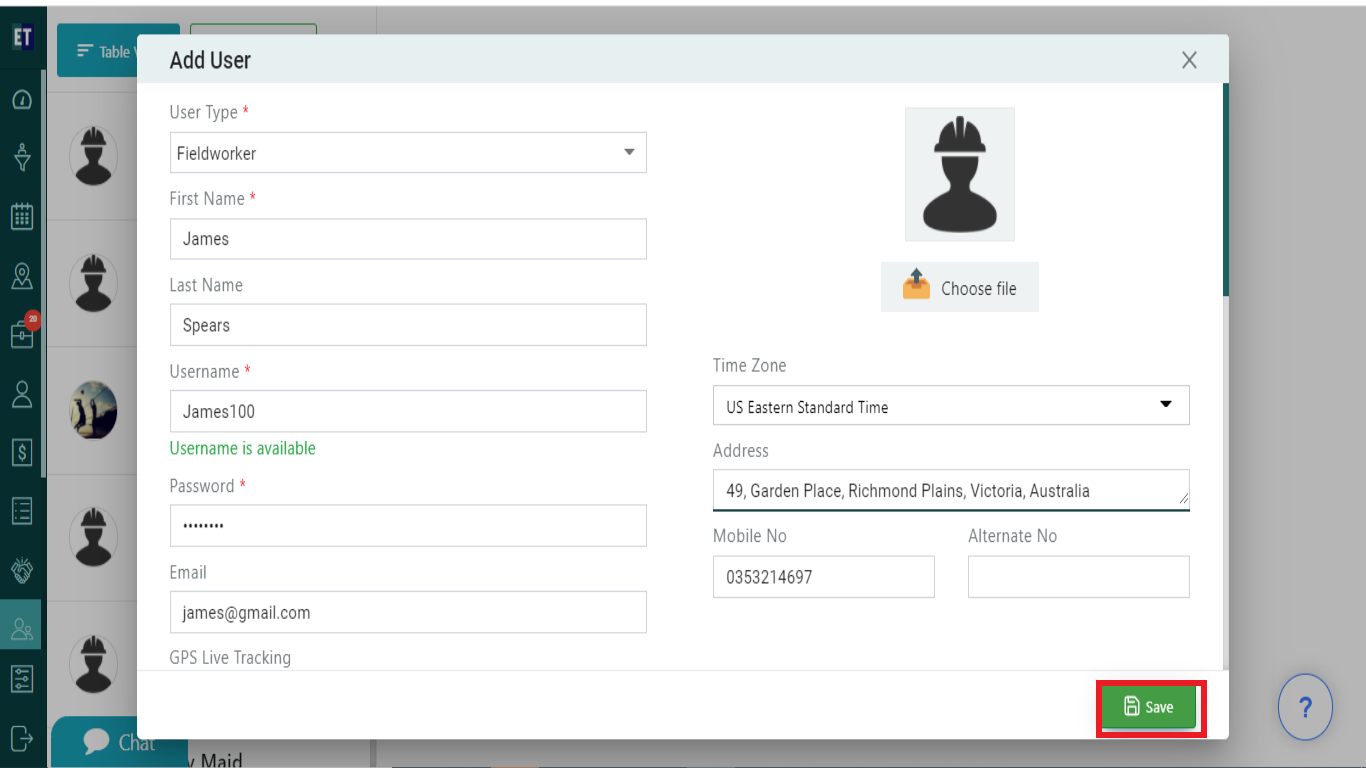
Select Save and it will display success alert.
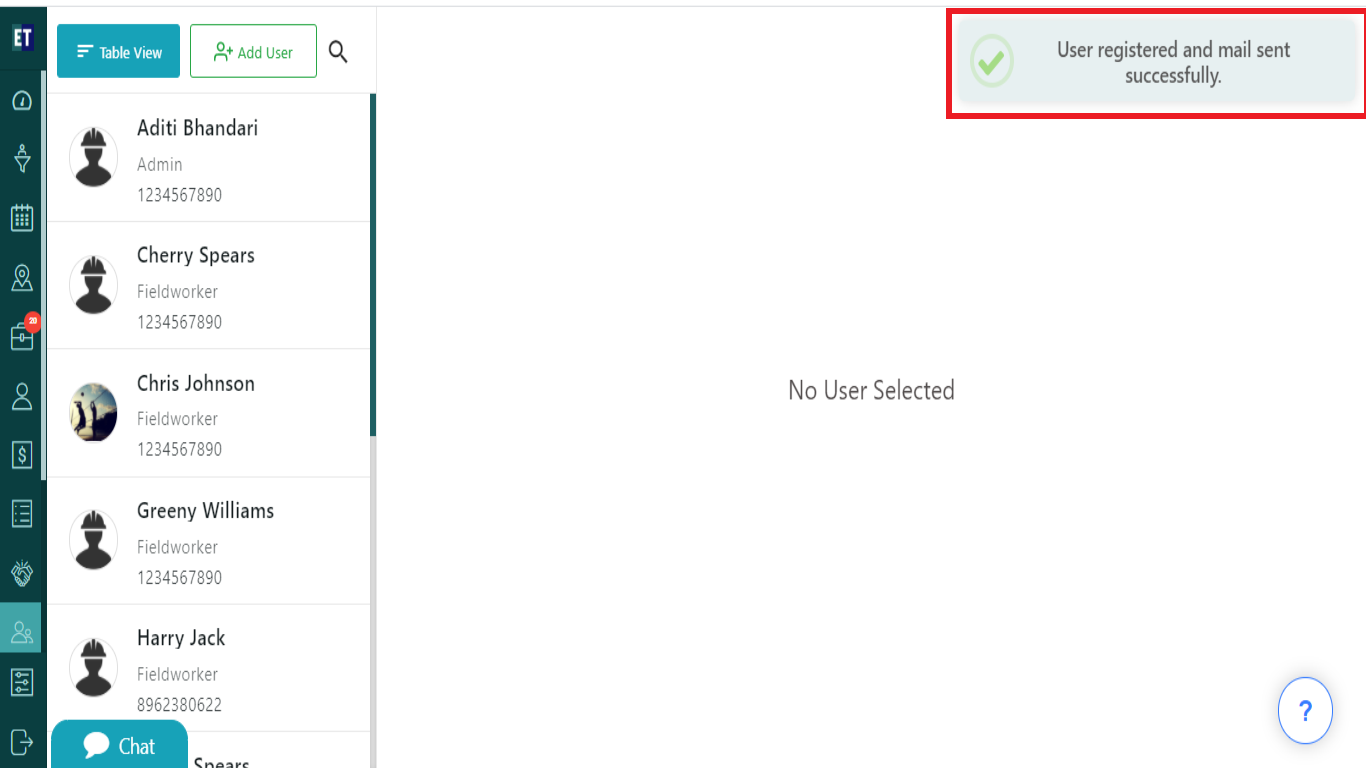
Success Alert means User has been added and will appear on the list of users on create a job form as well as on the users list on the top.
Select start date, end date using calendar and enter a value in tag
Already passed date can not be selected in start date and end date
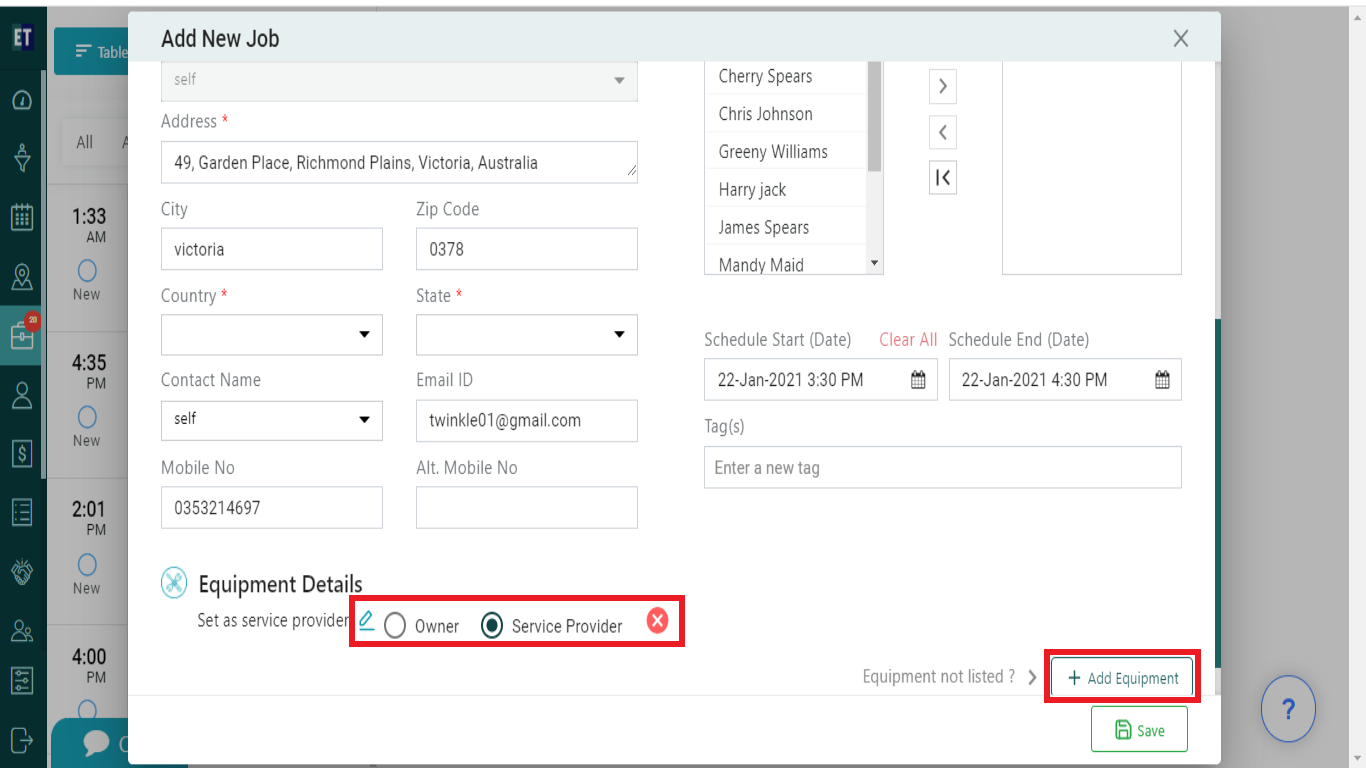
After filling up all the details, you can also add the Equipment to the job and by clicking on the edit icon you will get the option to set the service provider of the equipment..
Click Save and the job will appear on the job list on the top.
