How do I add a new Appointment within the scheduler?
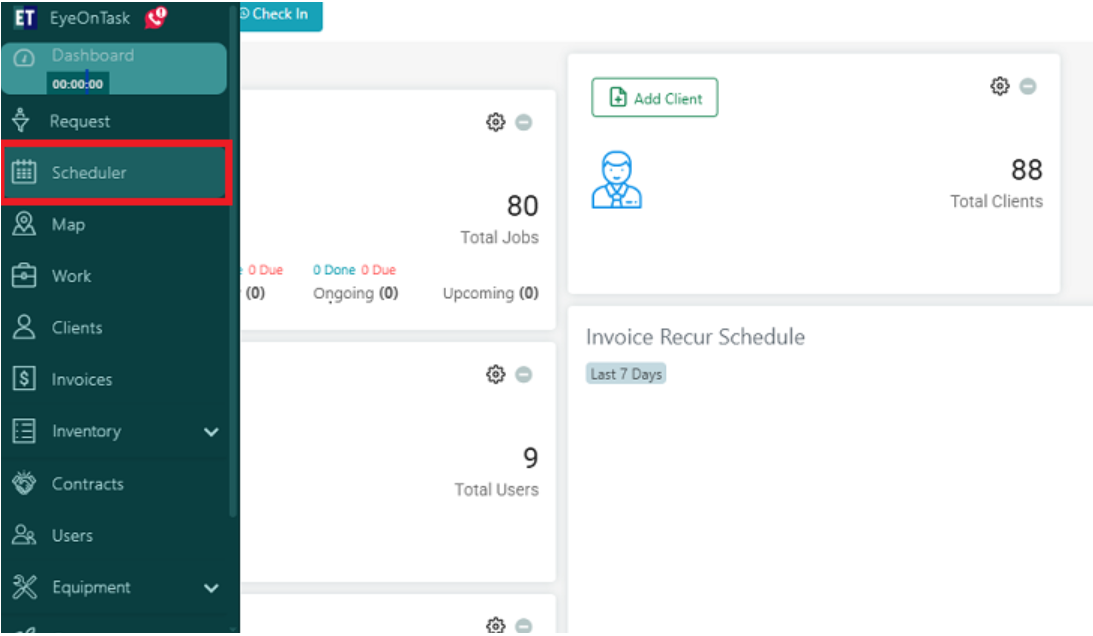
Select the Scheduler from the hamburger menu.
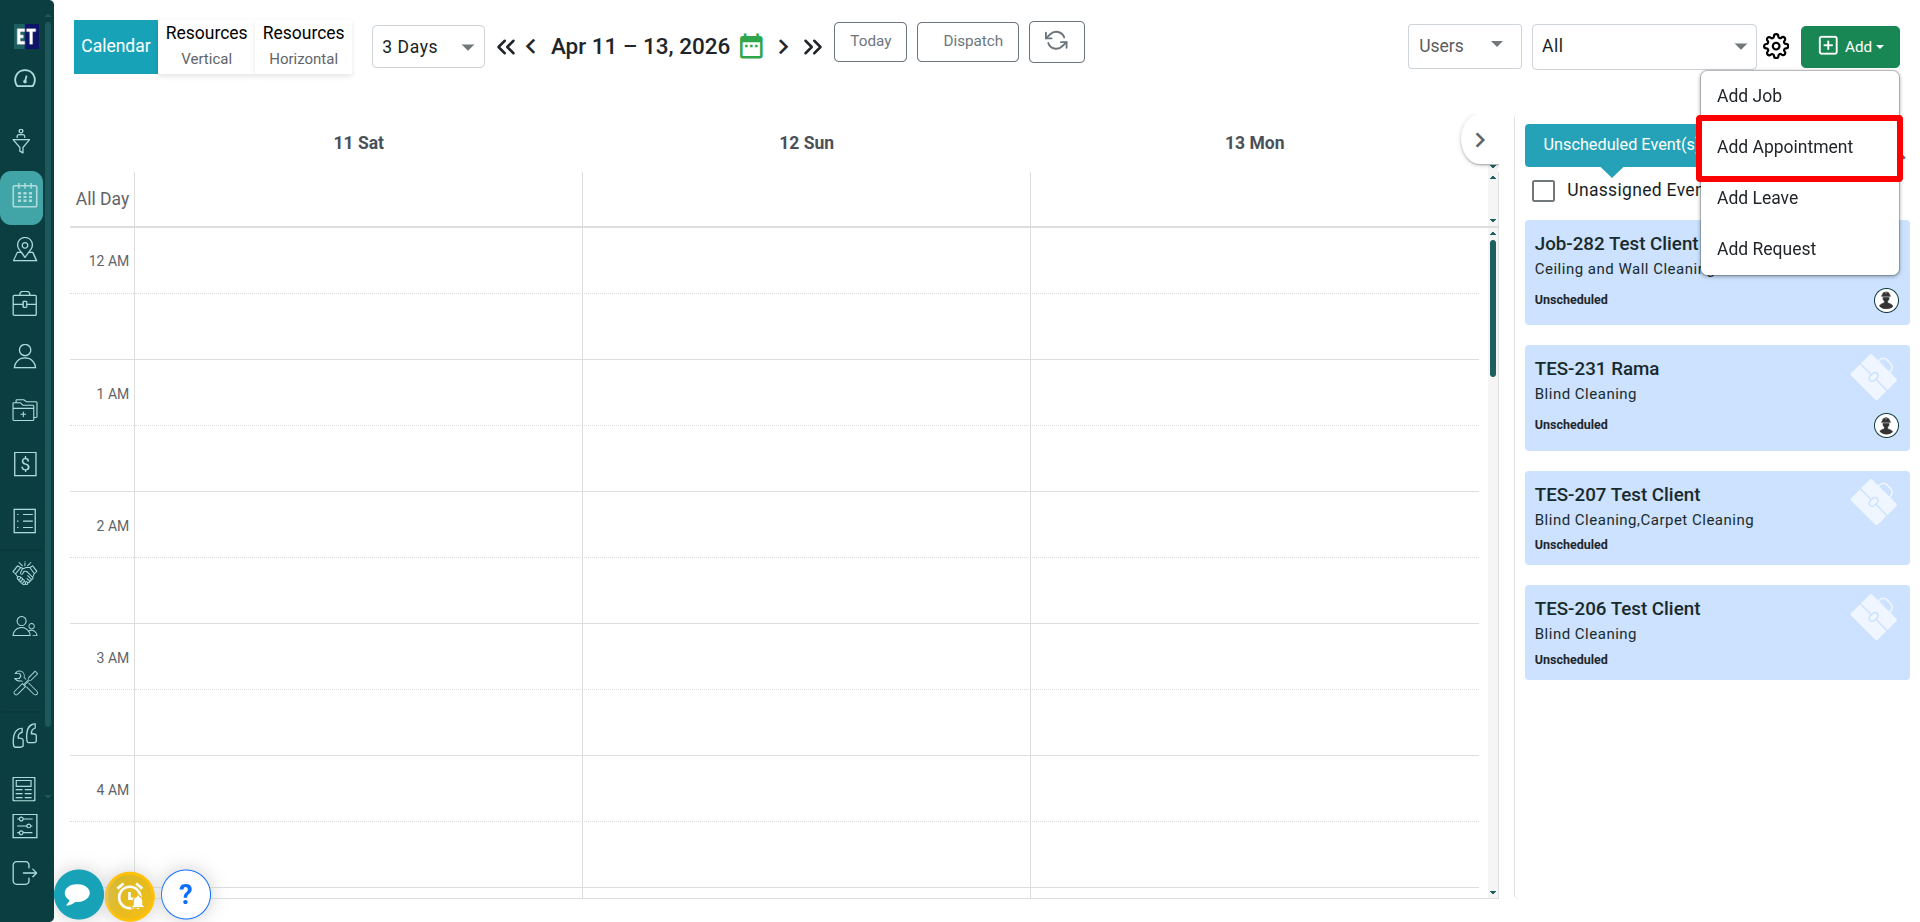
 Select the Add Appointment from the drop down menu.
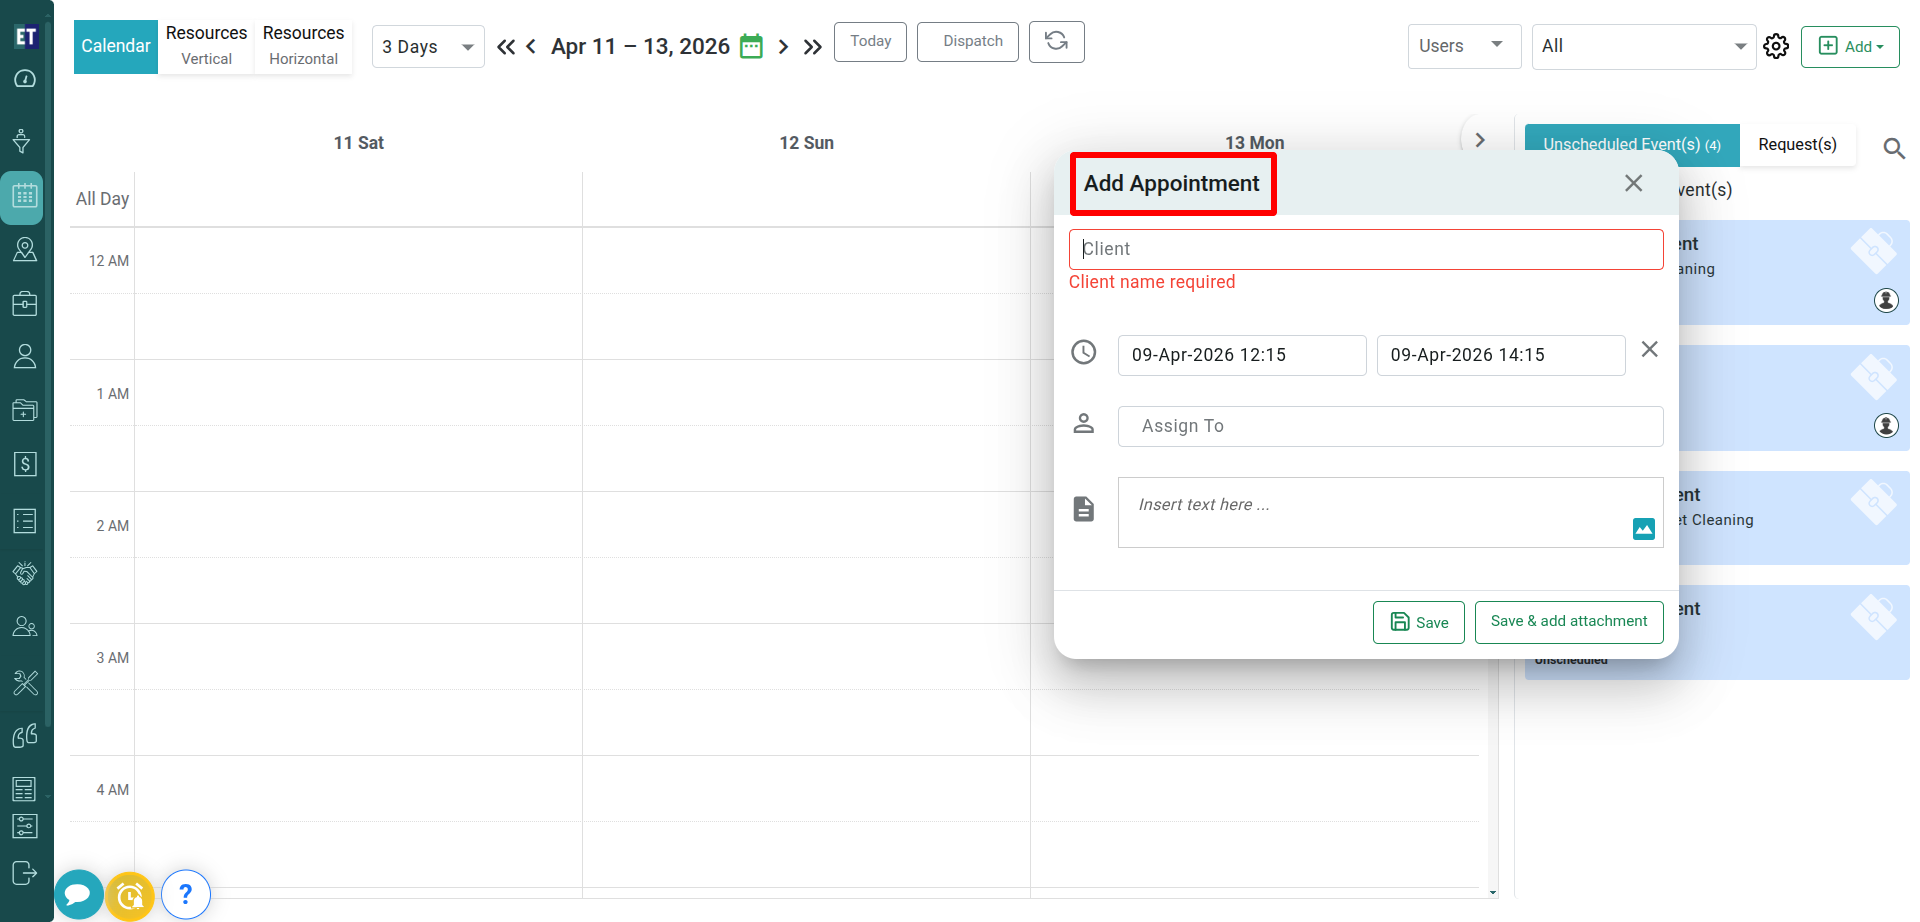
 On selecting Add Appointment, the Add Appointment popup window will appear with input fields.
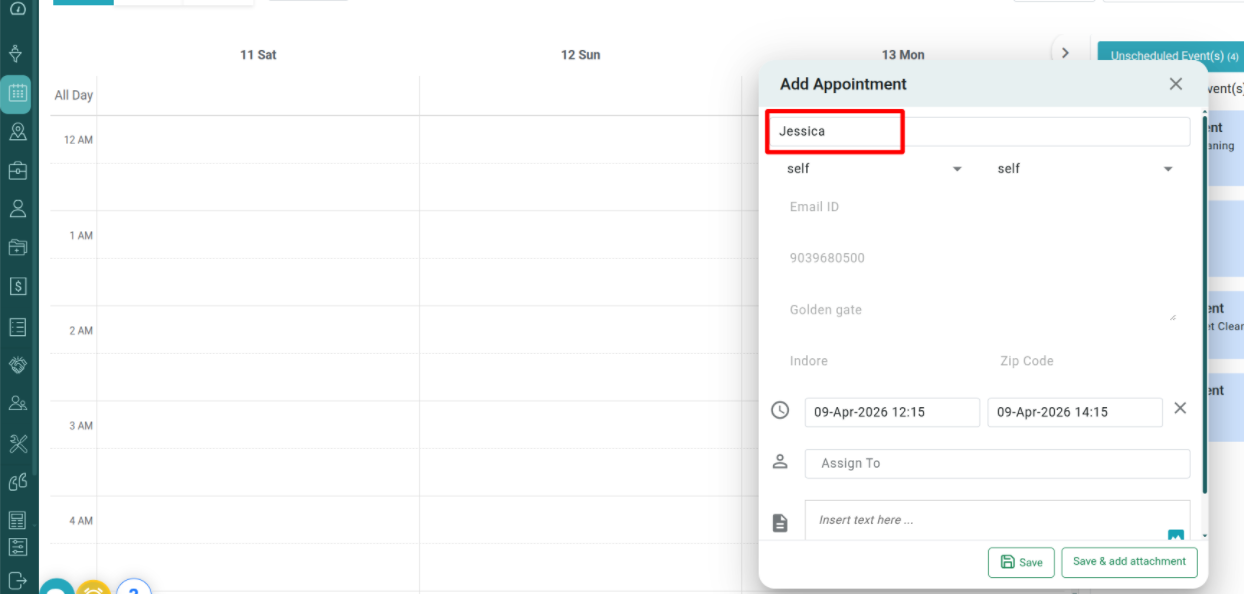
 Enter the Client Name. On entering the Client Name, a dropdown will appear with additional client details such as: Email ID, Mobile Number, Address, City.
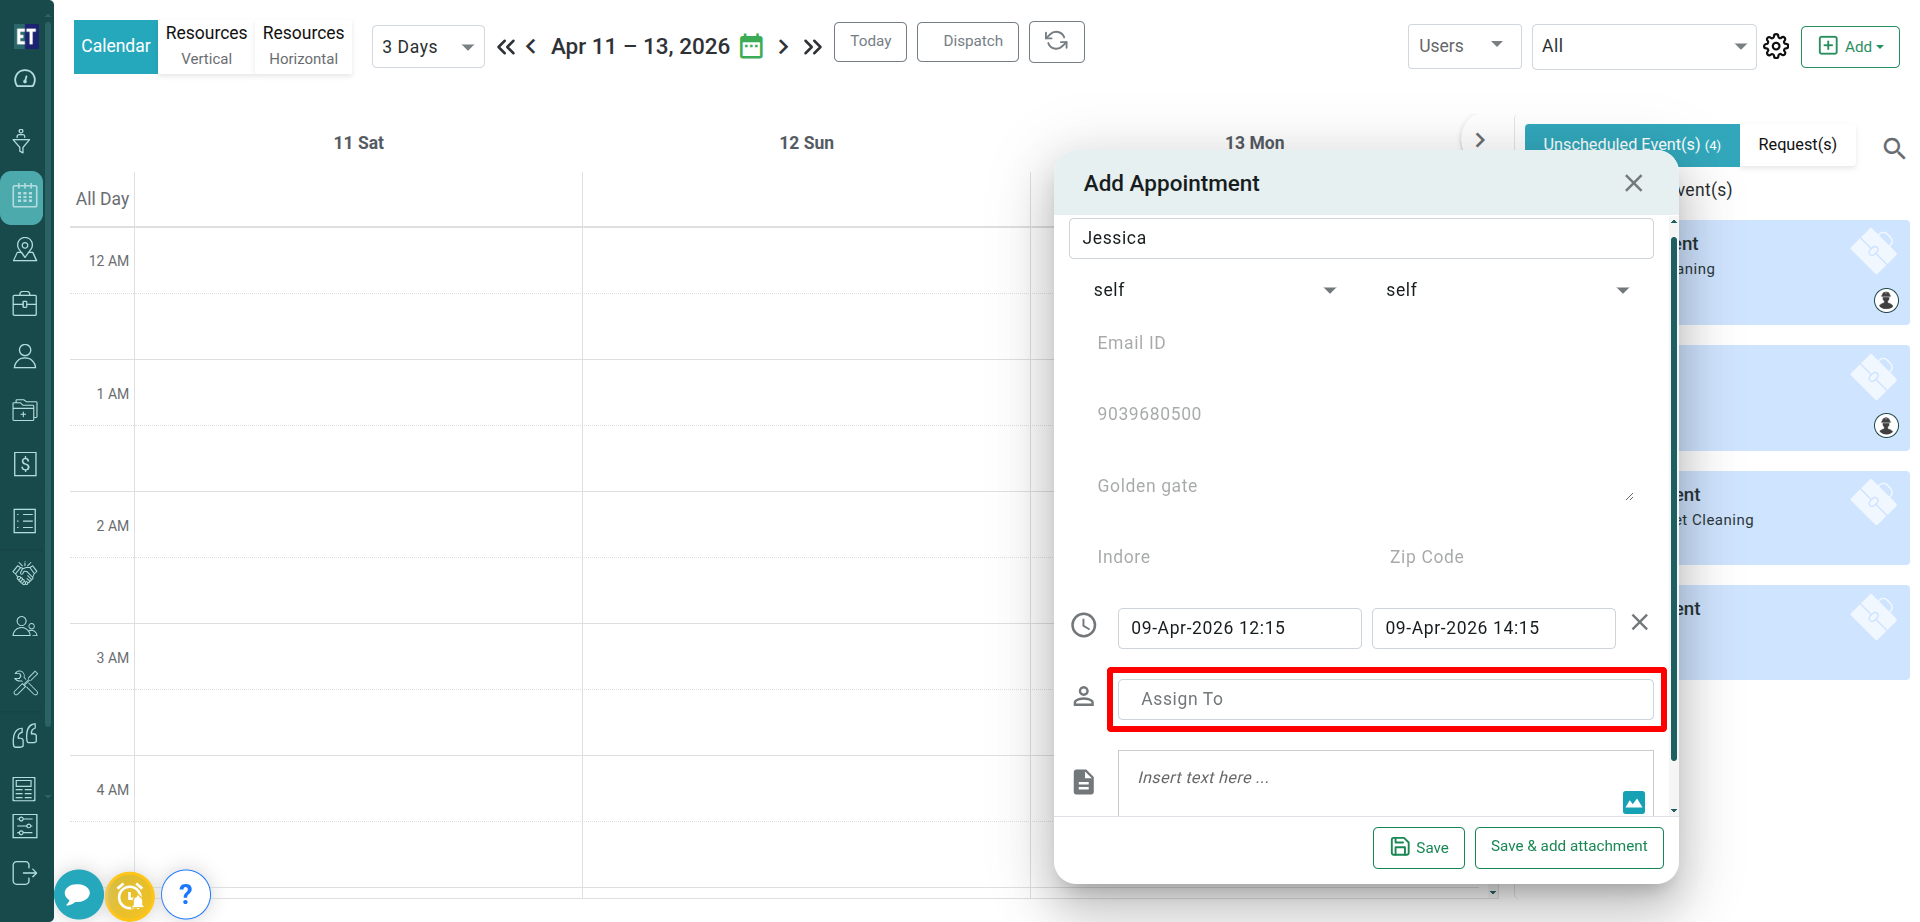
 Click on Assign To field will allow you to select the fieldworkers from the dropdown list to assign the job.
 If you want to Add the Description of the Appointment, type the text in Appointment Description .
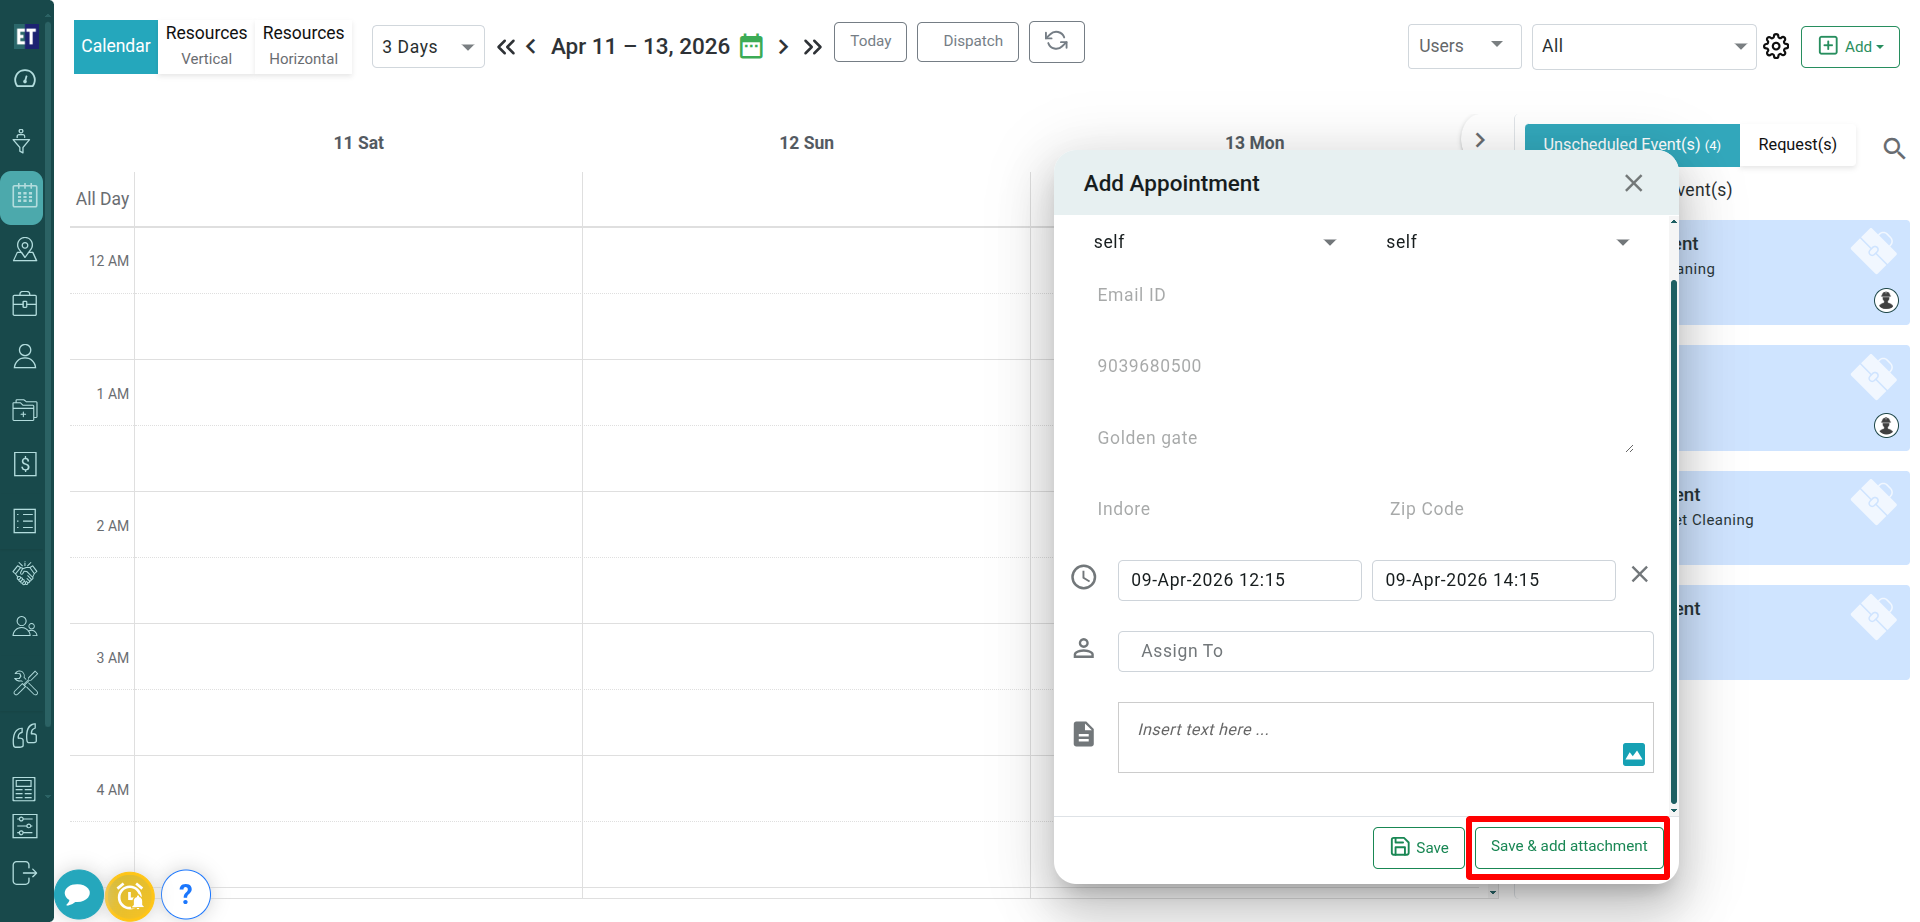
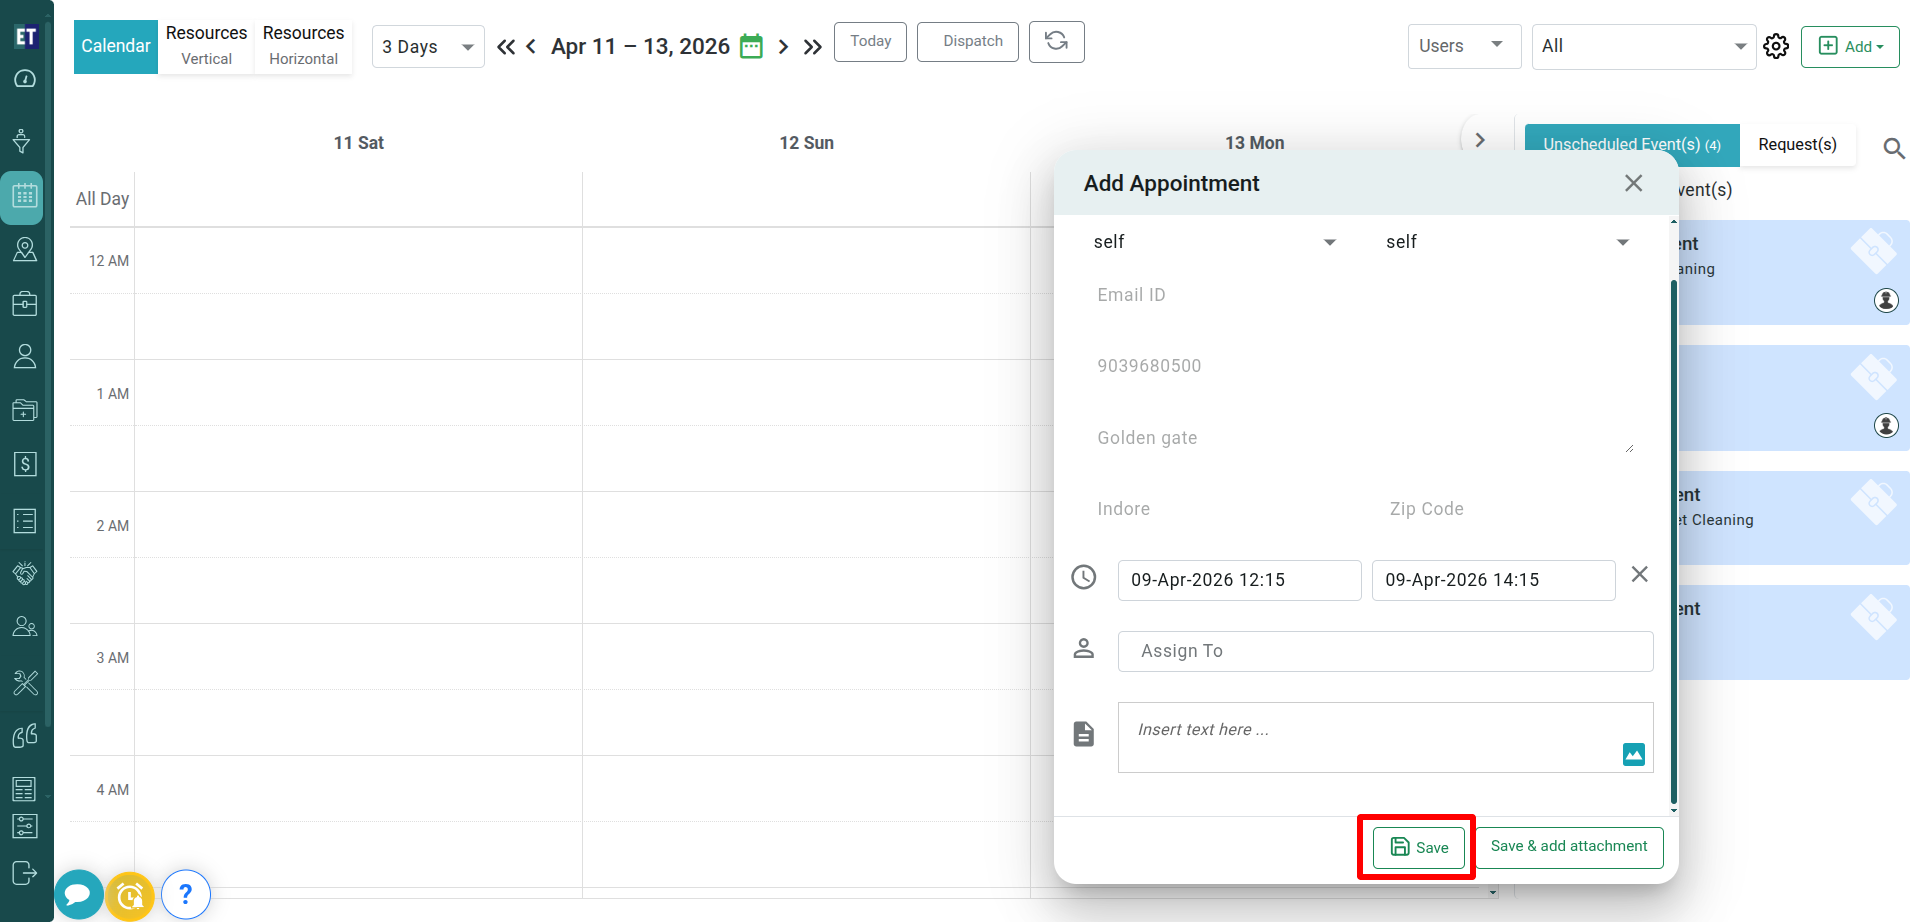
 To add an attachment to the appointment, click Save & Add Attachment. otherwise, click Save to proceed without adding attachments.
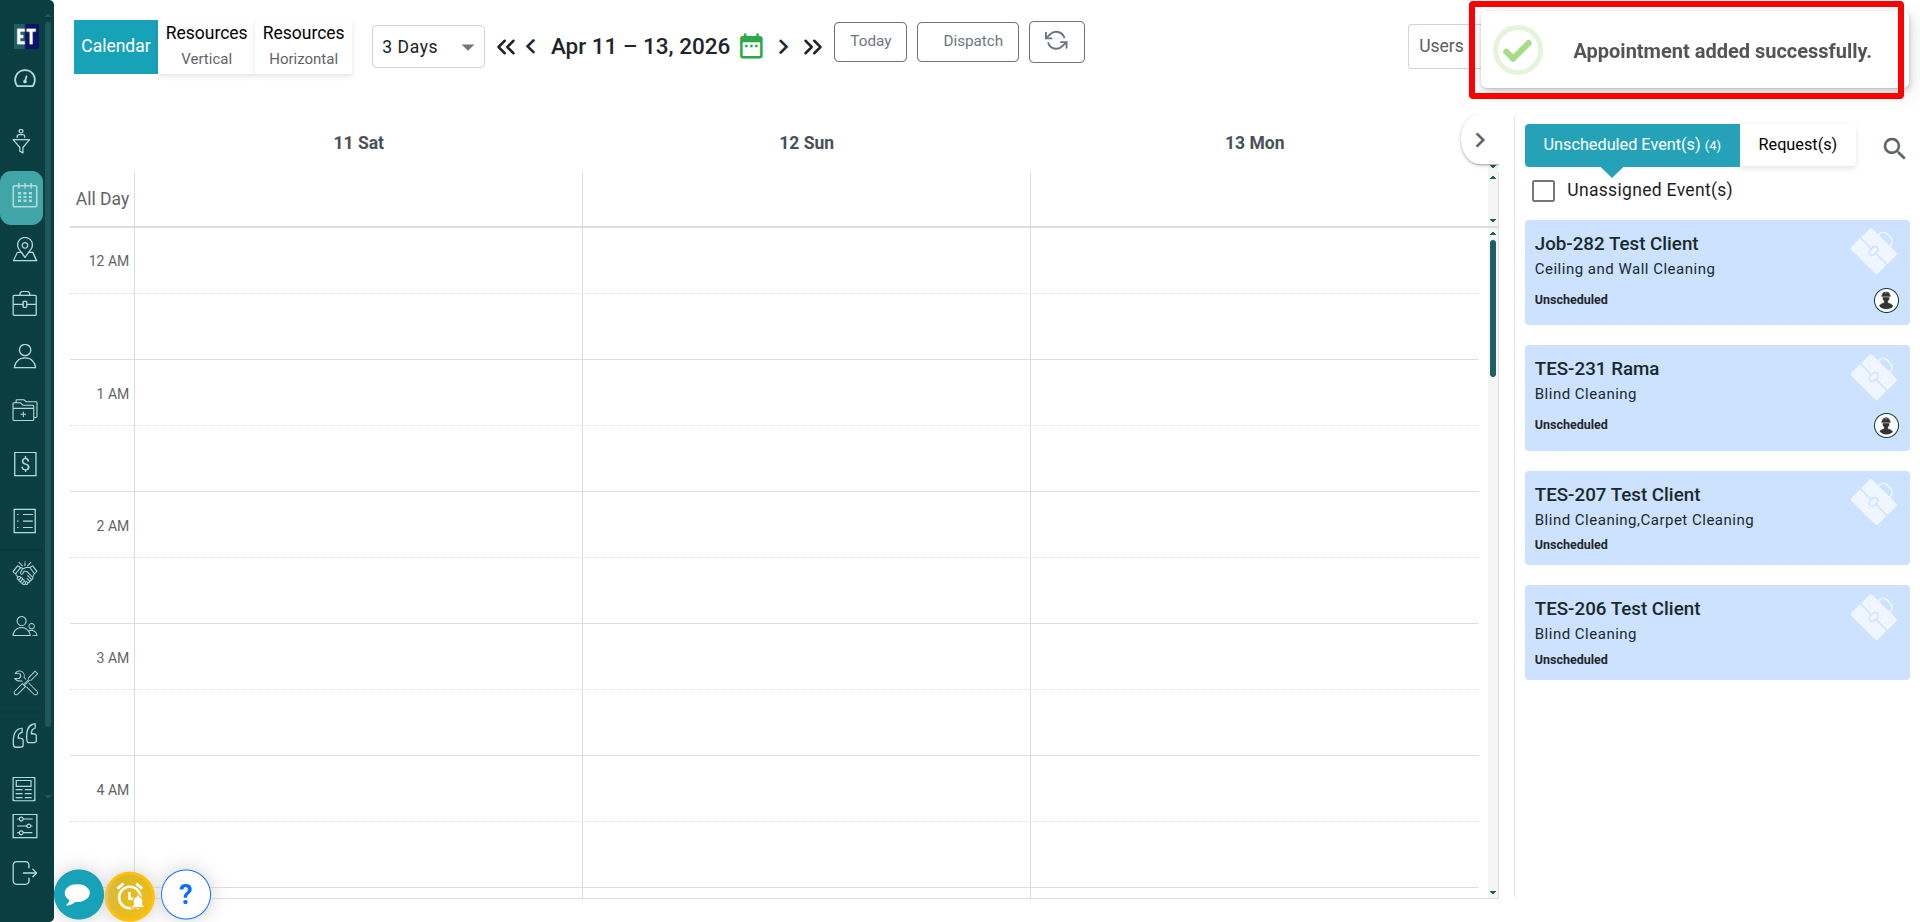
 A Success Alert will be displayed, indicating that the appointment has been successfully added to the scheduler.
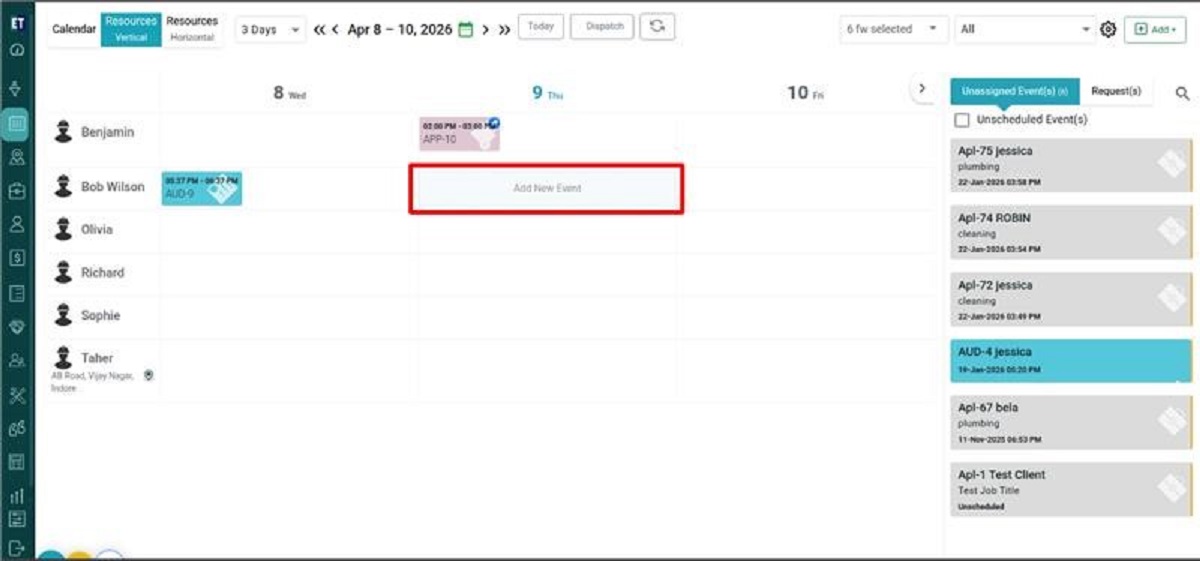
 Using the second method, click on any time slot for the desired date in the calendar.
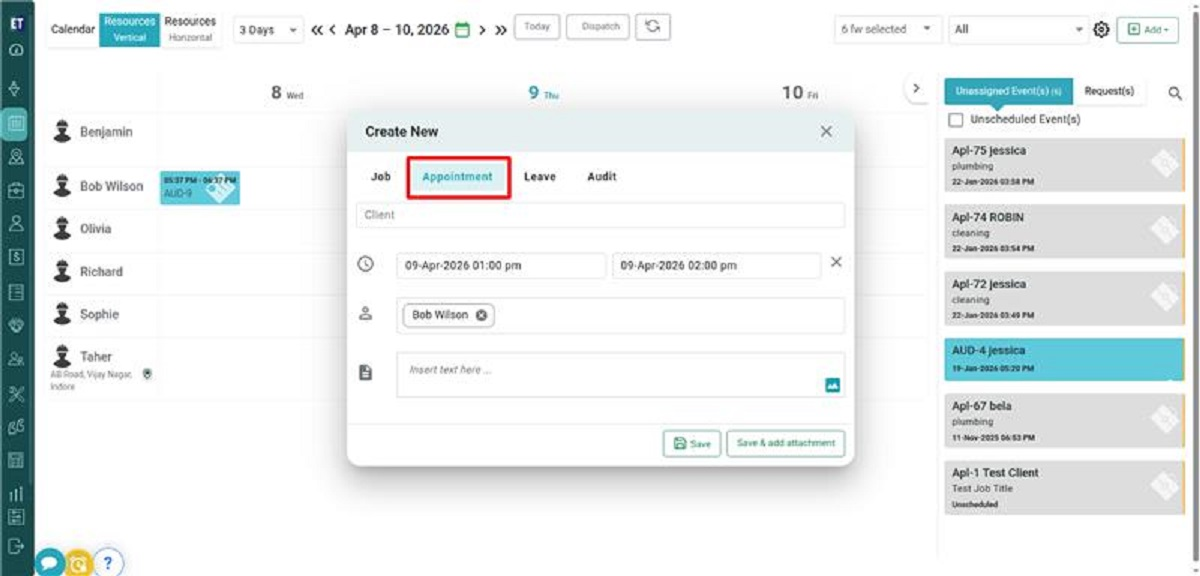
 Clicking on a time slot will open a “Create New” popup window. From there, navigate to the Appointment section.
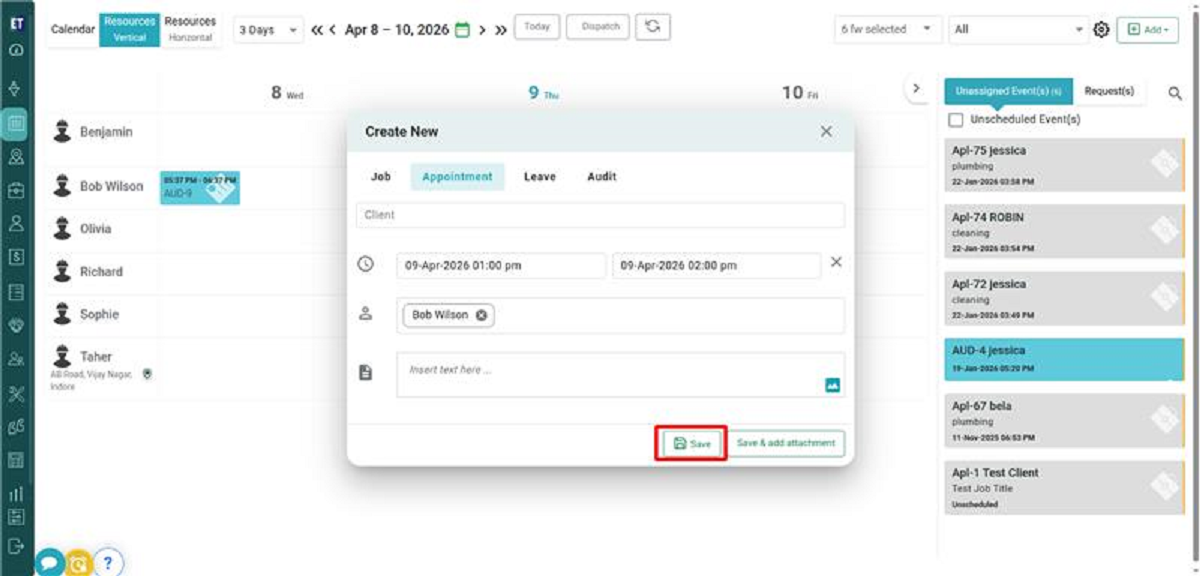
 Fill in all the required details as outlined in the first method, then click the Save button to add the appointment.
 Now, the appointment will be displayed on the calendar.
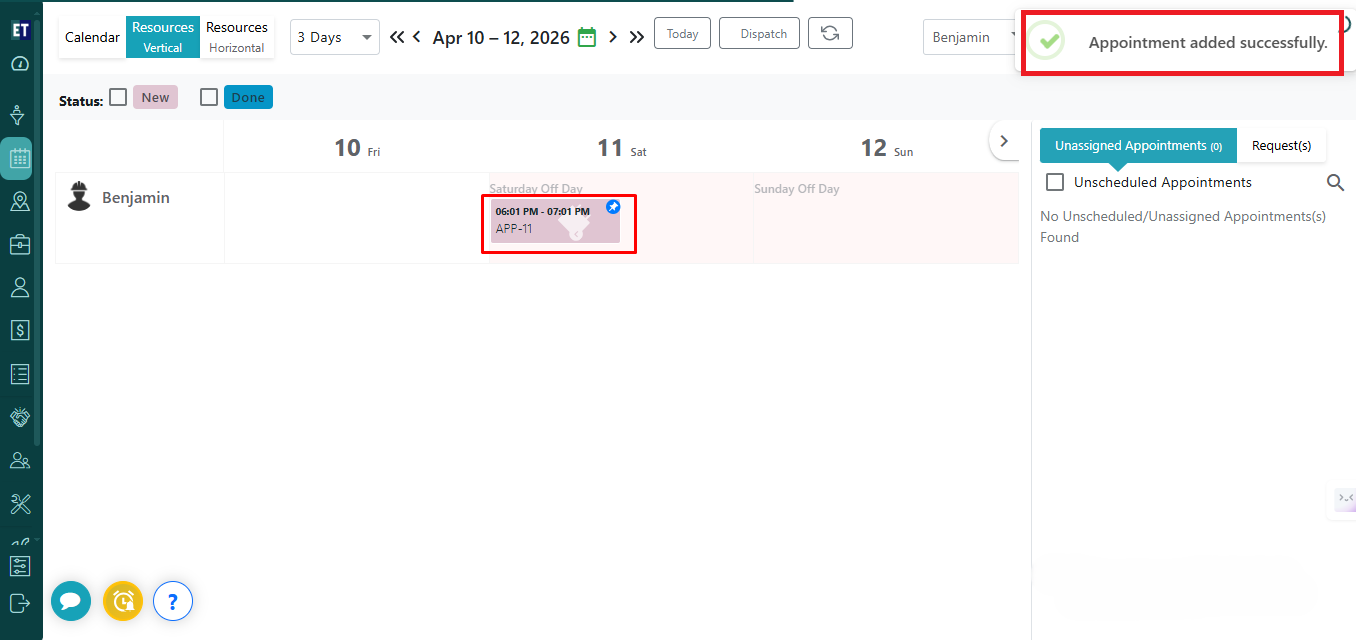 Also, a Success Alert will be displayed on the right top corner, indicating that the appointment has been successfully added to the scheduler.
 There are 2 Methods to add a new appointment.
2.By clicking on the time slot of the date of the scheduler.
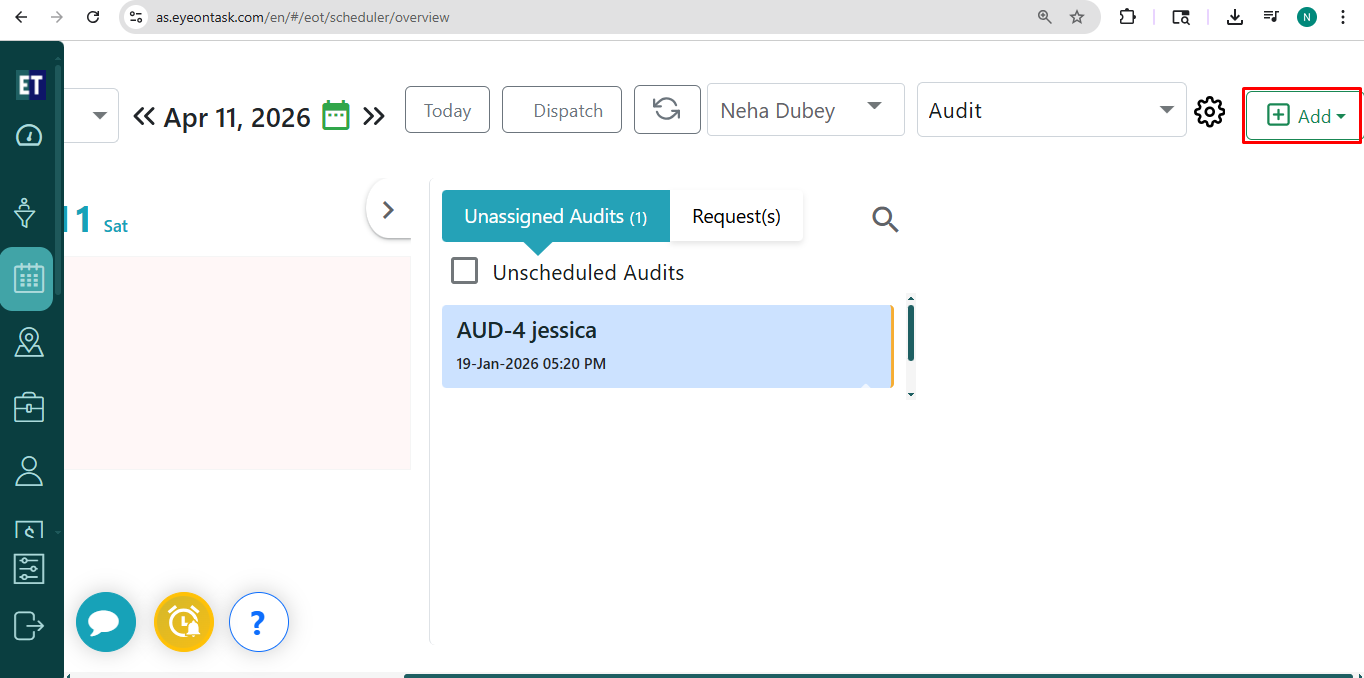
Using the first Method, Go to the Add drop down available at the top right corner of the screen.
Select the Add Appointment from the drop down menu.
On selecting Add Appointment, the Add Appointment popup window will appear with input fields.
Enter the Client Name. On entering the Client Name, a dropdown will appear with additional client details such as: Email ID, Mobile Number, Address, City.
Click on Assign To field will allow you to select the fieldworkers from the dropdown list to assign the job.
If you want to Add the Description of the Appointment, type the text in Appointment Description .
To add an attachment to the appointment, click Save & Add Attachment. otherwise, click Save to proceed without adding attachments.
A Success Alert will be displayed, indicating that the appointment has been successfully added to the scheduler.
Using the second method, click on any time slot for the desired date in the calendar.
Clicking on a time slot will open a “Create New” popup window. From there, navigate to the Appointment section.
Fill in all the required details as outlined in the first method, then click the Save button to add the appointment.
Now, the appointment will be displayed on the calendar.
Also, a Success Alert will be displayed on the right top corner, indicating that the appointment has been successfully added to the scheduler.