How do I add Expenses inside a job details?
The Expense section is primarily used by fieldworkers to submit expense claims. If a fieldworker is unable to access or use the Fieldworker application, an admin can submit the expense claim on their behalf.
To add expenses, Go to Work from the hamburger menu.
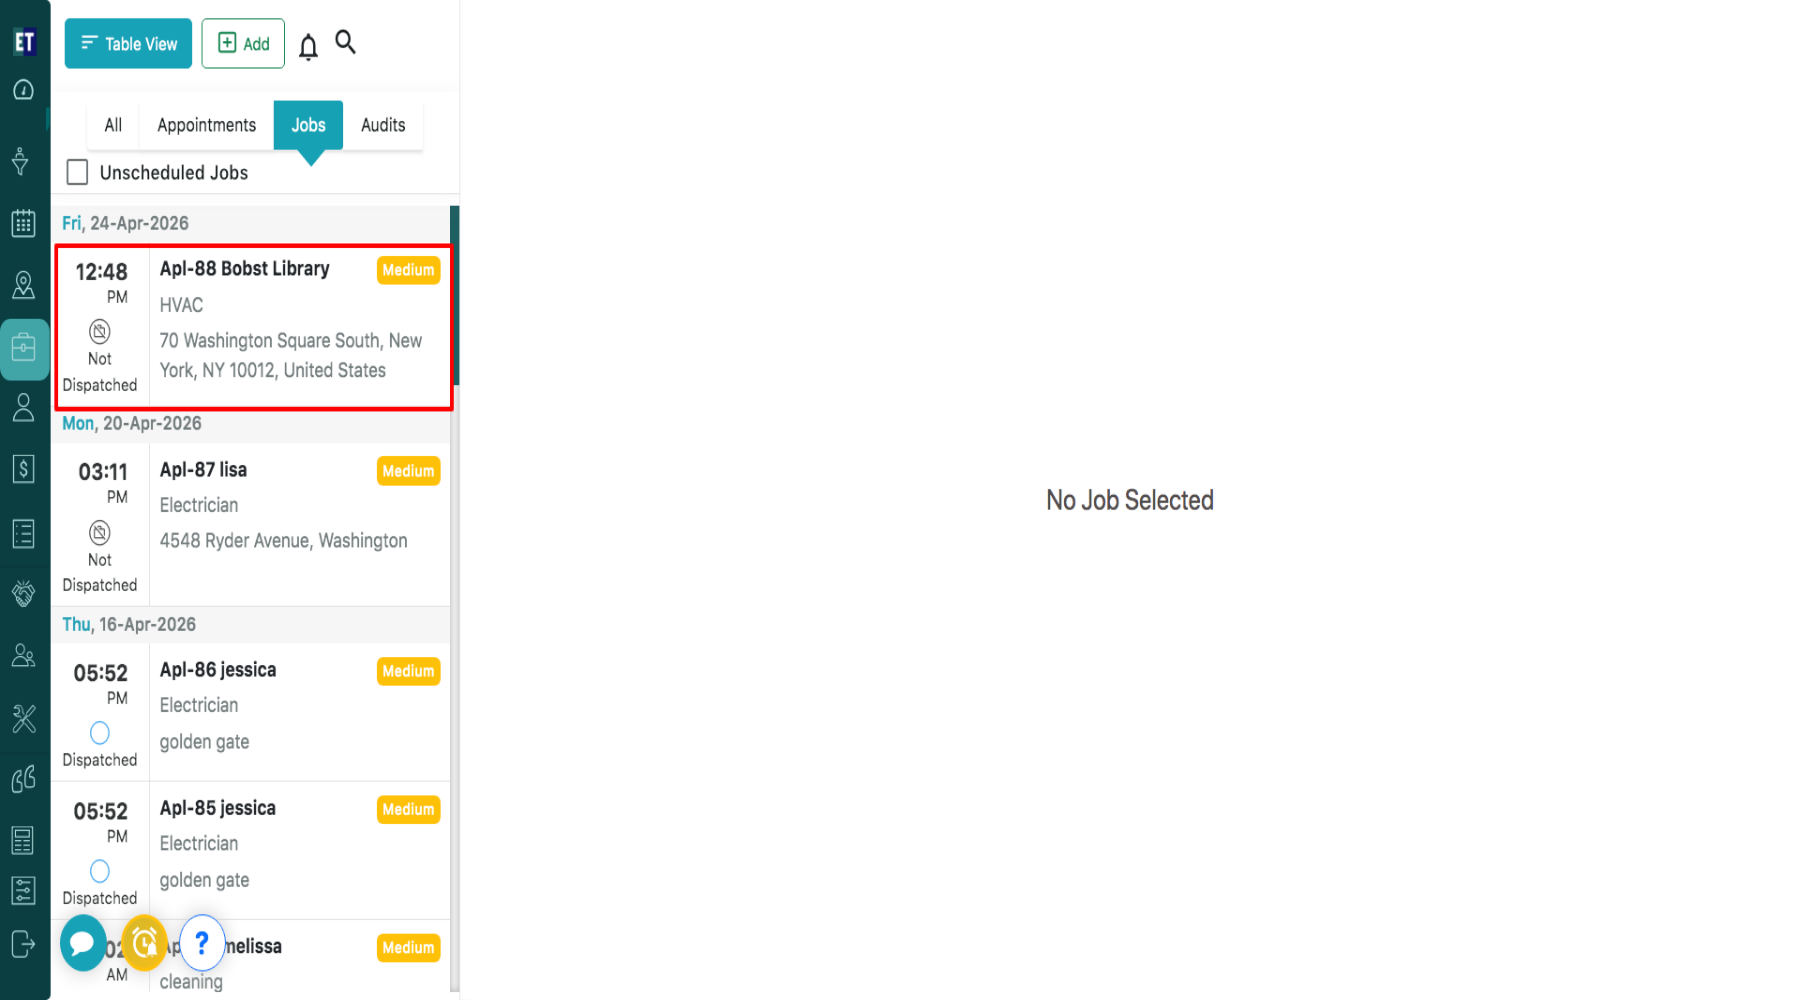
 Choose any job from the listed jobs.
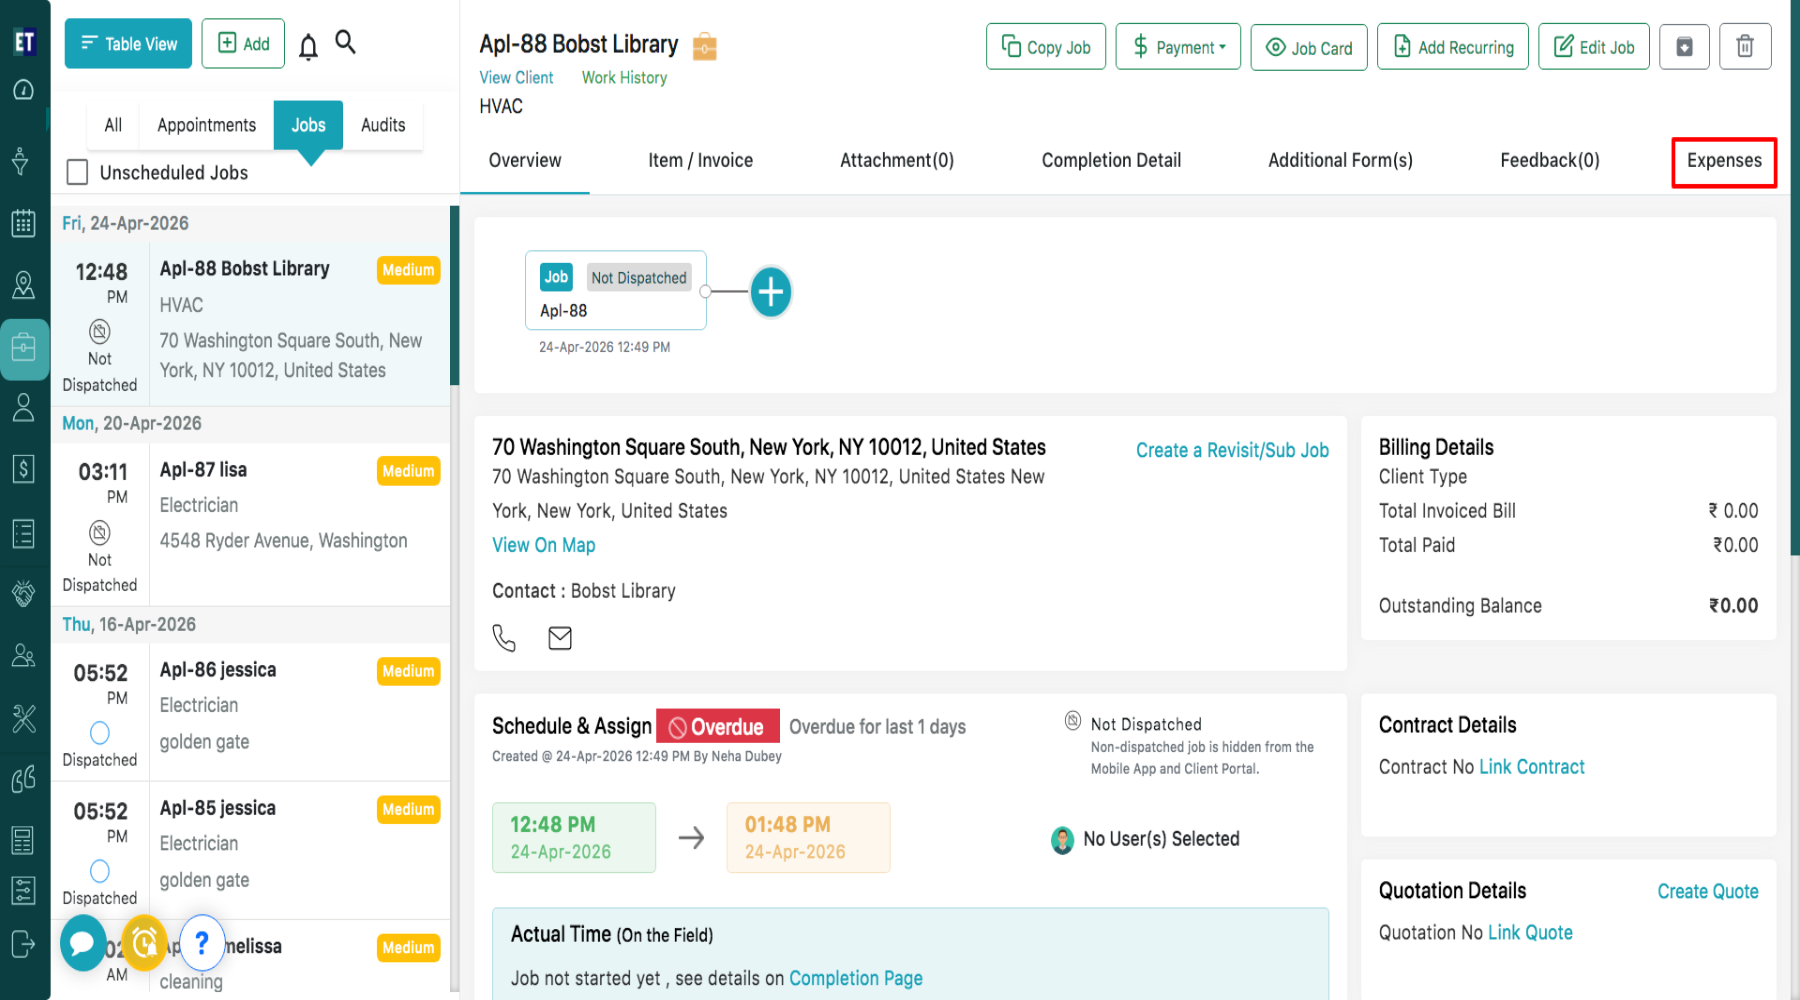
 you will see the Expenses option at the right hand side of the screen.
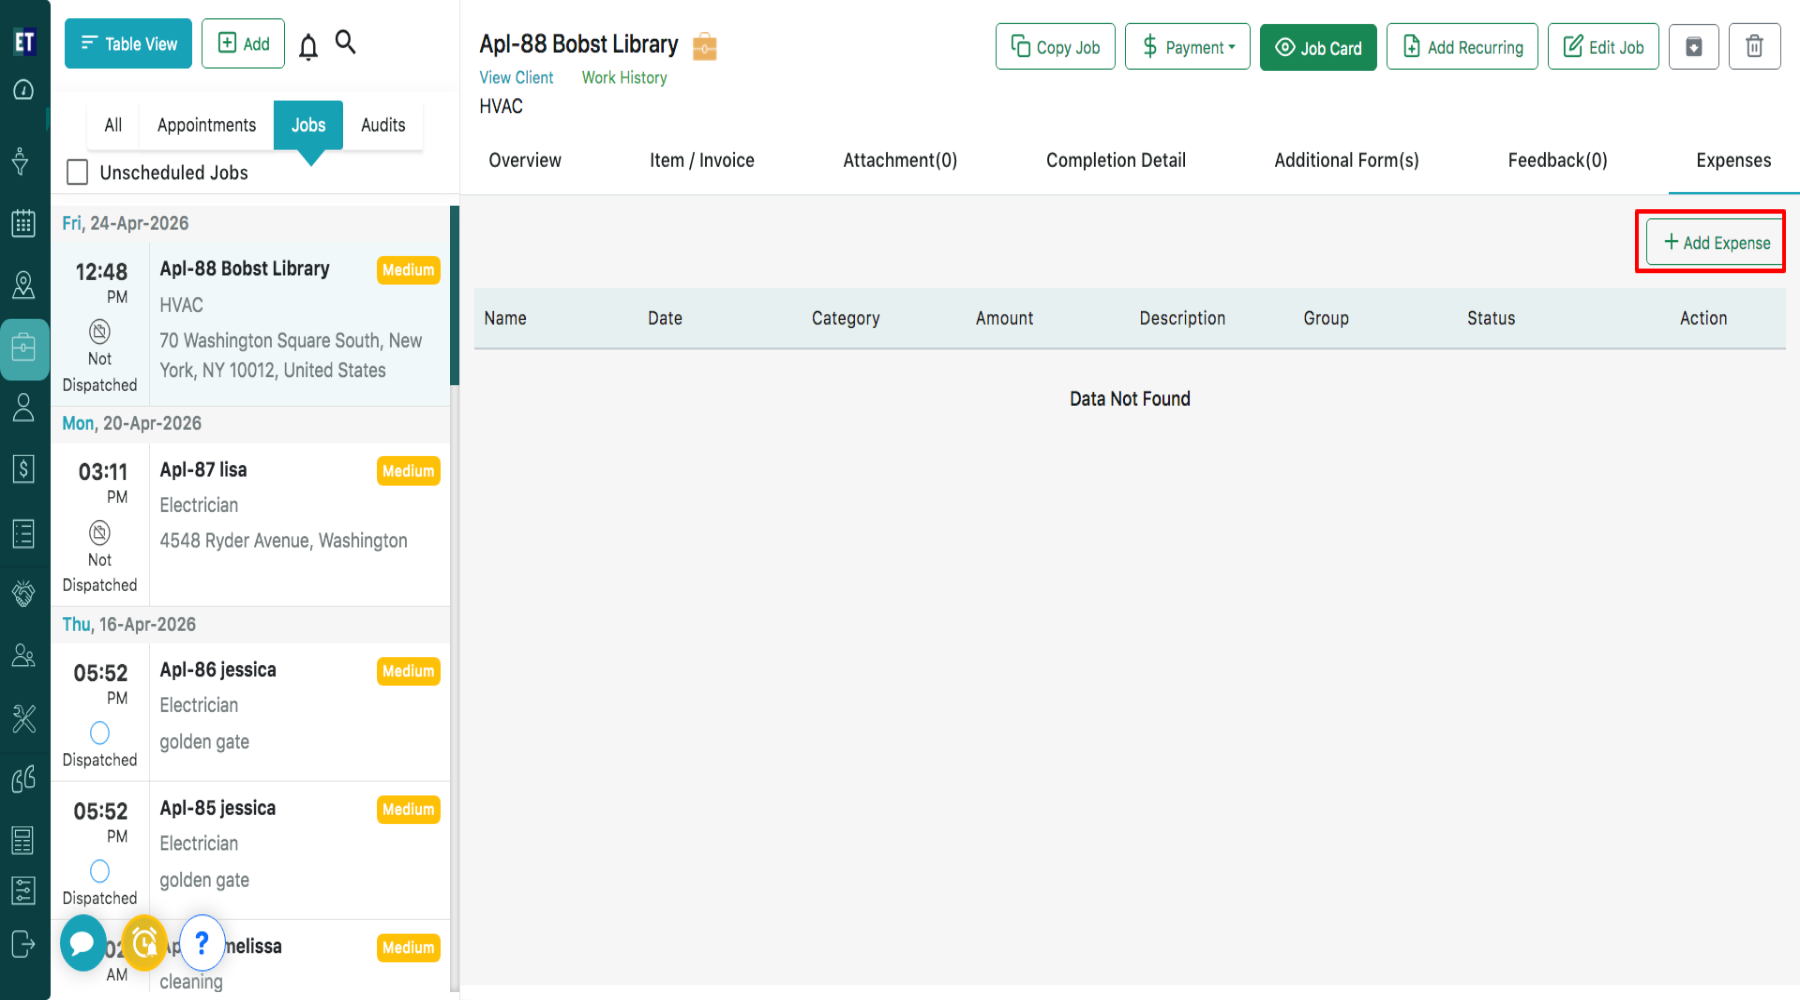
 Clicking on Expenses will display all expense details previously added to that particular job. If no expenses have been added, it will show “Data Not Found.”
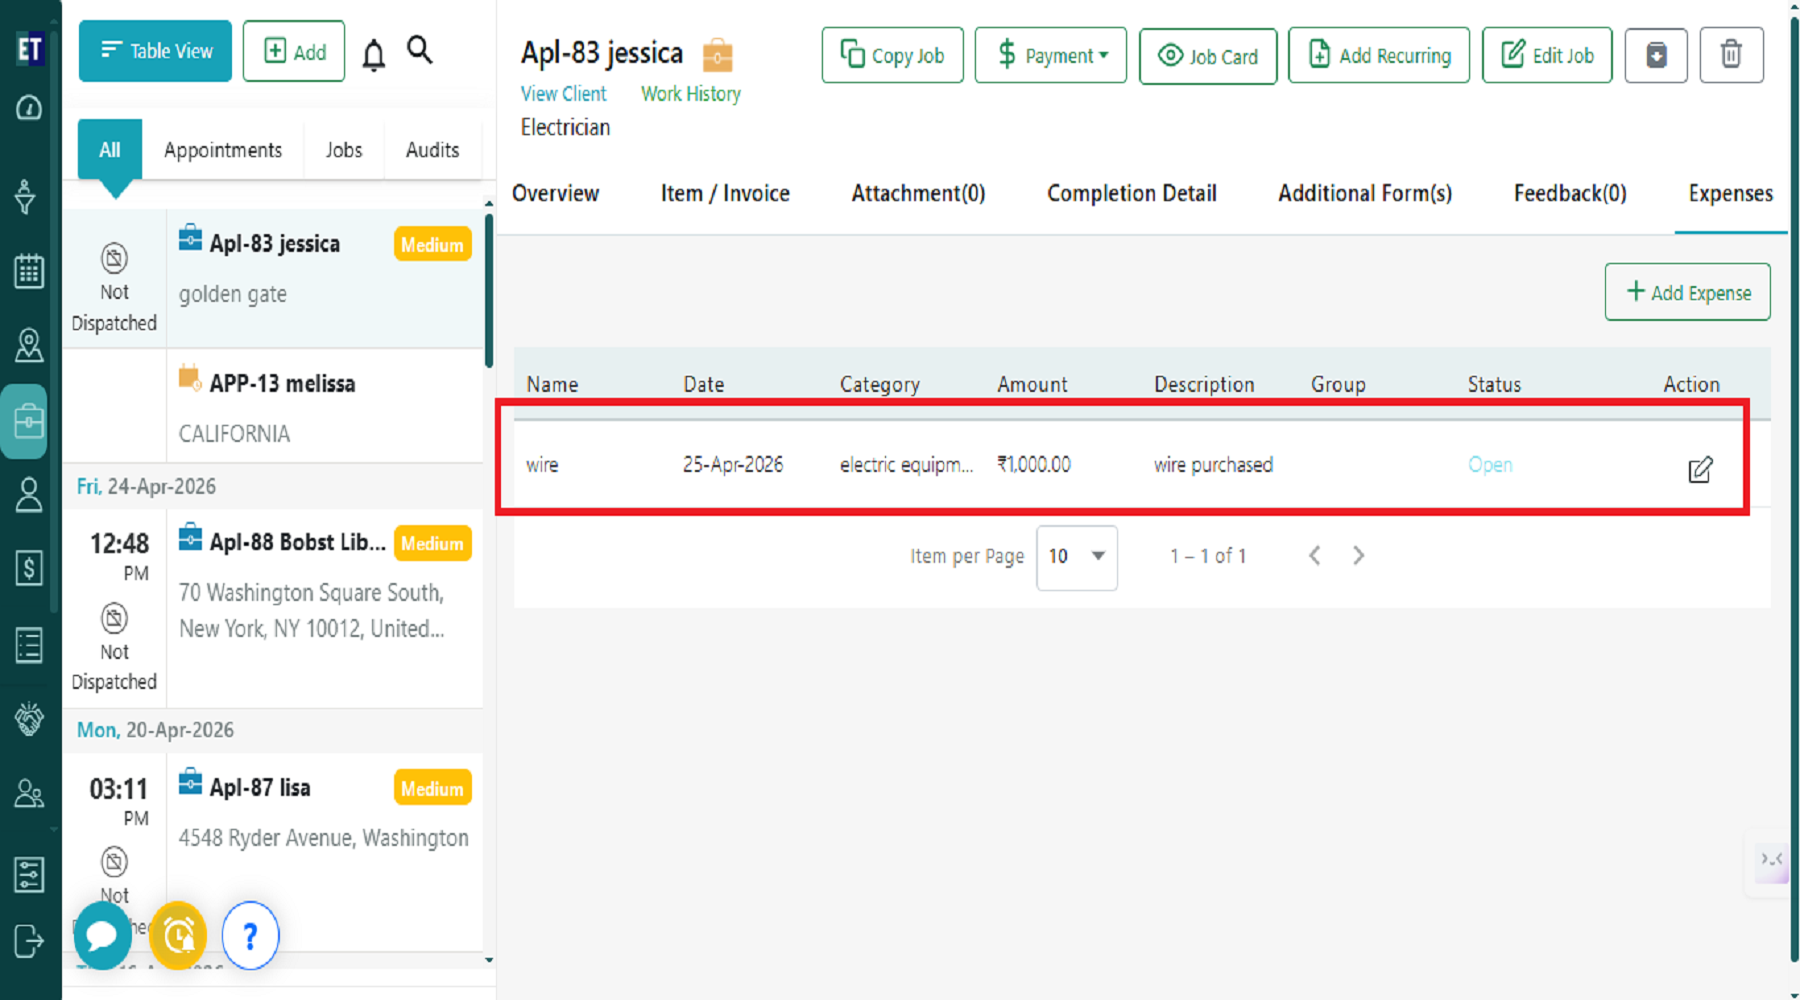 For adding new expenses, click on the Add Expense button.
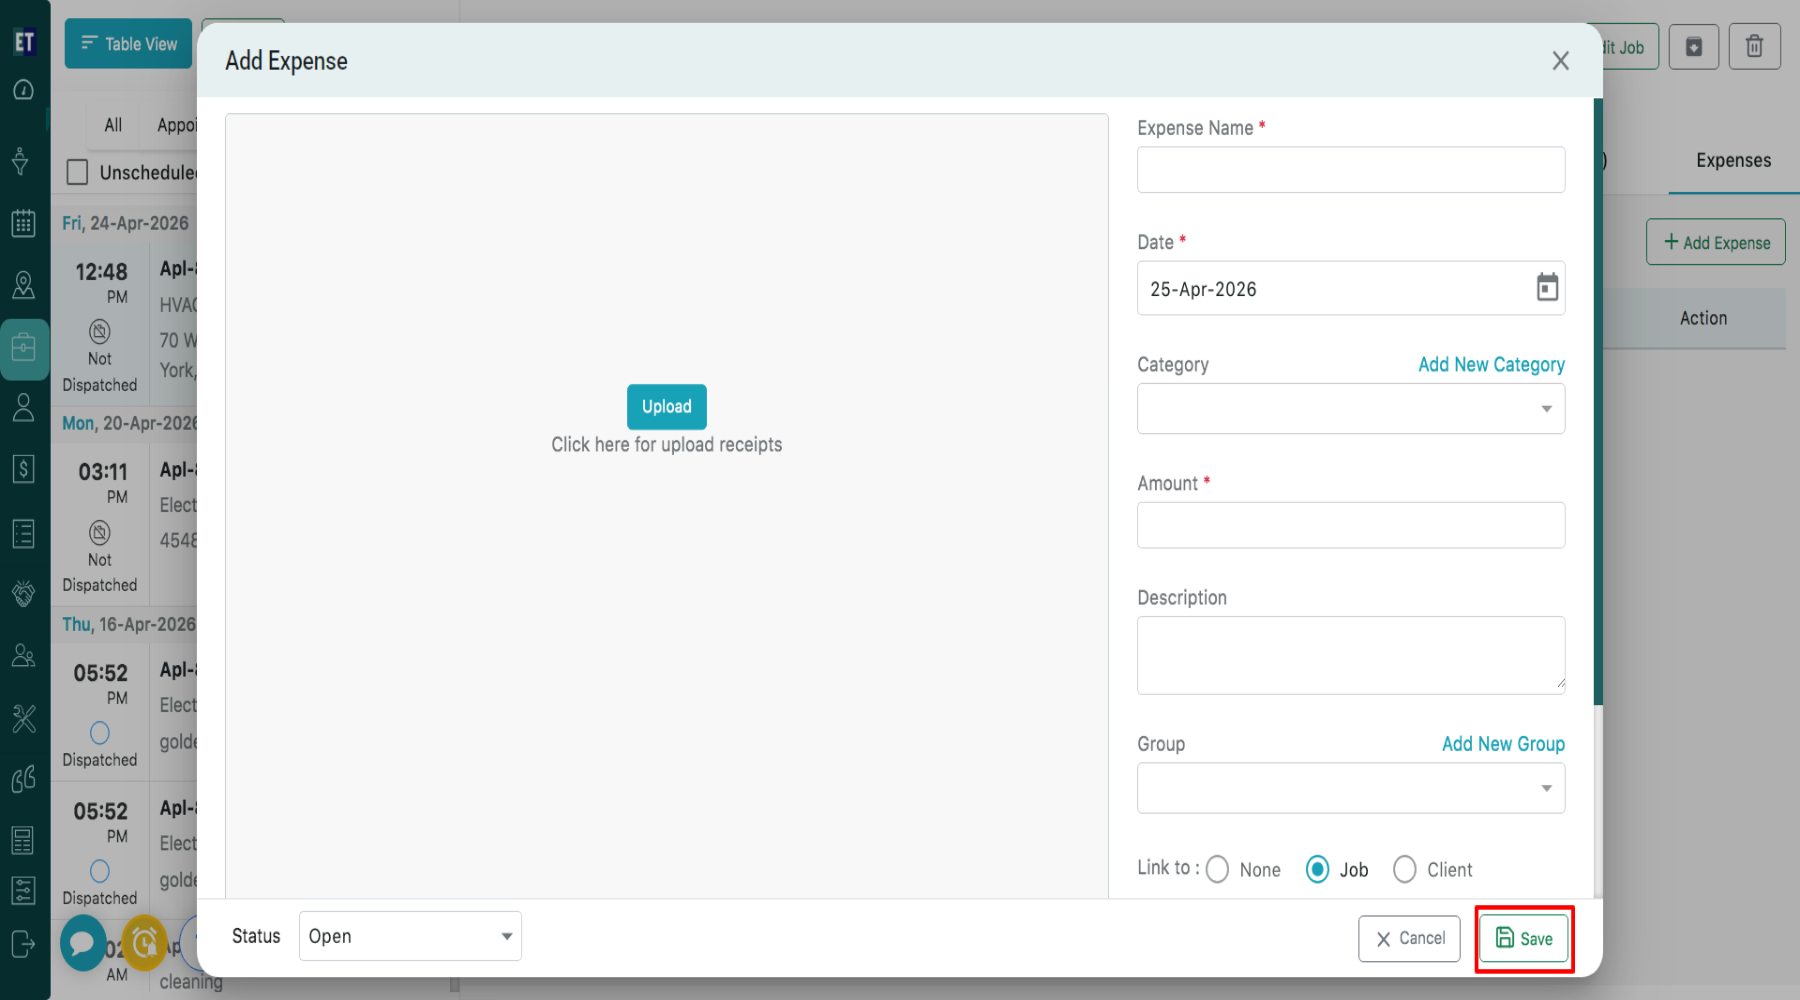
 Clicking on Add Expense will open a pop up.
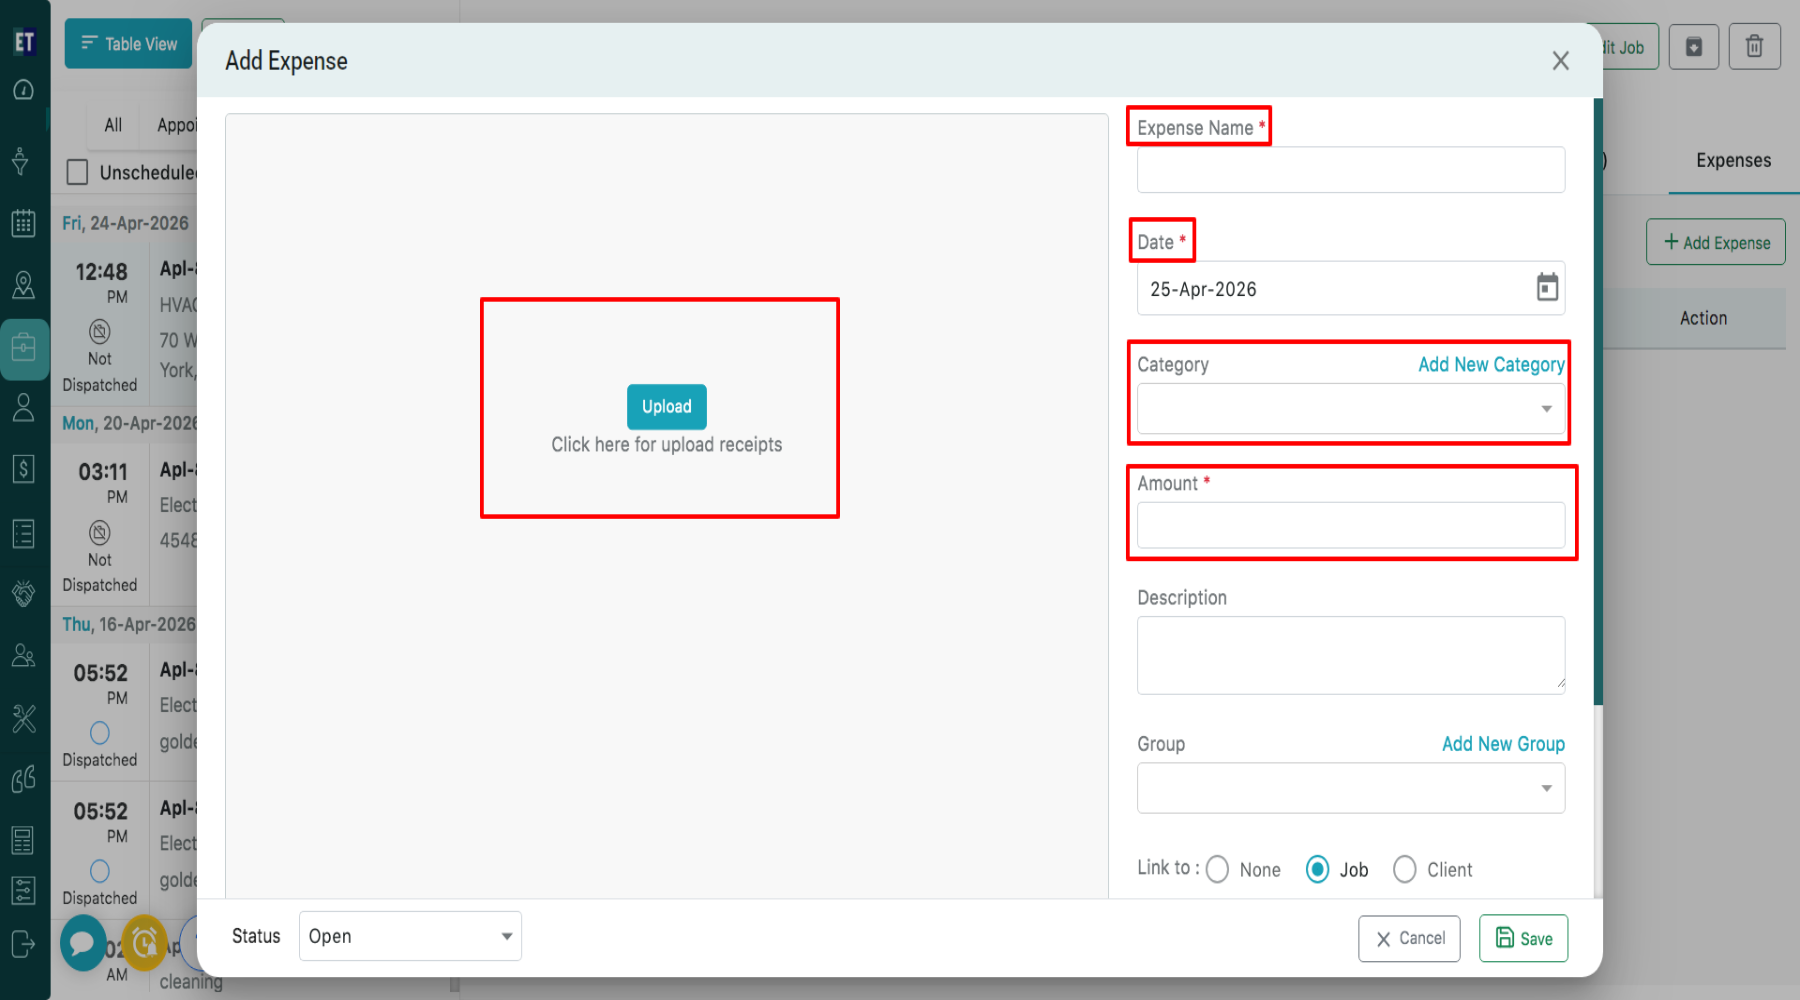
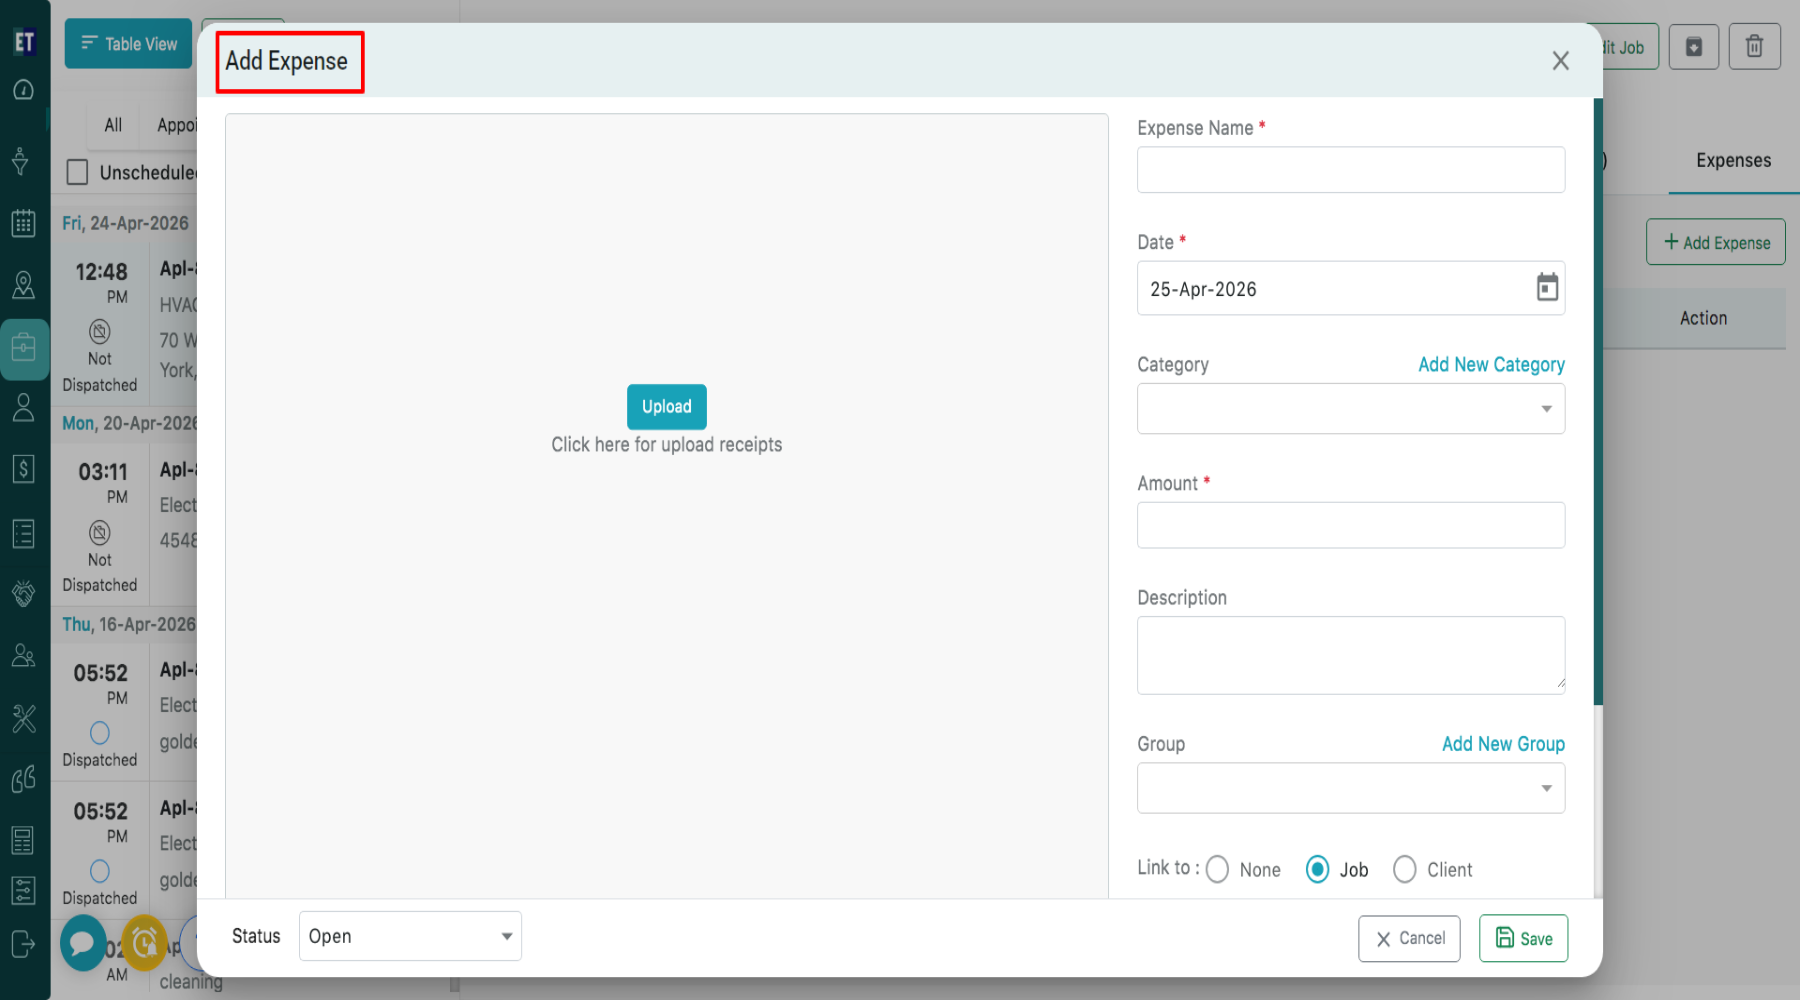 Within the pop up, you can upload the receipt of the expense and fill the details like Expense Name, Date, Amount. It is mandatory. Also you can fill Categories and add new category.
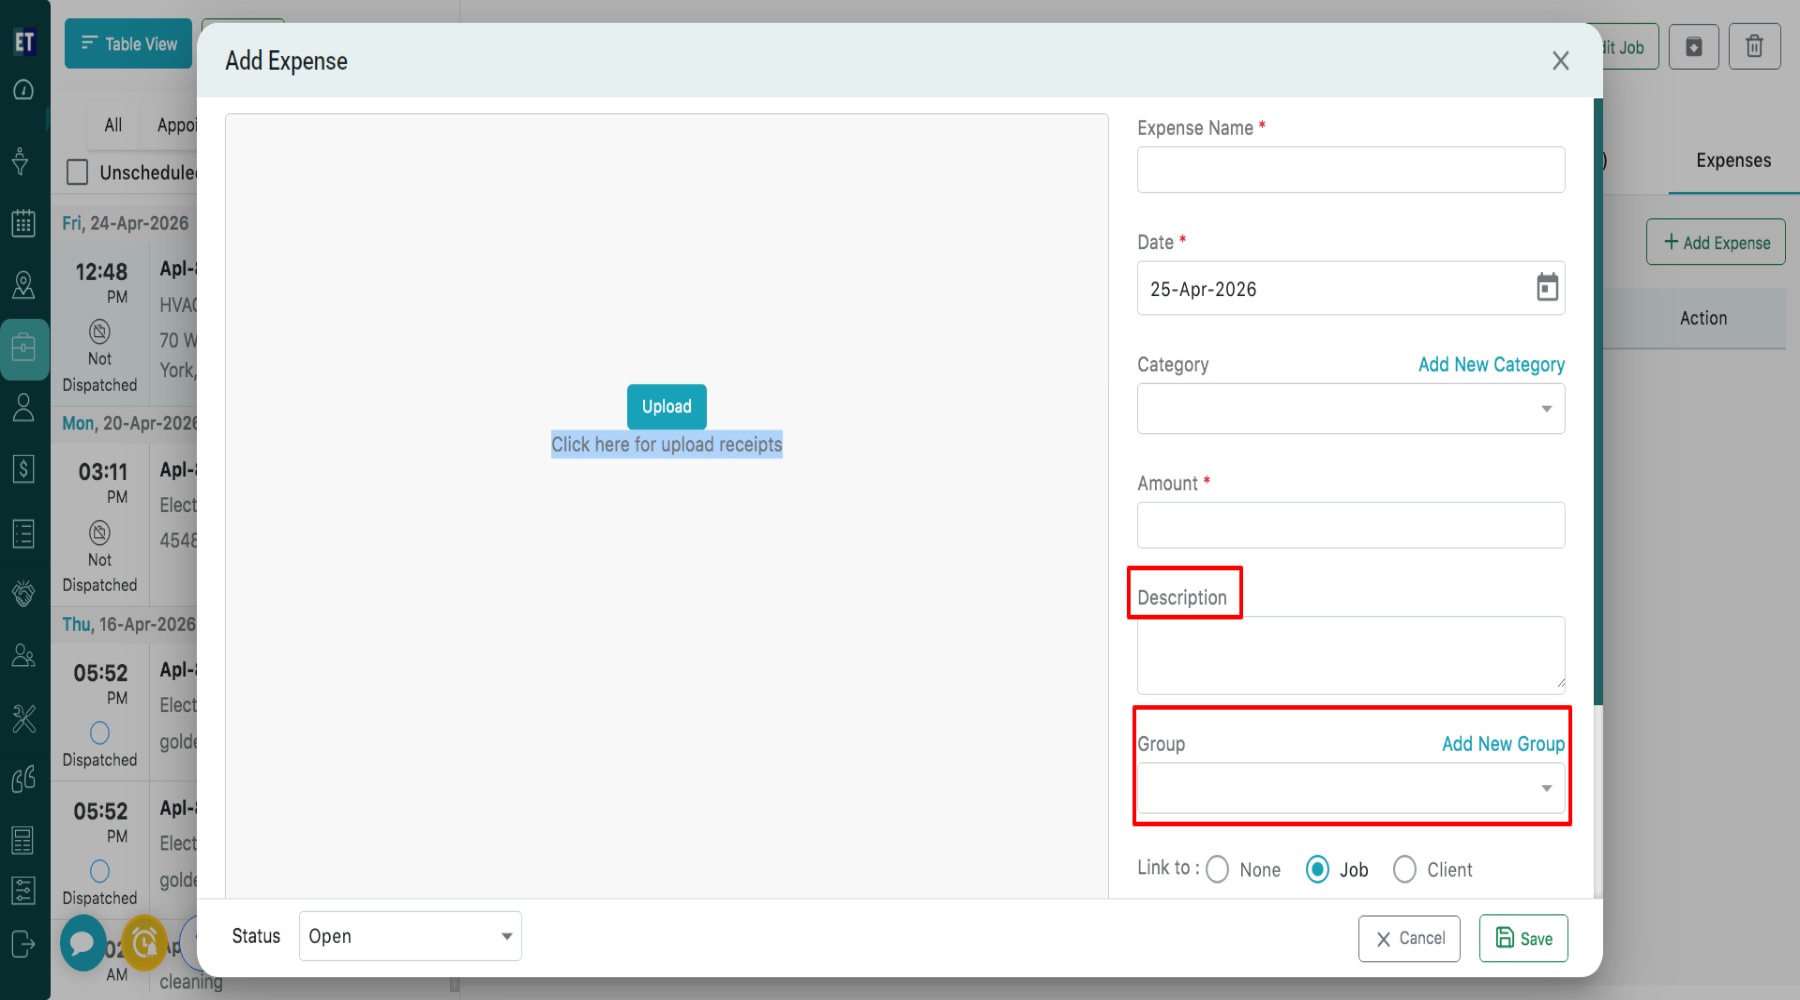
 Additionally, you can enter details such as Description and Group and also create new groups as needed.
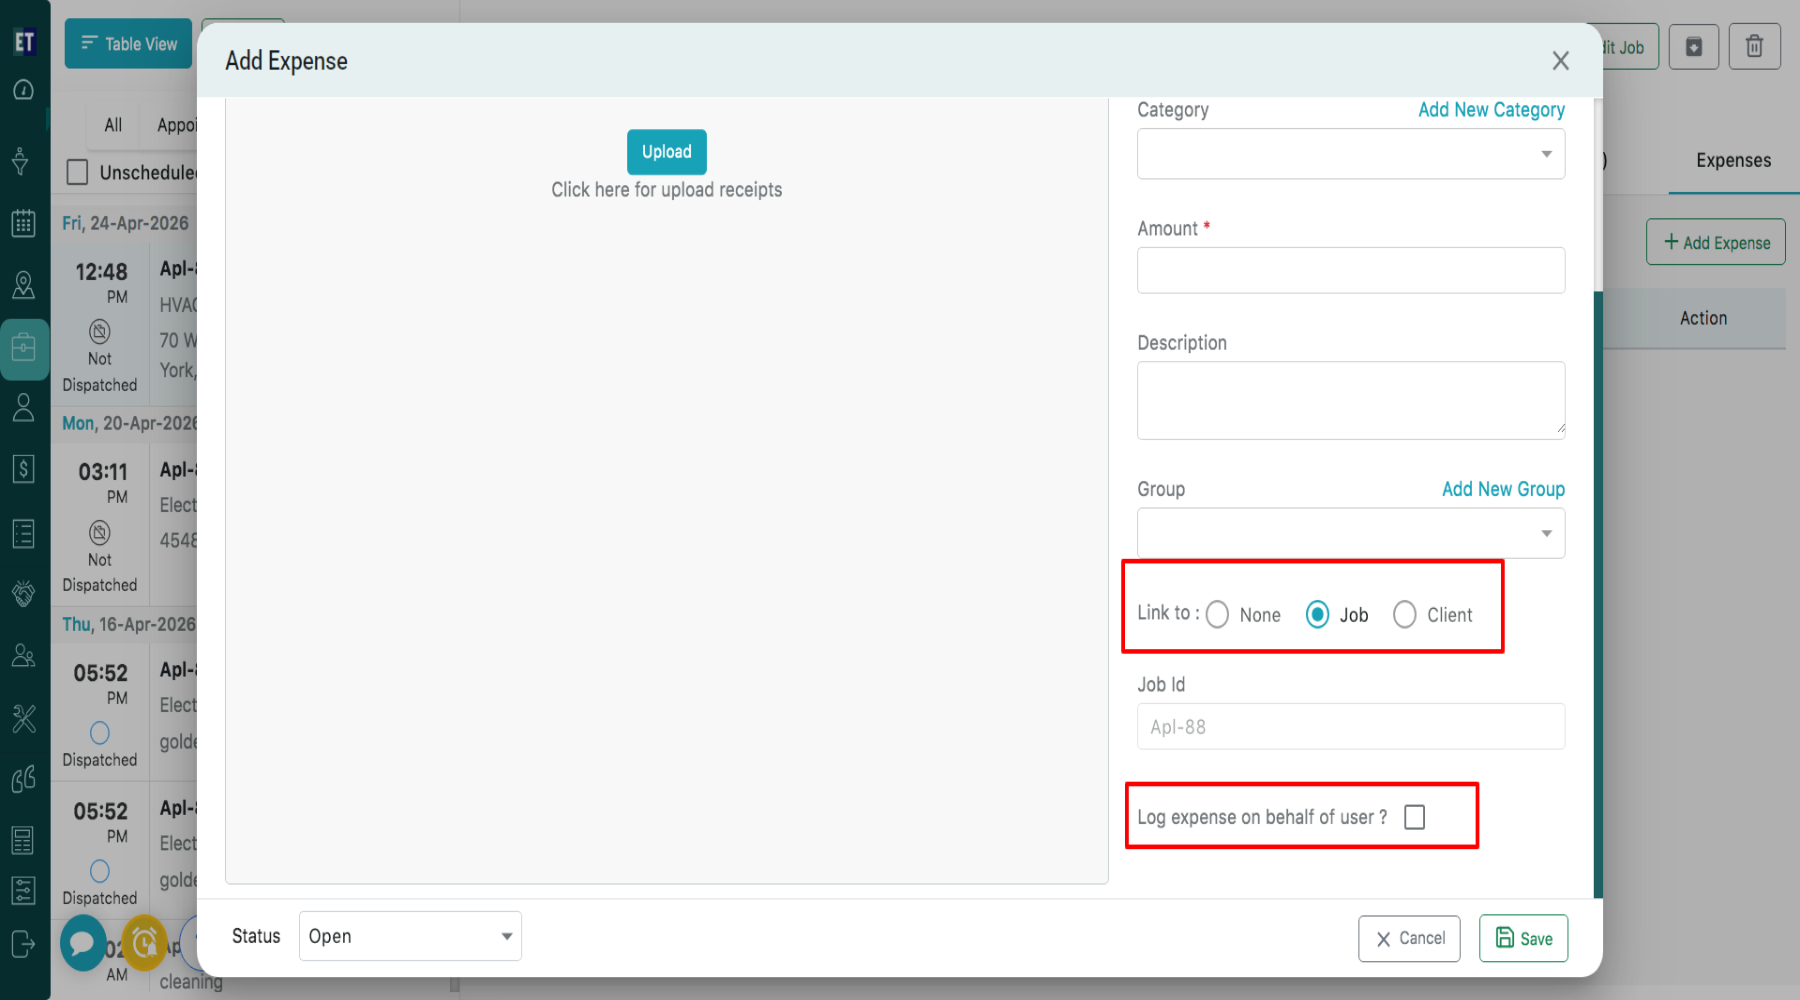
 You also have the option to link your expense to a Job or Client, and you can log the expense on behalf of a user by selecting the checkbox.
 After filling in all the details, click the Save button.
 Clicking the Save button will display an alert message.
Choose any job from the listed jobs.
you will see the Expenses option at the right hand side of the screen.
Clicking on Expenses will display all expense details previously added to that particular job. If no expenses have been added, it will show “Data Not Found.”
For adding new expenses, click on the Add Expense button.
Clicking on Add Expense will open a pop up.
Within the pop up, you can upload the receipt of the expense and fill the details like Expense Name, Date, Amount. It is mandatory. Also you can fill Categories and add new category.
Additionally, you can enter details such as Description and Group and also create new groups as needed.
You also have the option to link your expense to a Job or Client, and you can log the expense on behalf of a user by selecting the checkbox.
After filling in all the details, click the Save button.
Clicking the Save button will display an alert message.