How do I set up a Stripe account in EyeOnTask?
EyeOnTask provides you the service to make your payments more secure and fast by the use of Stripe Payment Gateway. For using Stripe services, you first need to set up your account following the below steps.
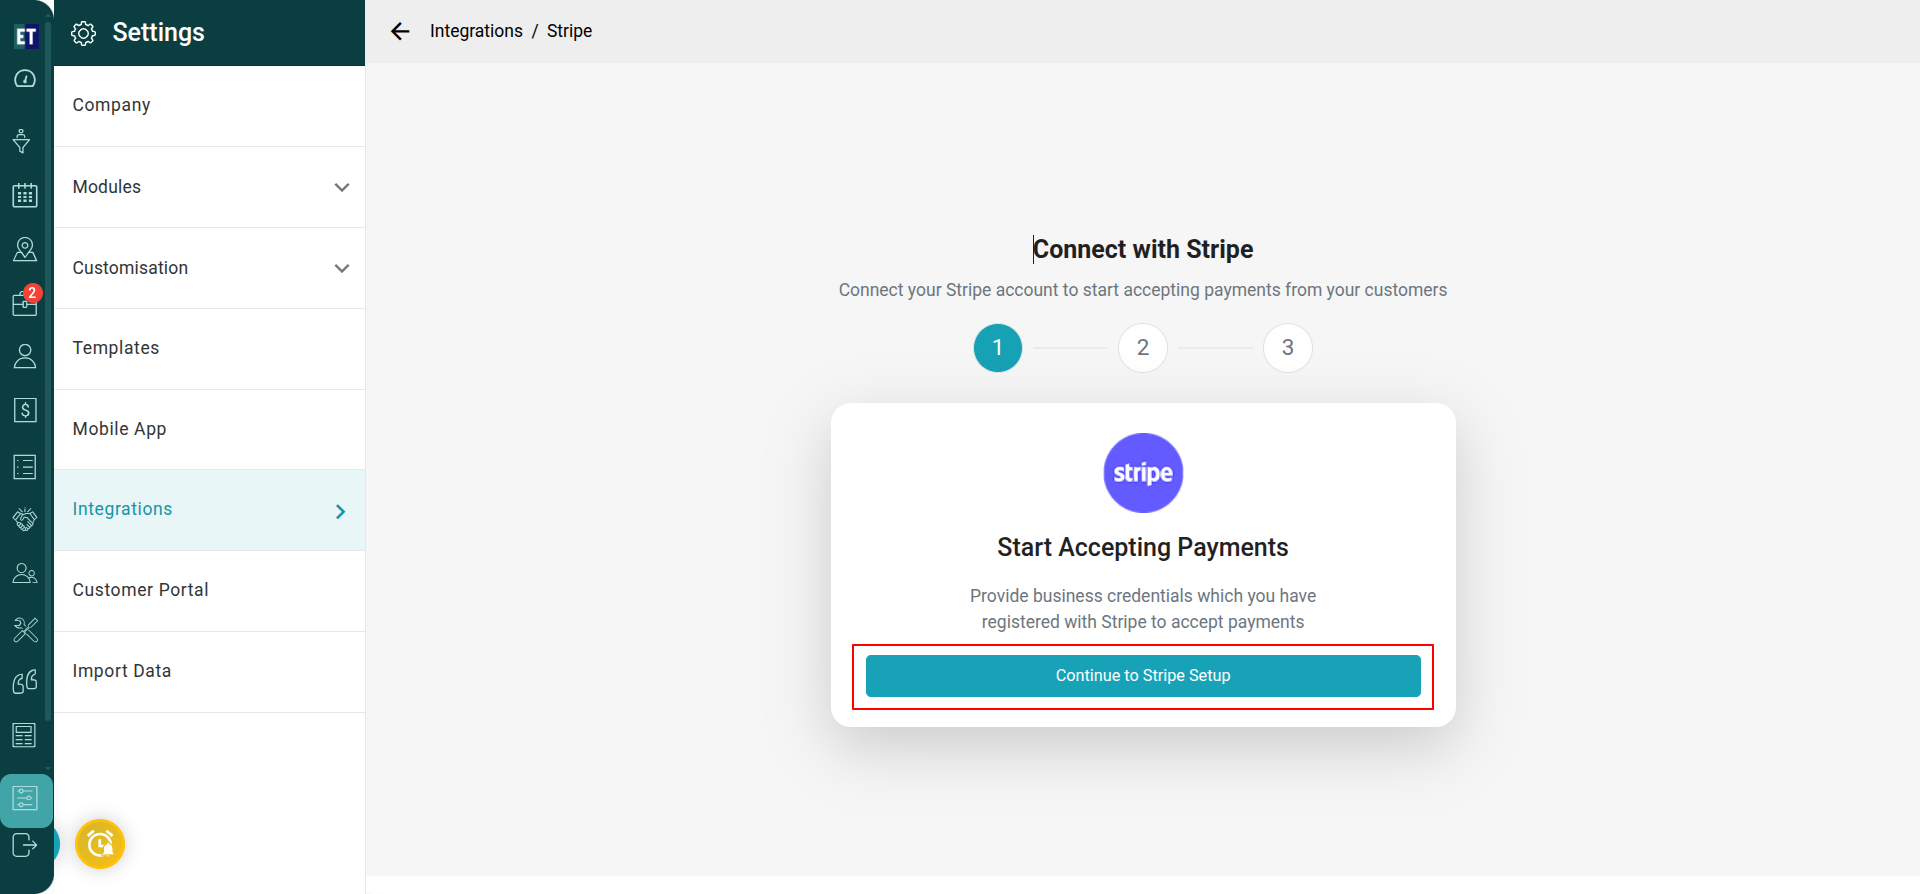
 After selecting the Stripe Integration option, you will find steps for integration with Stripe. Then click on “Continue to stripe setup”.
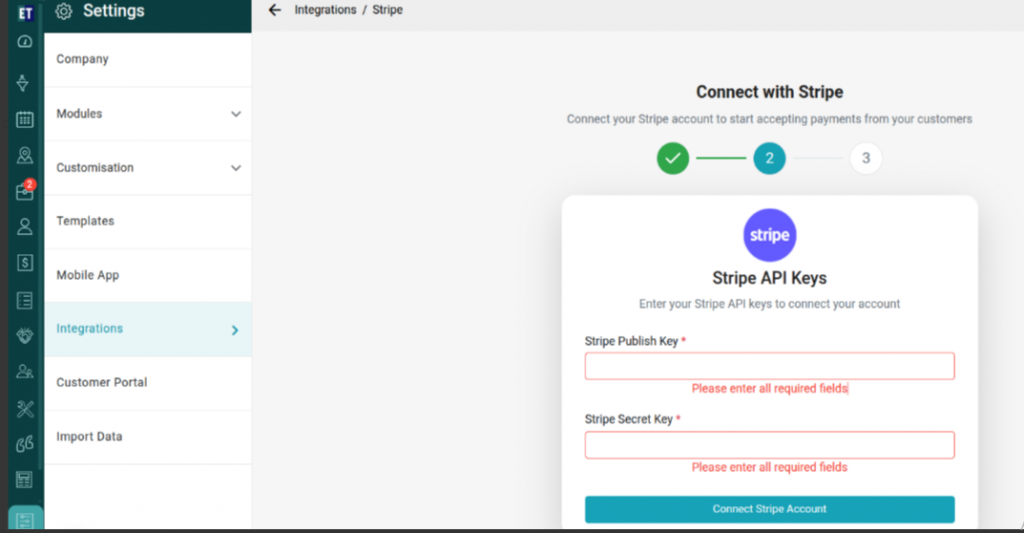
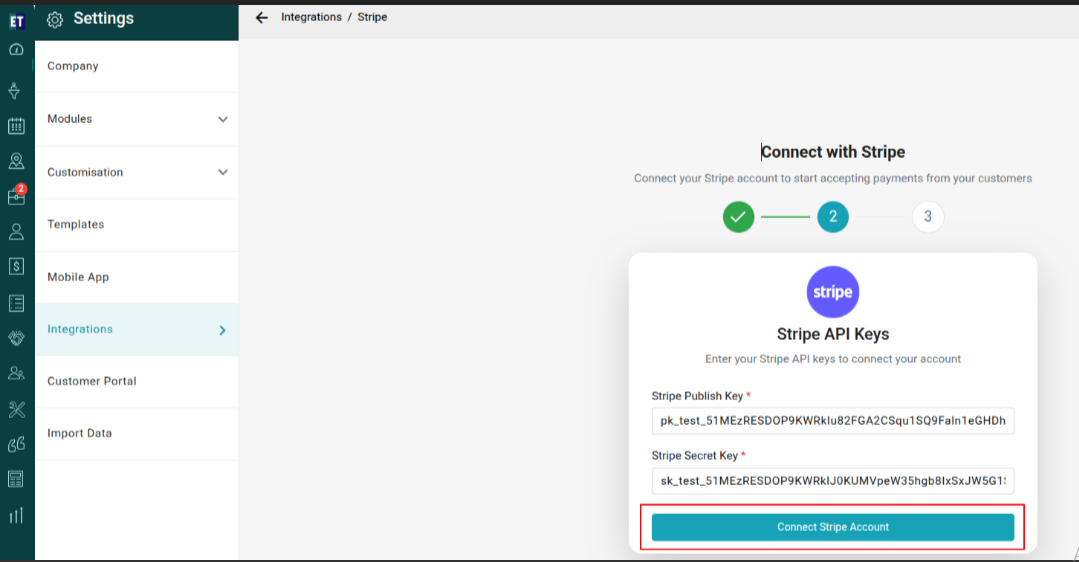
 Once the user logs in to Stripe, in the next step users have to enter the Publish key and Secret key to connect with Stripe.
The Publish key and Secret key is provided by Stripe to sync Stripe with EyeOnTask.
Once the user logs in to Stripe, in the next step users have to enter the Publish key and Secret key to connect with Stripe.
The Publish key and Secret key is provided by Stripe to sync Stripe with EyeOnTask.
 Note: To get the Publish & Secret key, go to the Developers option from the bottom left side on the stripe platform, and select API keys option.
Dashboard=> Developer=>API keys
Note: To get the Publish & Secret key, go to the Developers option from the bottom left side on the stripe platform, and select API keys option.
Dashboard=> Developer=>API keys
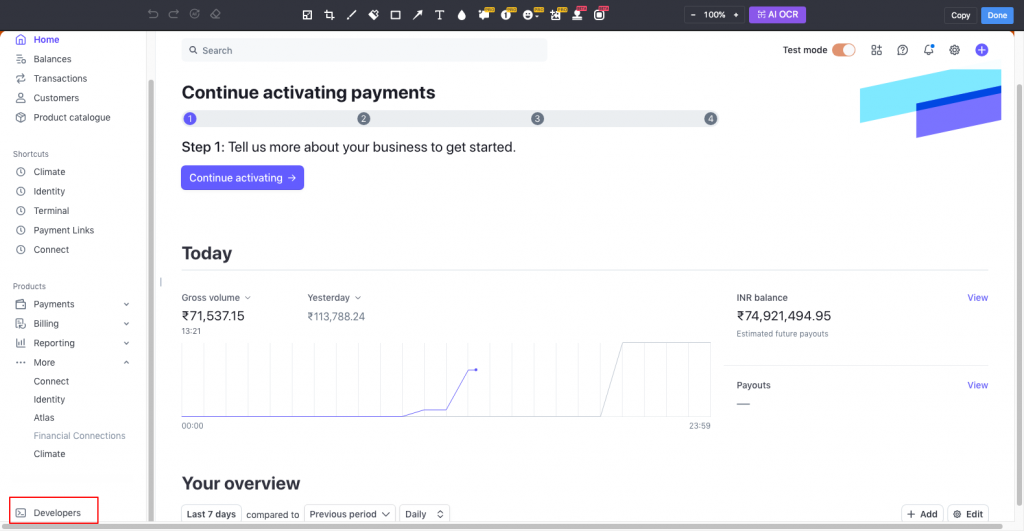
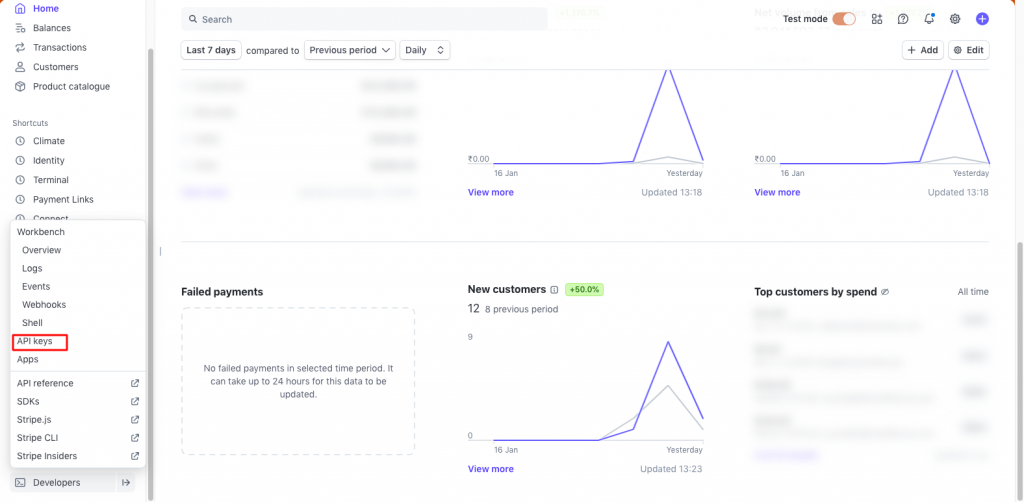
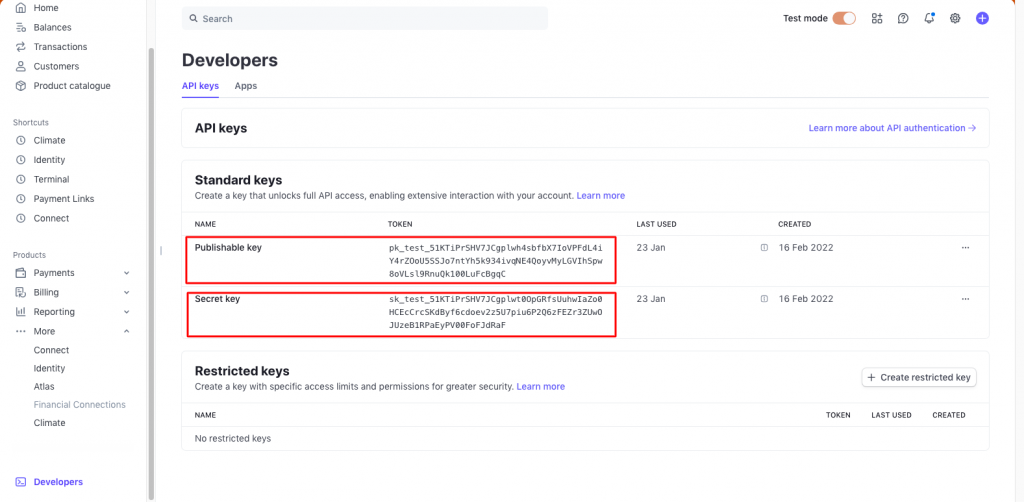 Here, users will get both Publish & Secret keys.
Once the user gets the Publish Key and Stripe Key, fill those keys on EyeOnTask’s Stripe Integration 2nd step and then Click the “Connect Stripe Account”.
Here, users will get both Publish & Secret keys.
Once the user gets the Publish Key and Stripe Key, fill those keys on EyeOnTask’s Stripe Integration 2nd step and then Click the “Connect Stripe Account”.
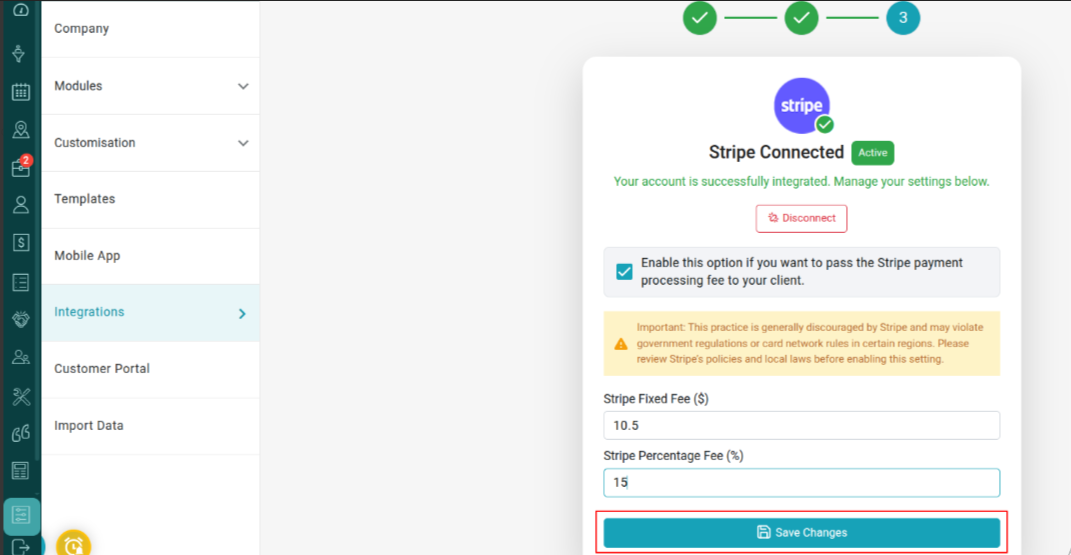
 Now in the 3rd step, If you want to charge the Stripe payment processing fee to your client, check the box “Enable this option if you want to pass the Stripe payment processing fee to your client.”
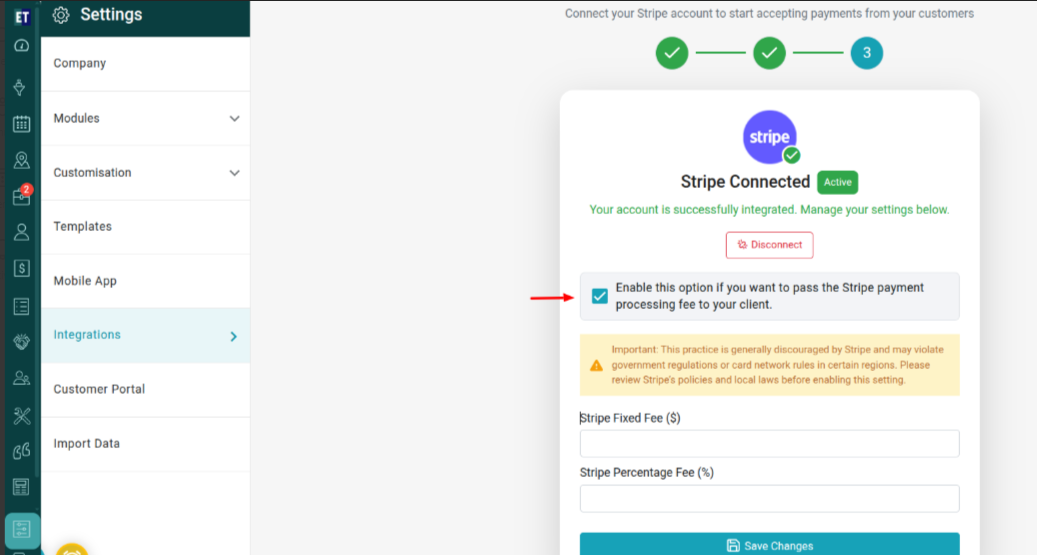 Also, Enter the fixed fee amount in the Stripe Fixed Fee ($) field, then Enter the percentage fee in the Stripe Percentage Fee (%) field and click on the “Save Changes” to save the changes.
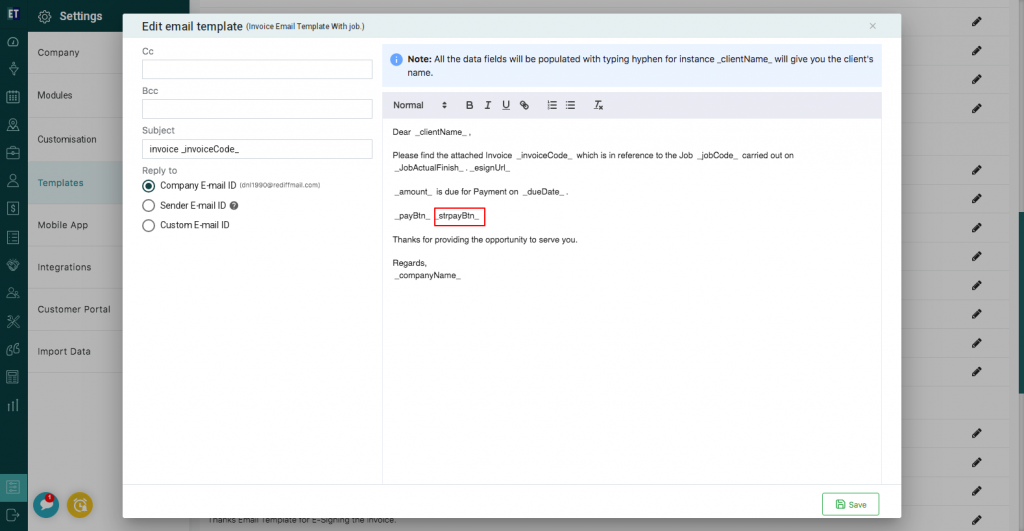
 After going inside the Email Template, Go to Invoice option under the tab “Send mail to Client” and edit anyone from “Invoice Email Template With job” or “Invoice Email Template Without job”.
 Here, in the Edit email template, you will have to type _strpayBtn_ or you can select from the list of options by typing _ in the text area to activate the Stripe button in the Invoice Email template.
 And click on Save button at the bottom.
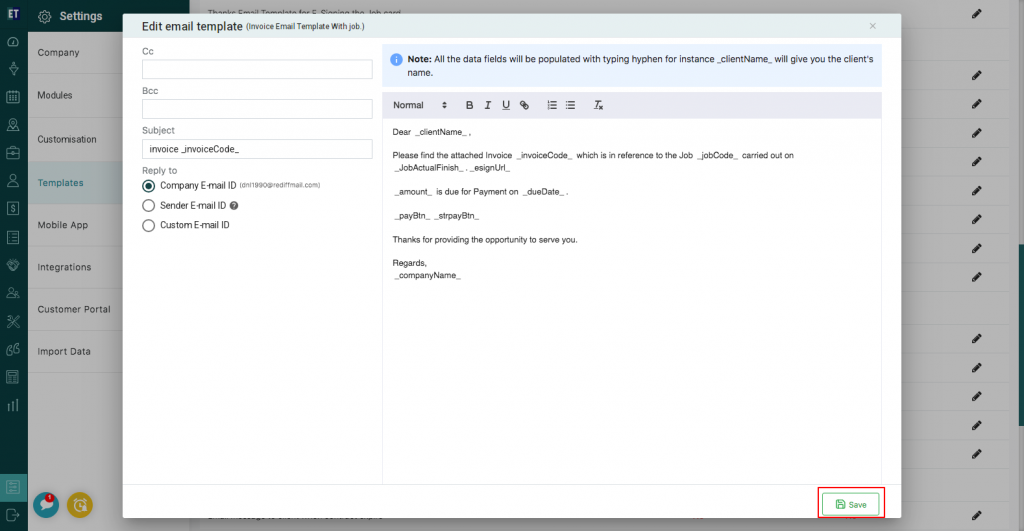 Now, you will see the Pay with Stripe button in the Invoice email template.
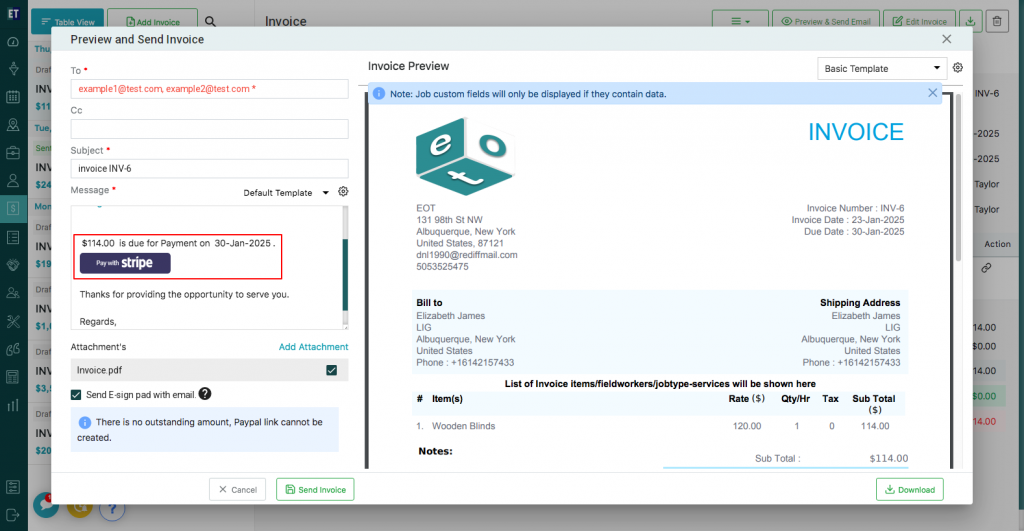 In this way, your customer can see the PaywithStripe button in the Invoice Email, through which they can initiate payment. By clicking on PaywithStripe button, customers will be redirected to the Stripe page, where they need to fill their personal/card details and can proceed with the payment.
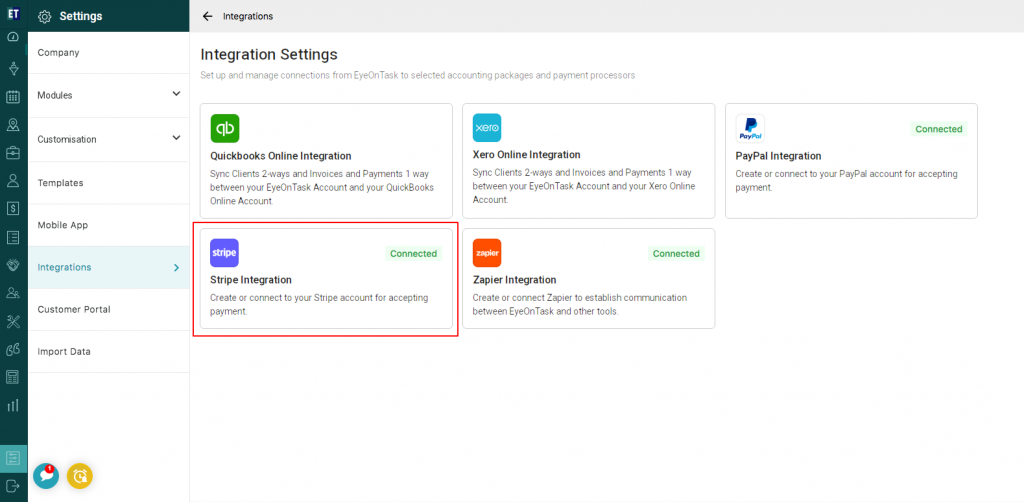
Go to the main menu and you will see the Settings option. Select it.
After selecting the Settings option Select Integrations. Here, you will find five options to integrate with Quickbooks, Xero, PayPal, Stripe and Zapier.
Go to the fourth option.
After selecting the Stripe Integration option, you will find steps for integration with Stripe. Then click on “Continue to stripe setup”.
Once the user logs in to Stripe, in the next step users have to enter the Publish key and Secret key to connect with Stripe.
The Publish key and Secret key is provided by Stripe to sync Stripe with EyeOnTask.
Note: To get the Publish & Secret key, go to the Developers option from the bottom left side on the stripe platform, and select API keys option.
Dashboard=> Developer=>API keys
Here, users will get both Publish & Secret keys.
Once the user gets the Publish Key and Stripe Key, fill those keys on EyeOnTask’s Stripe Integration 2nd step and then Click the “Connect Stripe Account”.
Now in the 3rd step, If you want to charge the Stripe payment processing fee to your client, check the box “Enable this option if you want to pass the Stripe payment processing fee to your client.”
Also, Enter the fixed fee amount in the Stripe Fixed Fee ($) field, then Enter the percentage fee in the Stripe Percentage Fee (%) field and click on the “Save Changes” to save the changes.
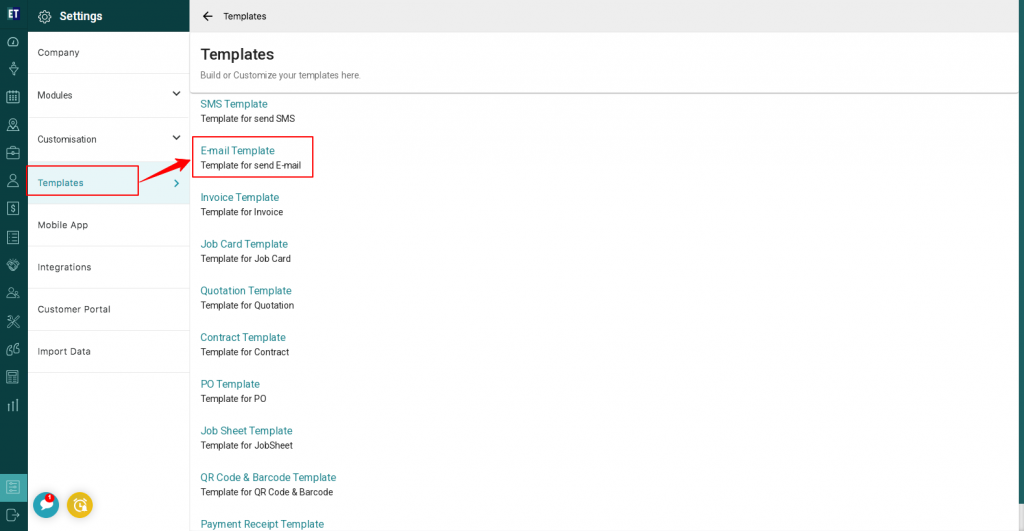
After this, to activate the Stripe Button in the Email template, go to Eyeontask’s setting option and select Templates and then click on Email Template.
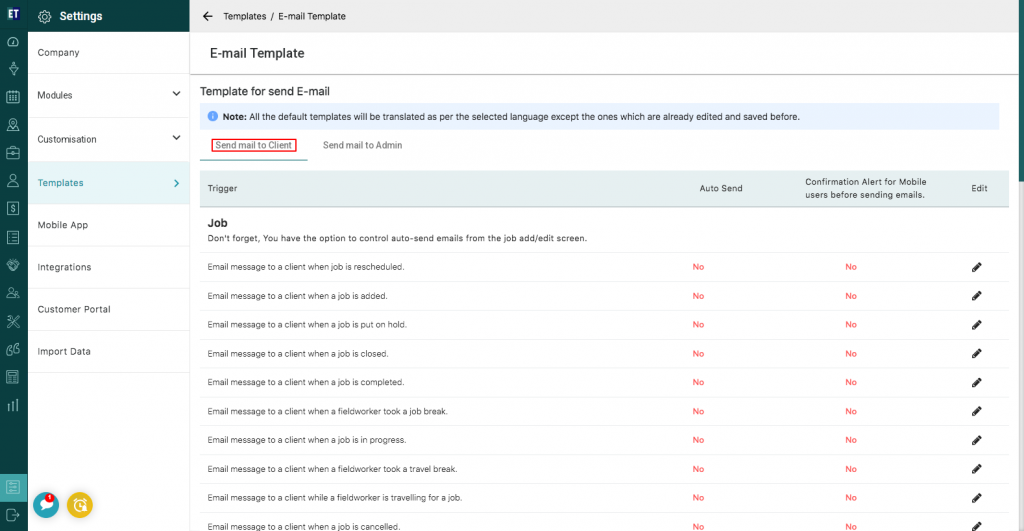
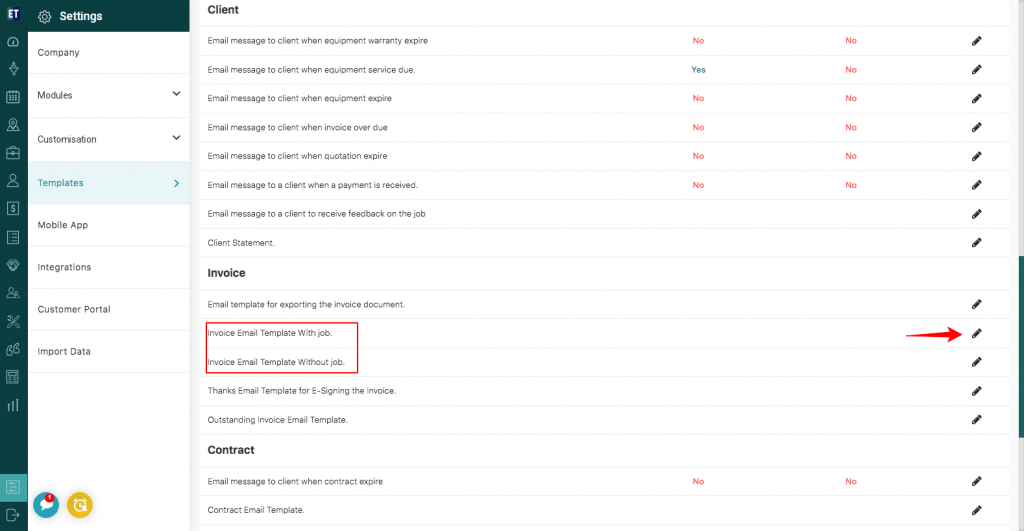
After going inside the Email Template, Go to Invoice option under the tab “Send mail to Client” and edit anyone from “Invoice Email Template With job” or “Invoice Email Template Without job”.
Here, in the Edit email template, you will have to type _strpayBtn_ or you can select from the list of options by typing _ in the text area to activate the Stripe button in the Invoice Email template.
And click on Save button at the bottom.
Now, you will see the Pay with Stripe button in the Invoice email template.
In this way, your customer can see the PaywithStripe button in the Invoice Email, through which they can initiate payment. By clicking on PaywithStripe button, customers will be redirected to the Stripe page, where they need to fill their personal/card details and can proceed with the payment.