How do I set up a Zapier account in EyeOnTask?
Zapier is used to automate workflows by connecting different apps and services without requiring any coding. It helps save time and reduce manual effort by allowing data to move automatically between tools you use every day.
 Then click on the “Copy”button present with the API Key .
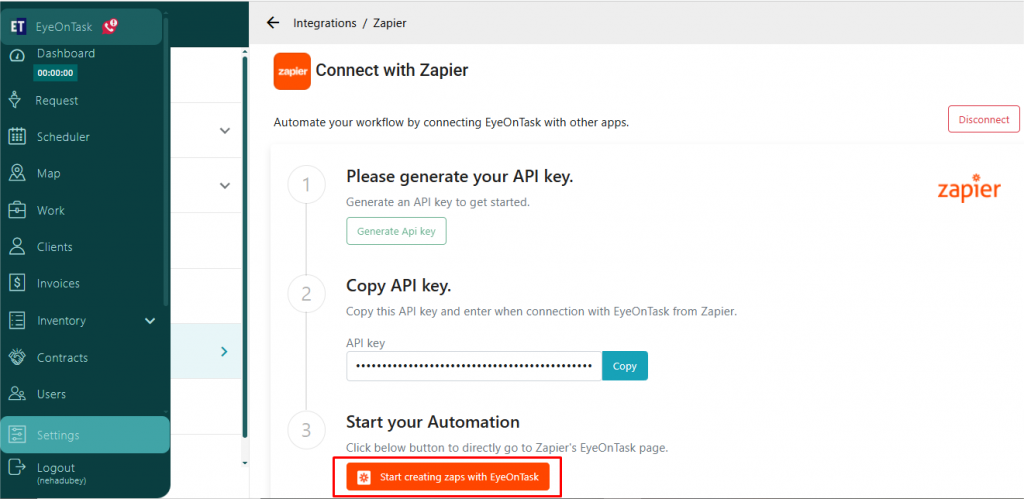
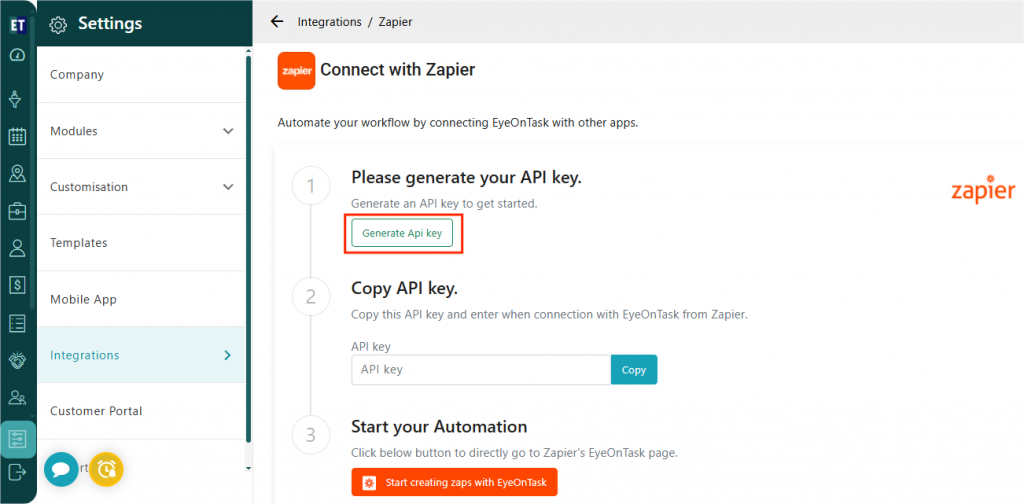 In the third step, click on “Start creating zaps with EyeOnTask”, It will take you to the login window of Zapier.
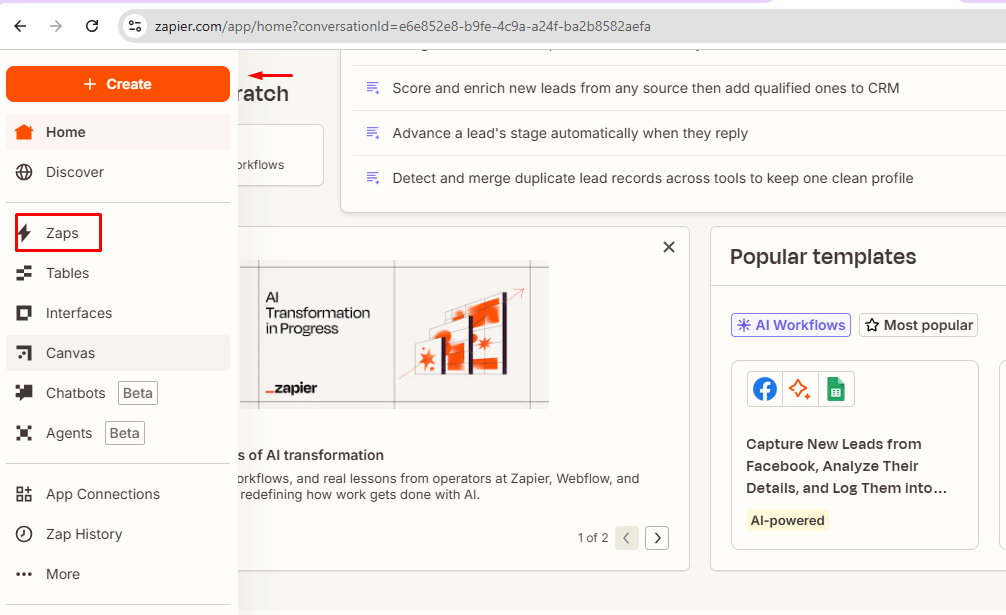
 After successfully login to Zapier, Go to the “Create” option, present on the upper left side of the window and select “Zaps”.
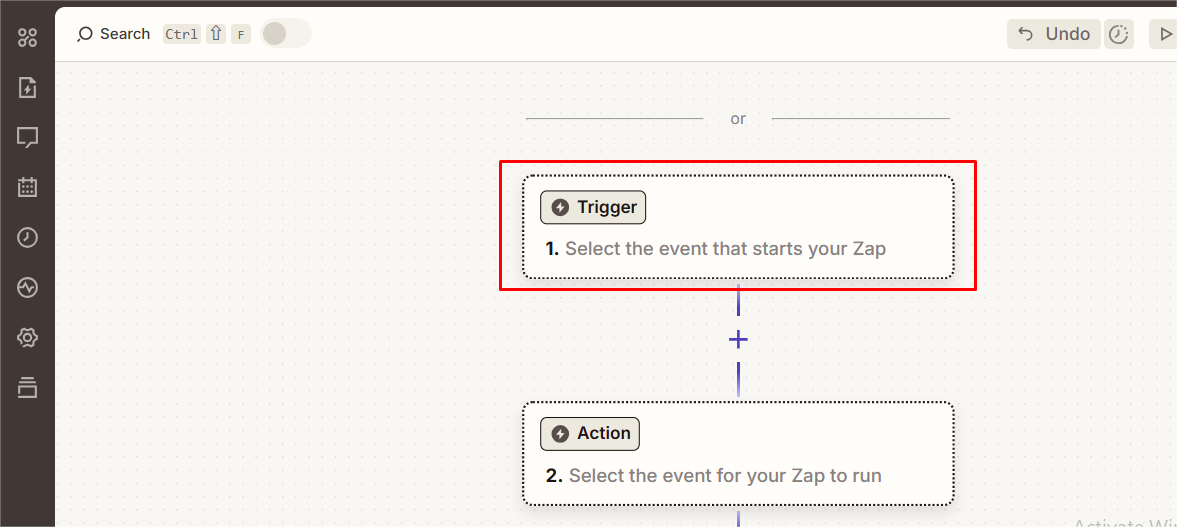
 After clicking on Zaps, a new window will open displaying two options — Trigger and Action. Select Trigger.
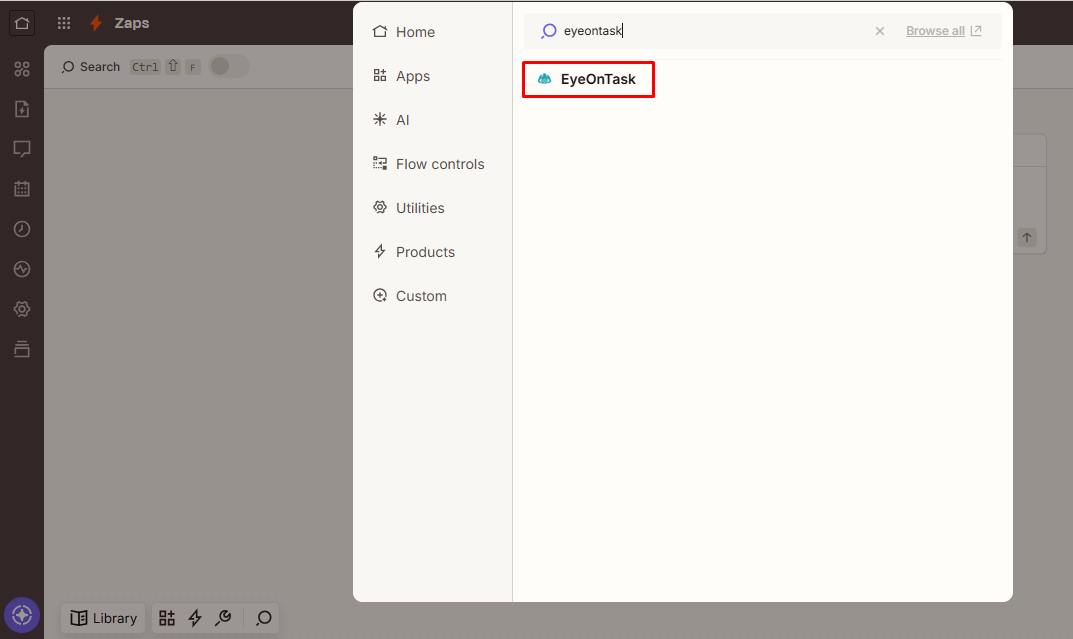
 Then search for EyeOnTask and set it as your trigger application.
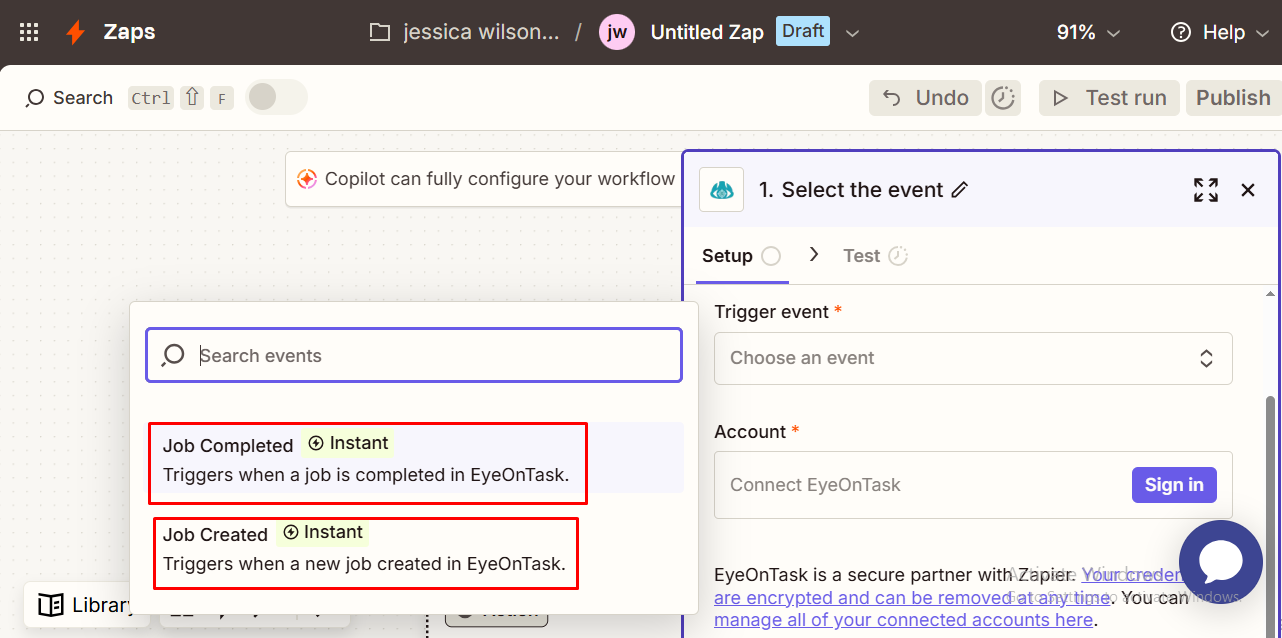
 After selecting EyeOnTask, a Pop Window will appear, where in the Trigger event, you can choose either of the two available options — Job Completed or Job Created.
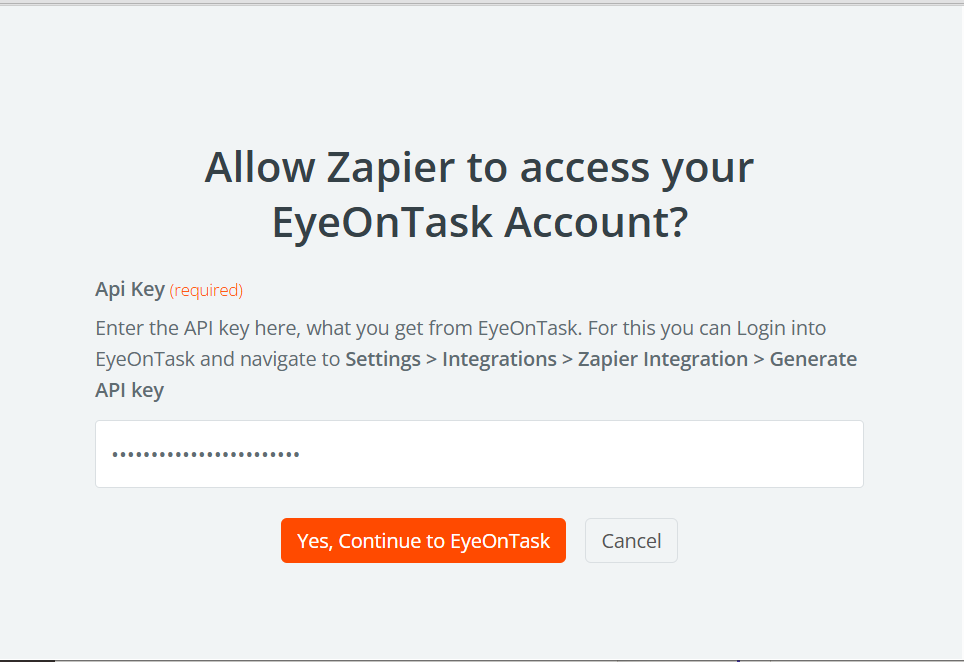
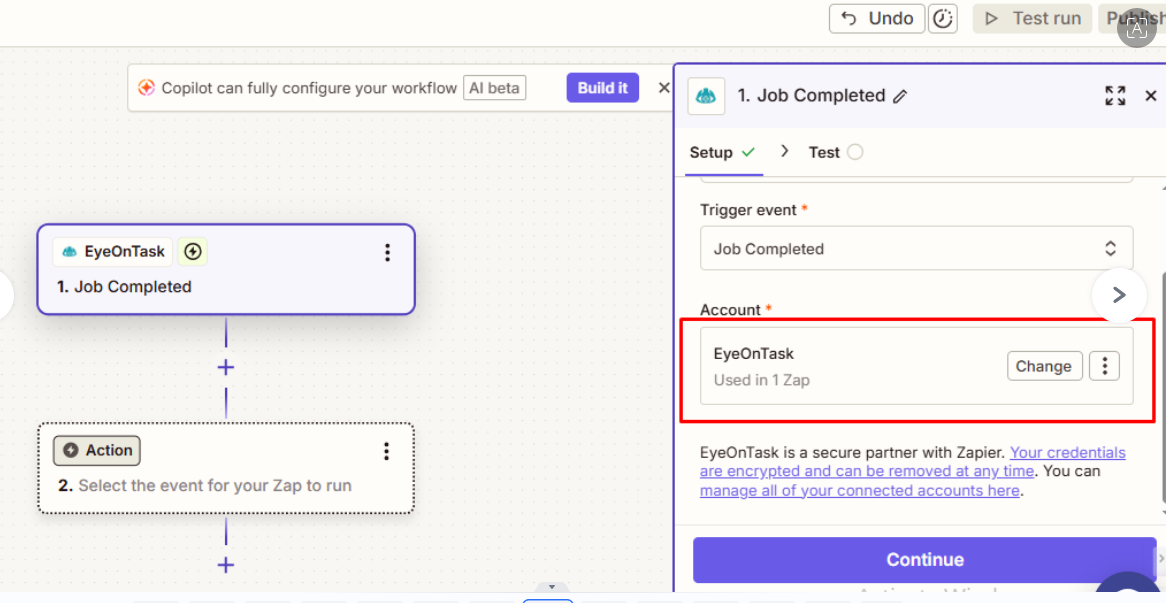
 Then, click on the Account Tab. This action will open a new window where you need to paste the API key that you copied earlier from EyeOnTask’s Zapier Integration section (navigate to Settings > Integrations > Zapier Integration > Generate API key) and click on “Yes, Continue to EyeOnTask”.
 After this, EyeOnTask will be connected with Zapier and click on the “Continue” button to proceed further.
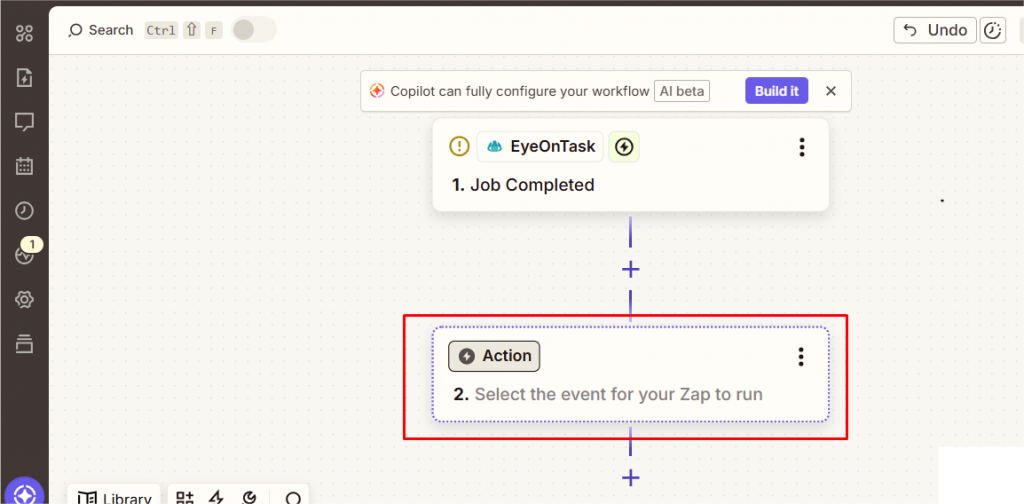
 Now, go to the “Action” Button.
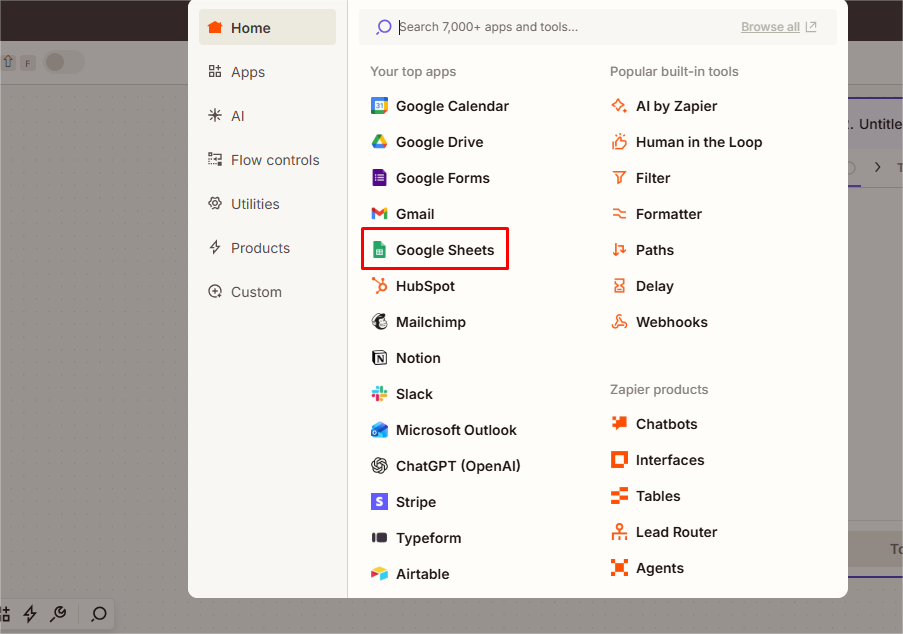
 You can choose any of the available Action options. In this example, we are selecting Google Spreadsheet.
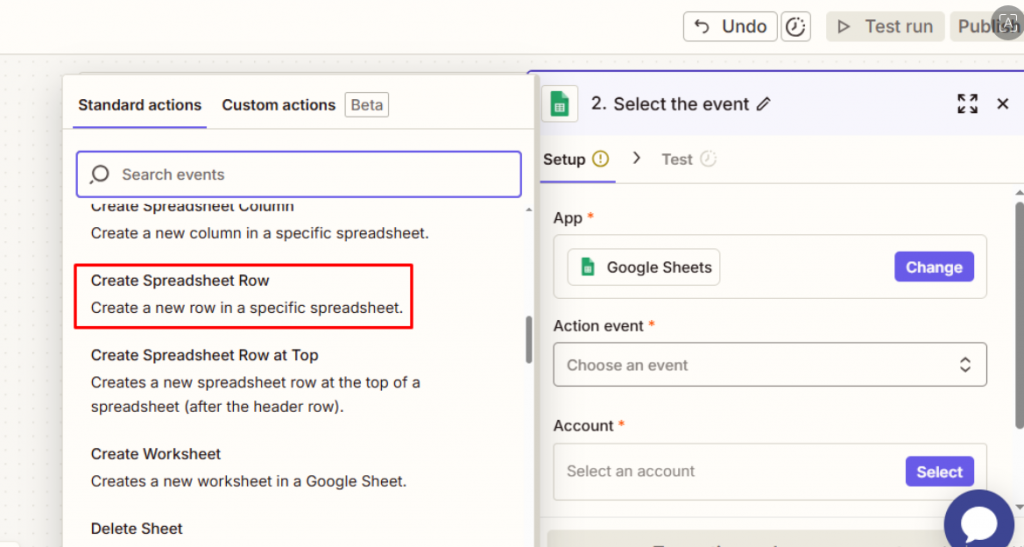
 After selecting Google Spreadsheet as the action application, a pop-up window will appear on the right side of the screen. From the Action Event toolbar, you can choose any action event that best suits your requirements. In this example, we are selecting “Create Spreadsheet Row”.
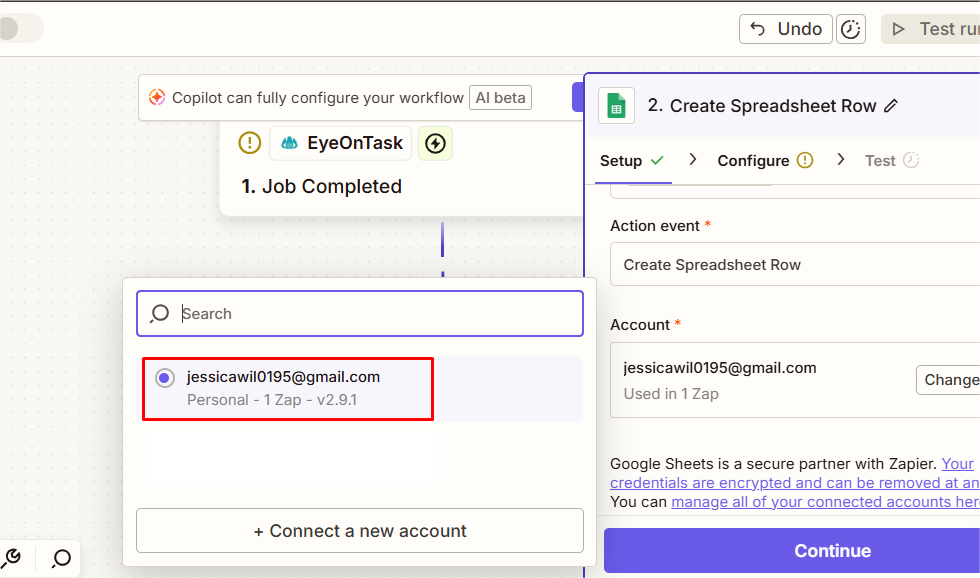
 Now, in the Account tab, link your Gmail account in which you want to create a new Google Spreadsheet row. This setup ensures that whenever a job is completed in EyeOnTask, a new entry will automatically be added to the connected Google Spreadsheet. Once the account is linked, click on Continue to proceed.
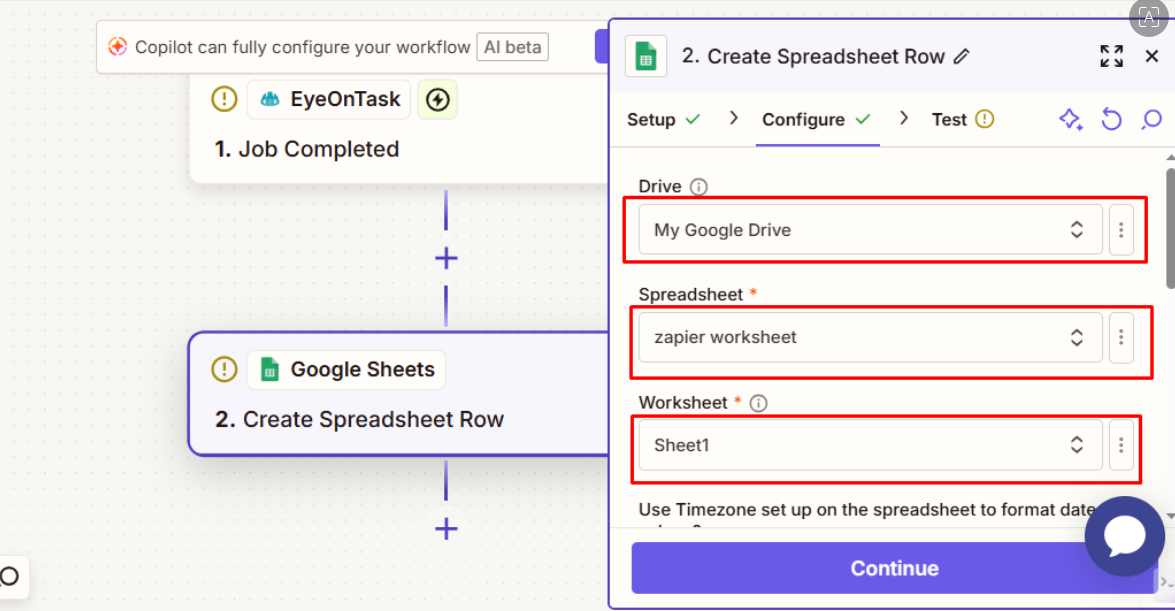
 Next, it will take you to the configure section of the Pop up Window, where you can select the Drive, Spreadsheet and Worksheet in which you want to get your job completion data to be recorded and then click on “Continue” Button.
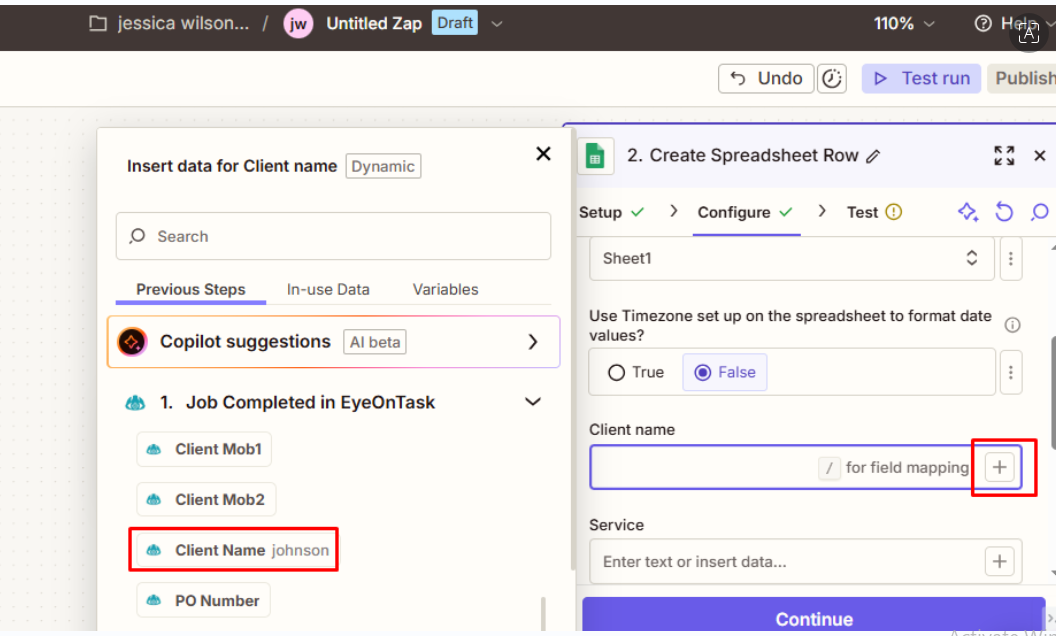
 Now, you will see the column heads of the selected Google Spreadsheet in the window and we will have to Map those Heads with heads present in the “Job Completed in EyeOnTask”section. For example, here we are mapping Client Name by clicking on the “+” sign present with the Client Name head. Select the corresponding head from the “Job Completed in EyeOnTask” section to map to it. In the same way, map other column heads also and click Continue.
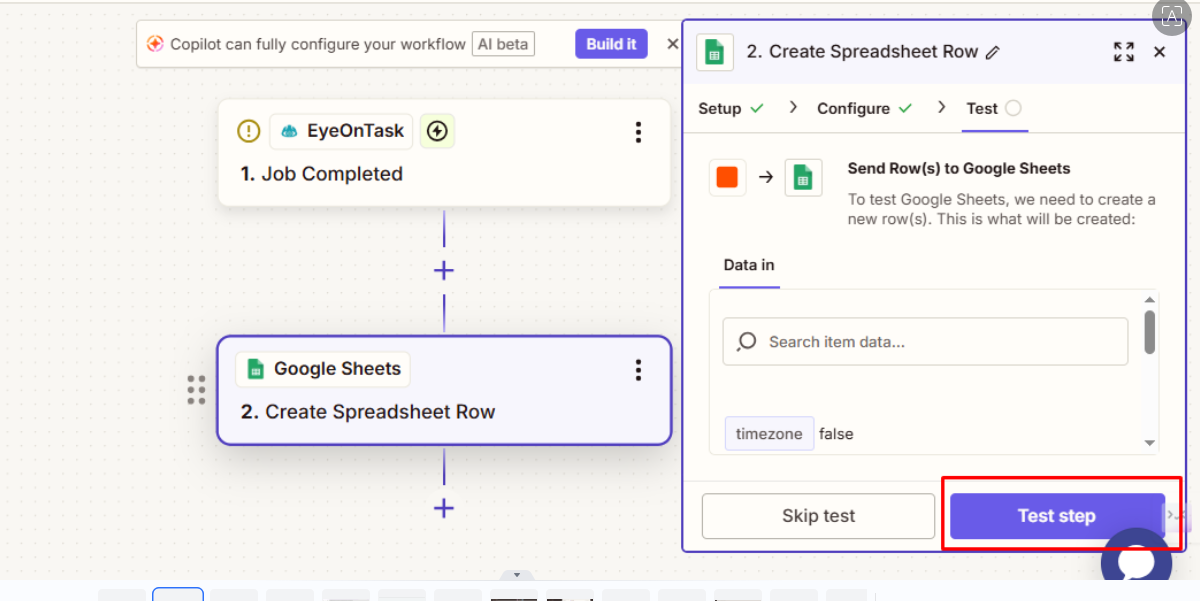
 Now, you can test your process by clicking on “Test step”
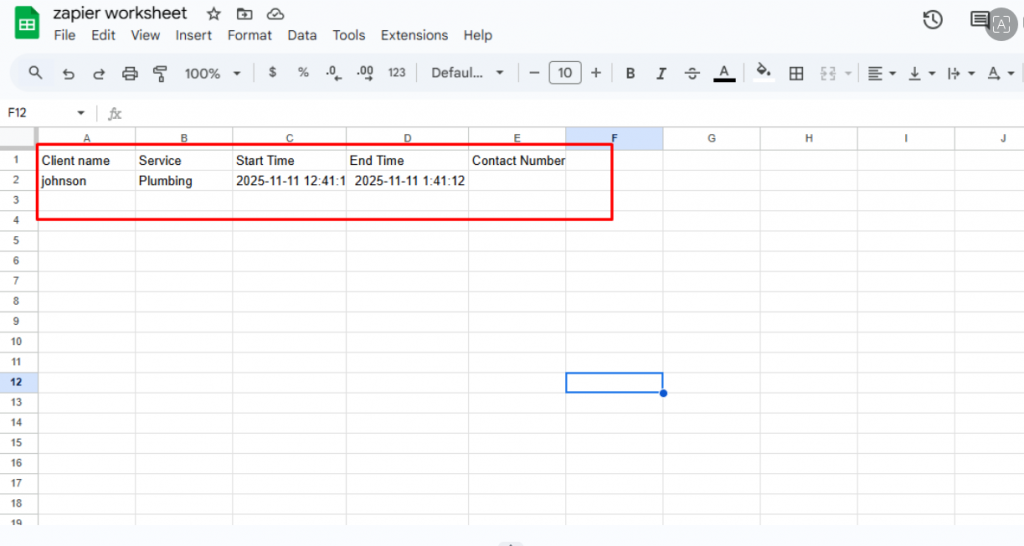
 On Test, you will find an added row in the selected Google spreadsheet, as shown in the below picture.
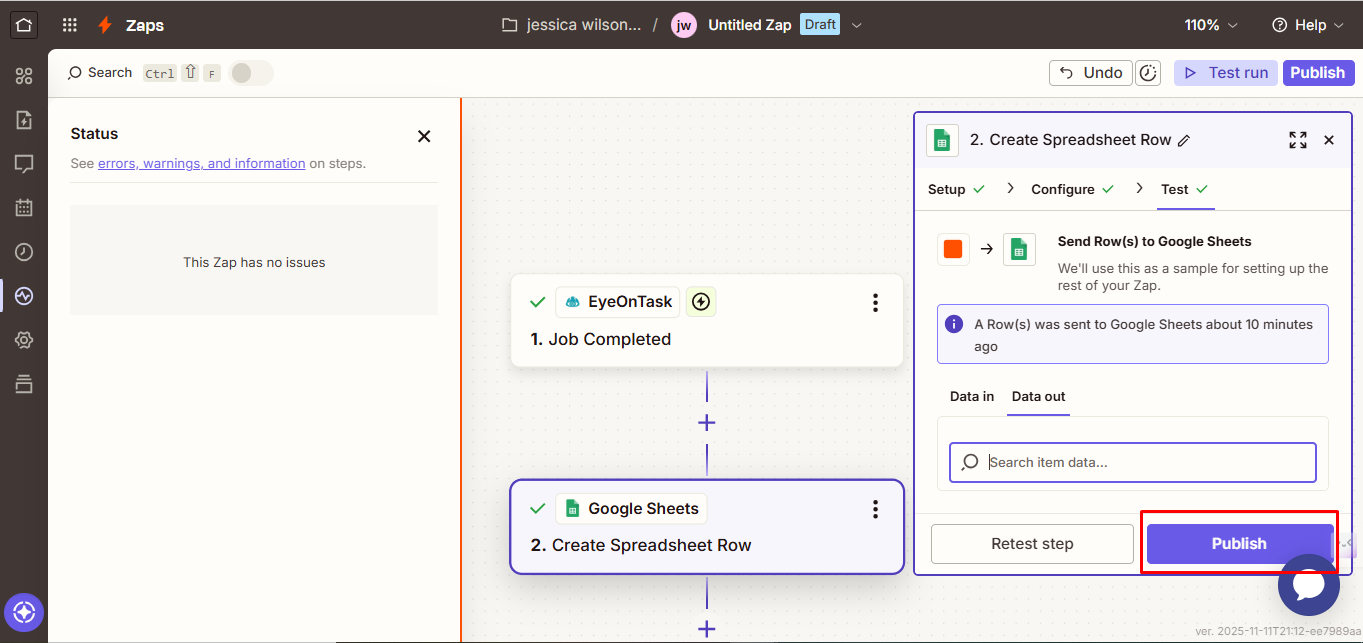
 Finally, click the Publish button to run the Zap (i.e., activate the workflow so it will begin processing automatically).
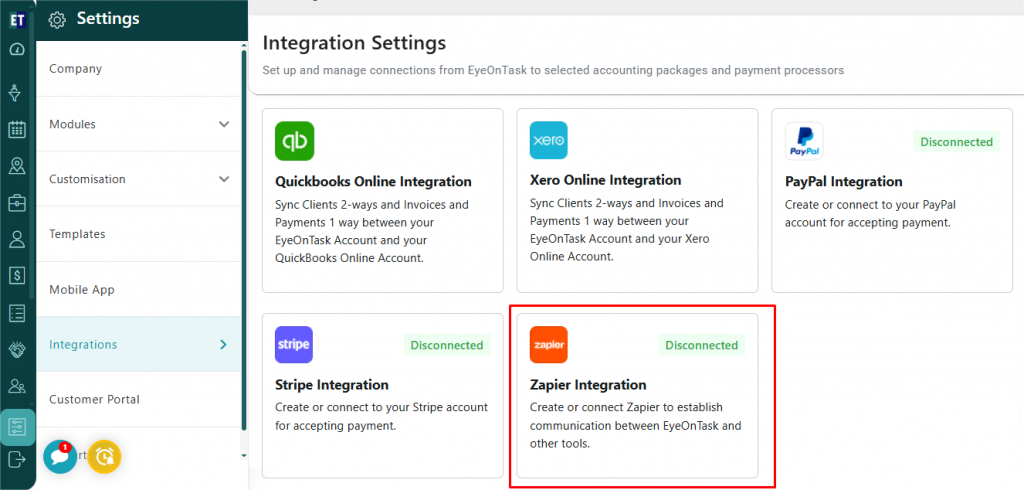
To integrate Zapier with EyeOnTask, Go to the main menu and select the Settings option. Under Settings, choose Integrations. Here, you will find five integration options — QuickBooks, Xero, PayPal, Stripe and Zapier.
Select the fifth option Zapier.
Then click on the “Copy”button present with the API Key .
In the third step, click on “Start creating zaps with EyeOnTask”, It will take you to the login window of Zapier.
After successfully login to Zapier, Go to the “Create” option, present on the upper left side of the window and select “Zaps”.
After clicking on Zaps, a new window will open displaying two options — Trigger and Action. Select Trigger.
Then search for EyeOnTask and set it as your trigger application.
After selecting EyeOnTask, a Pop Window will appear, where in the Trigger event, you can choose either of the two available options — Job Completed or Job Created.
Then, click on the Account Tab. This action will open a new window where you need to paste the API key that you copied earlier from EyeOnTask’s Zapier Integration section (navigate to Settings > Integrations > Zapier Integration > Generate API key) and click on “Yes, Continue to EyeOnTask”.
After this, EyeOnTask will be connected with Zapier and click on the “Continue” button to proceed further.
Now, go to the “Action” Button.
You can choose any of the available Action options. In this example, we are selecting Google Spreadsheet.
After selecting Google Spreadsheet as the action application, a pop-up window will appear on the right side of the screen. From the Action Event toolbar, you can choose any action event that best suits your requirements. In this example, we are selecting “Create Spreadsheet Row”.
Now, in the Account tab, link your Gmail account in which you want to create a new Google Spreadsheet row. This setup ensures that whenever a job is completed in EyeOnTask, a new entry will automatically be added to the connected Google Spreadsheet. Once the account is linked, click on Continue to proceed.
Next, it will take you to the configure section of the Pop up Window, where you can select the Drive, Spreadsheet and Worksheet in which you want to get your job completion data to be recorded and then click on “Continue” Button.
Now, you will see the column heads of the selected Google Spreadsheet in the window and we will have to Map those Heads with heads present in the “Job Completed in EyeOnTask”section. For example, here we are mapping Client Name by clicking on the “+” sign present with the Client Name head. Select the corresponding head from the “Job Completed in EyeOnTask” section to map to it. In the same way, map other column heads also and click Continue.
Now, you can test your process by clicking on “Test step”
On Test, you will find an added row in the selected Google spreadsheet, as shown in the below picture.
Finally, click the Publish button to run the Zap (i.e., activate the workflow so it will begin processing automatically).