“How can we view undispatched jobs in the Scheduler and dispatch them?”
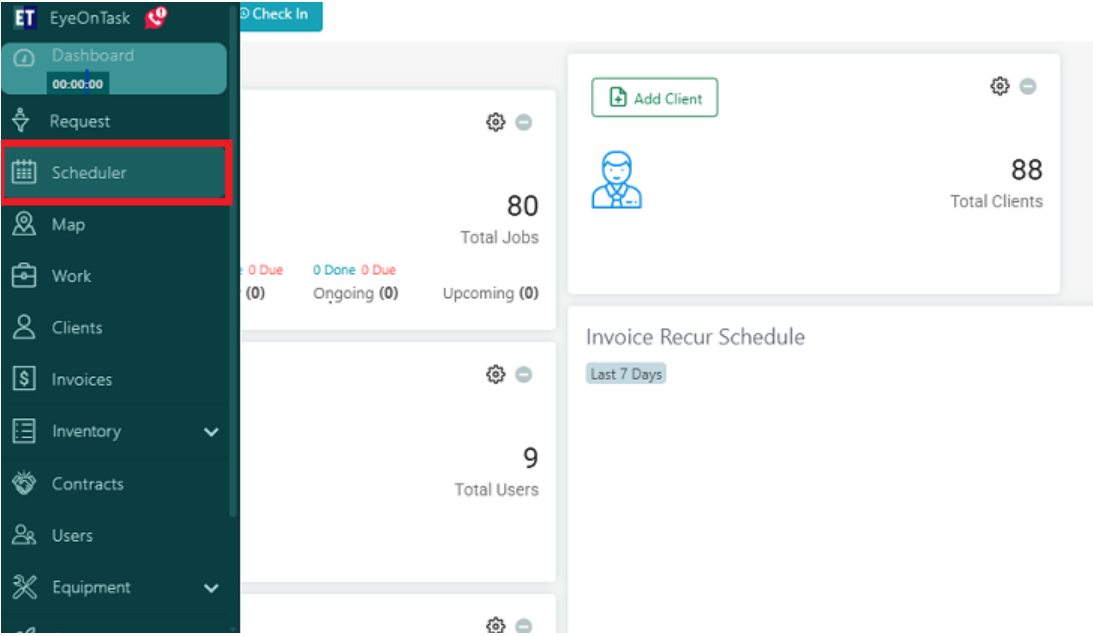
Go to the Scheduler from the main menu.
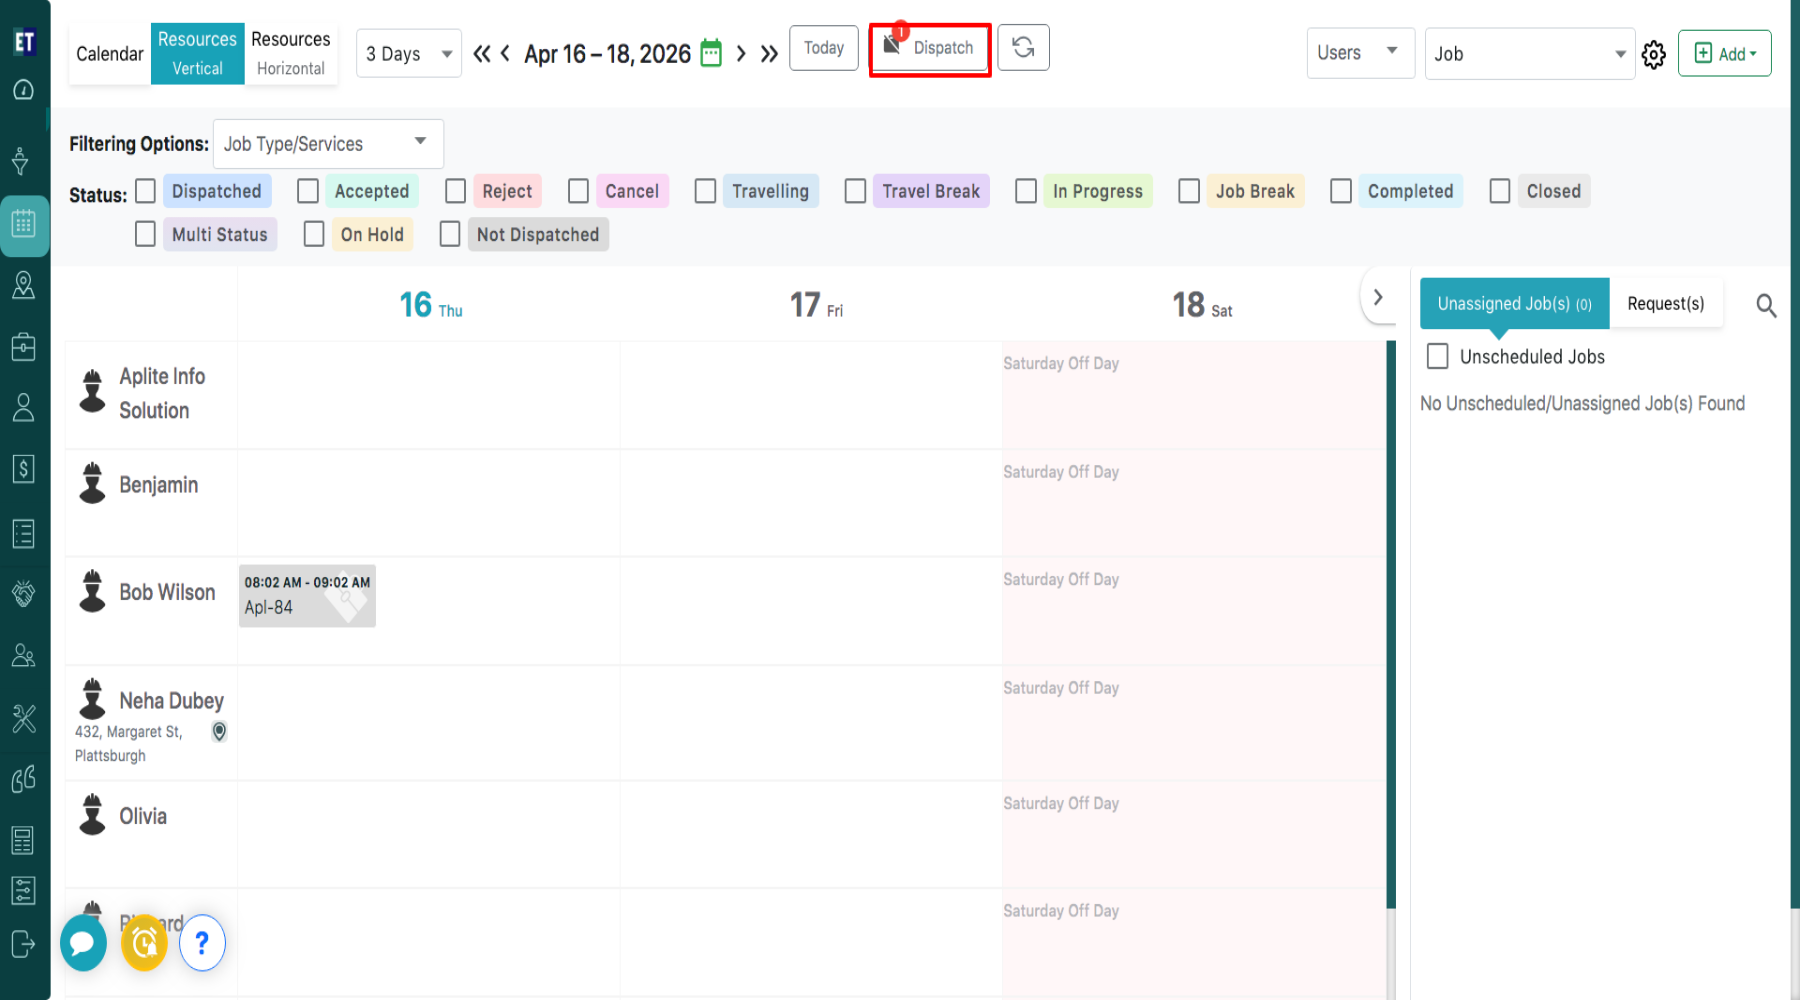
 At the top of the screen, click on the “Dispatch” button.
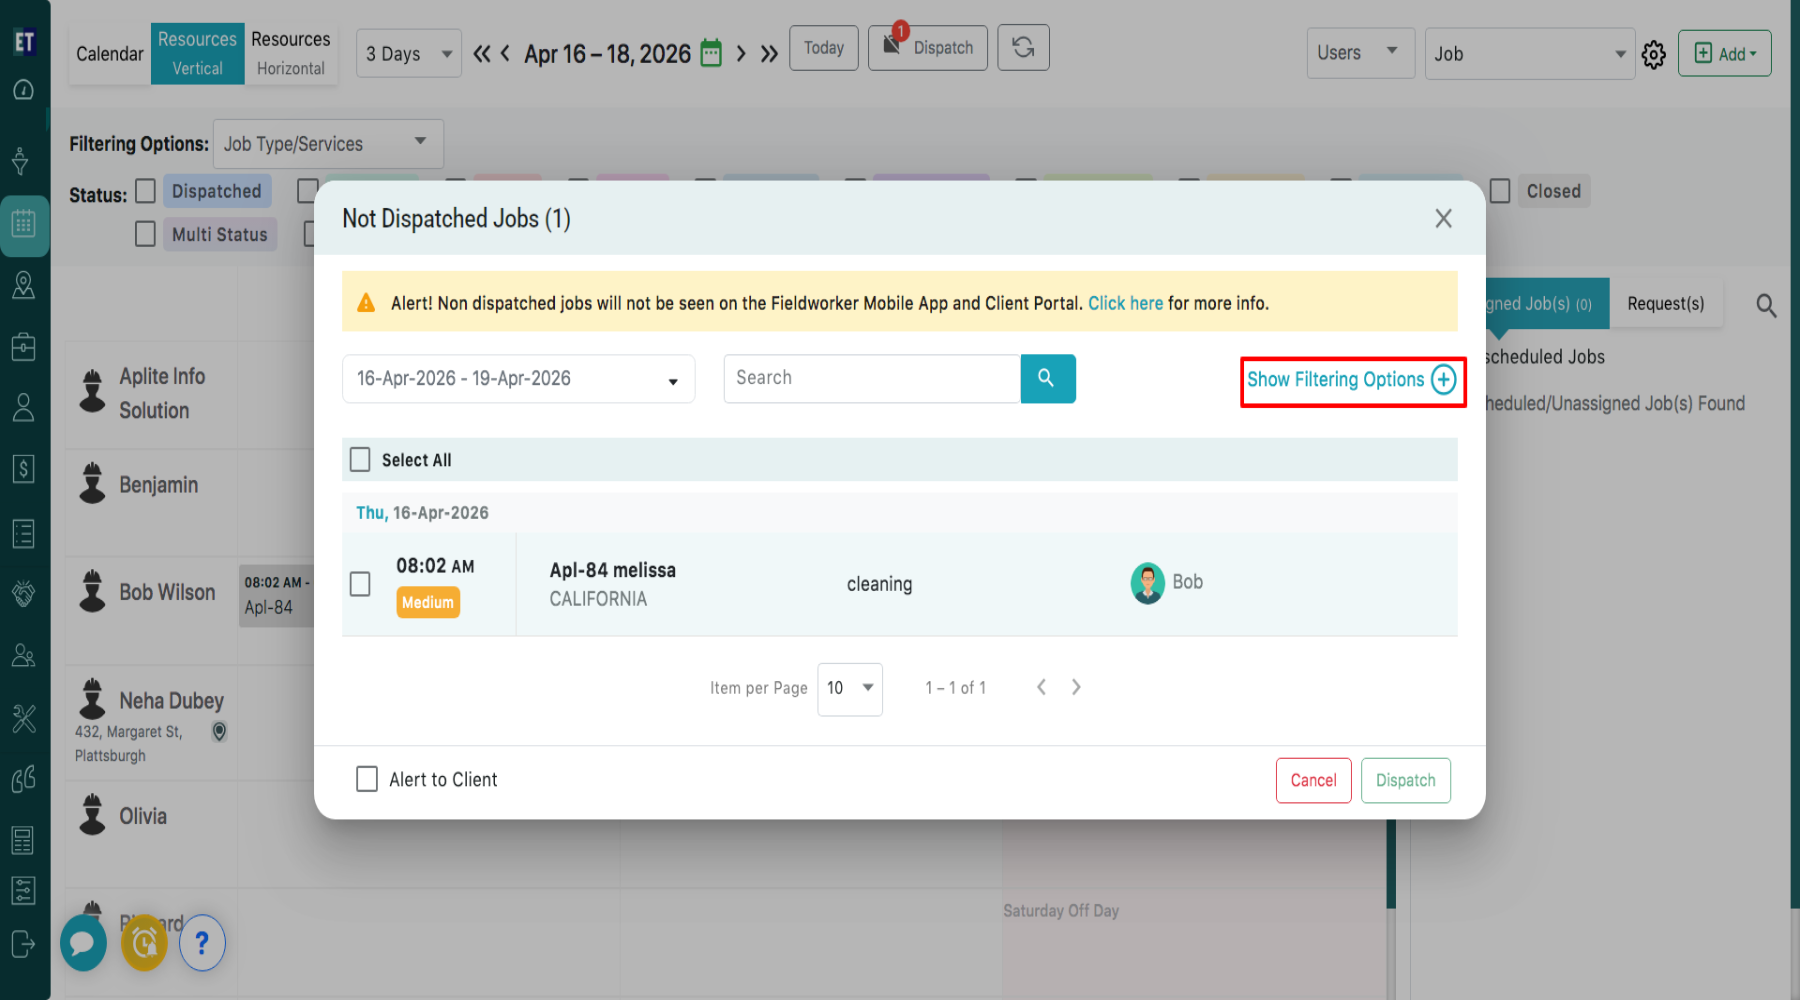
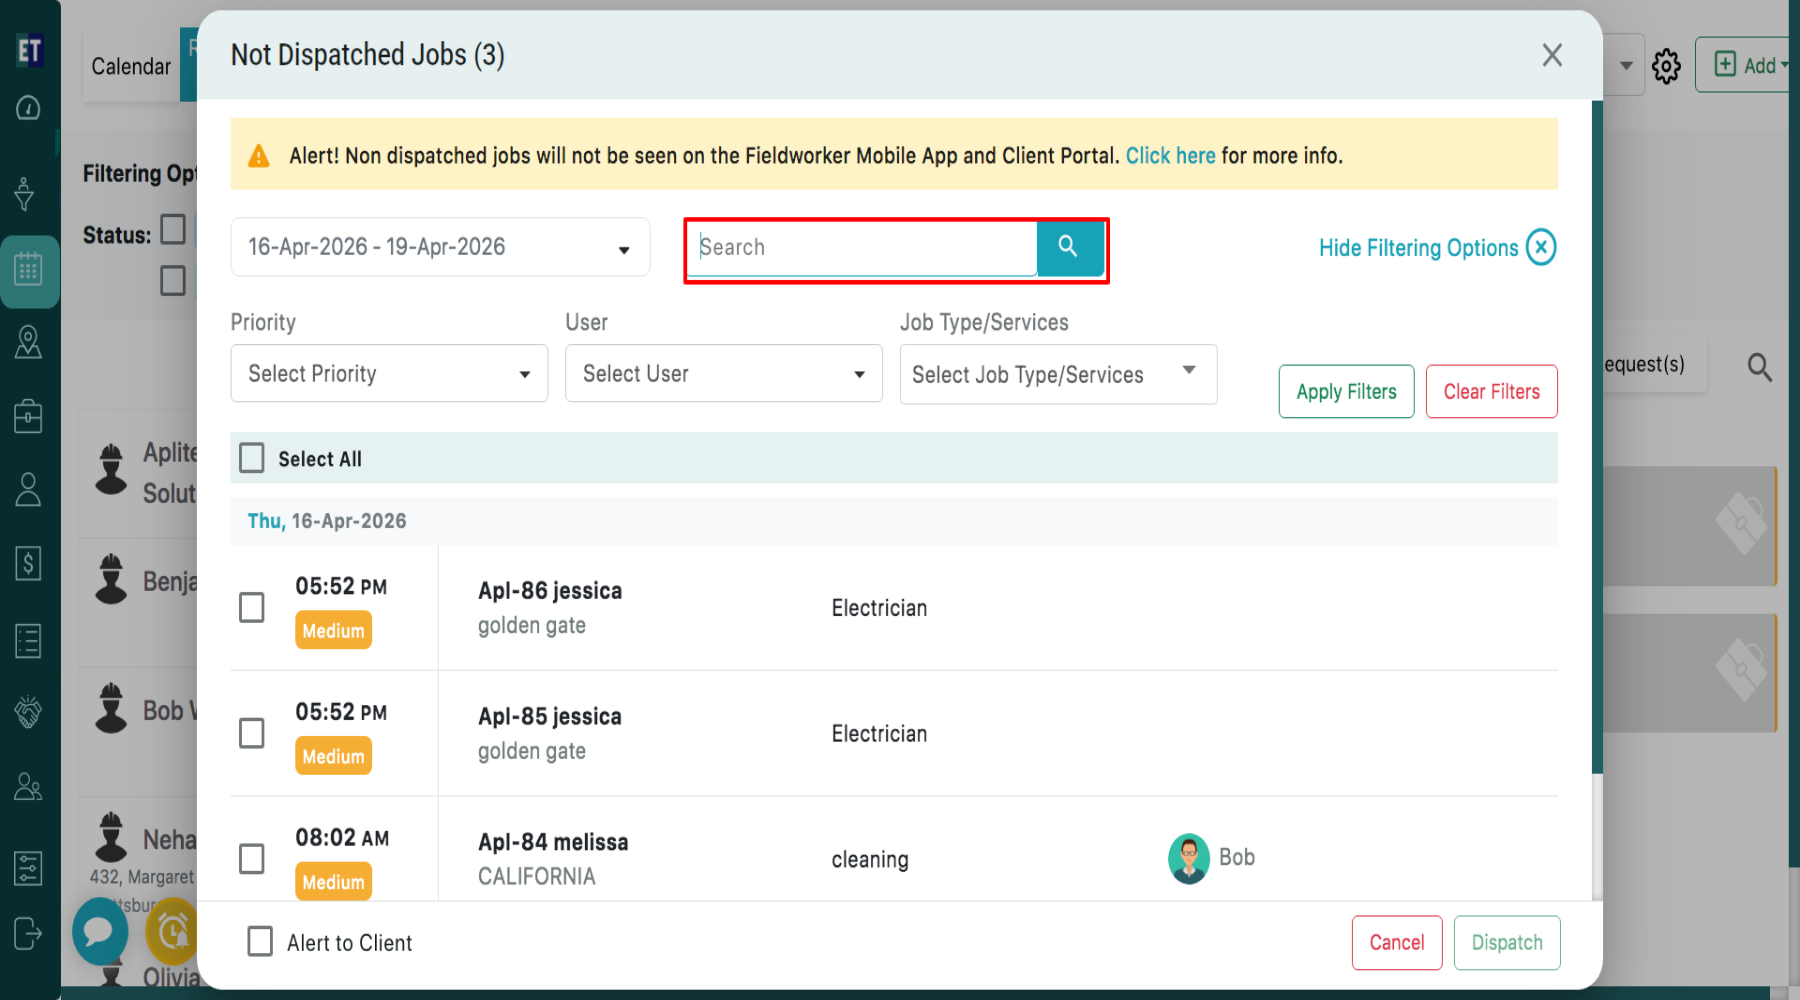
 A pop-up window titled “Not Dispatched Jobs” will appear. The system will display all jobs that are not yet dispatched. You will see job details such as: Time, Job Name, Location, Job Type/Service, Assigned User.
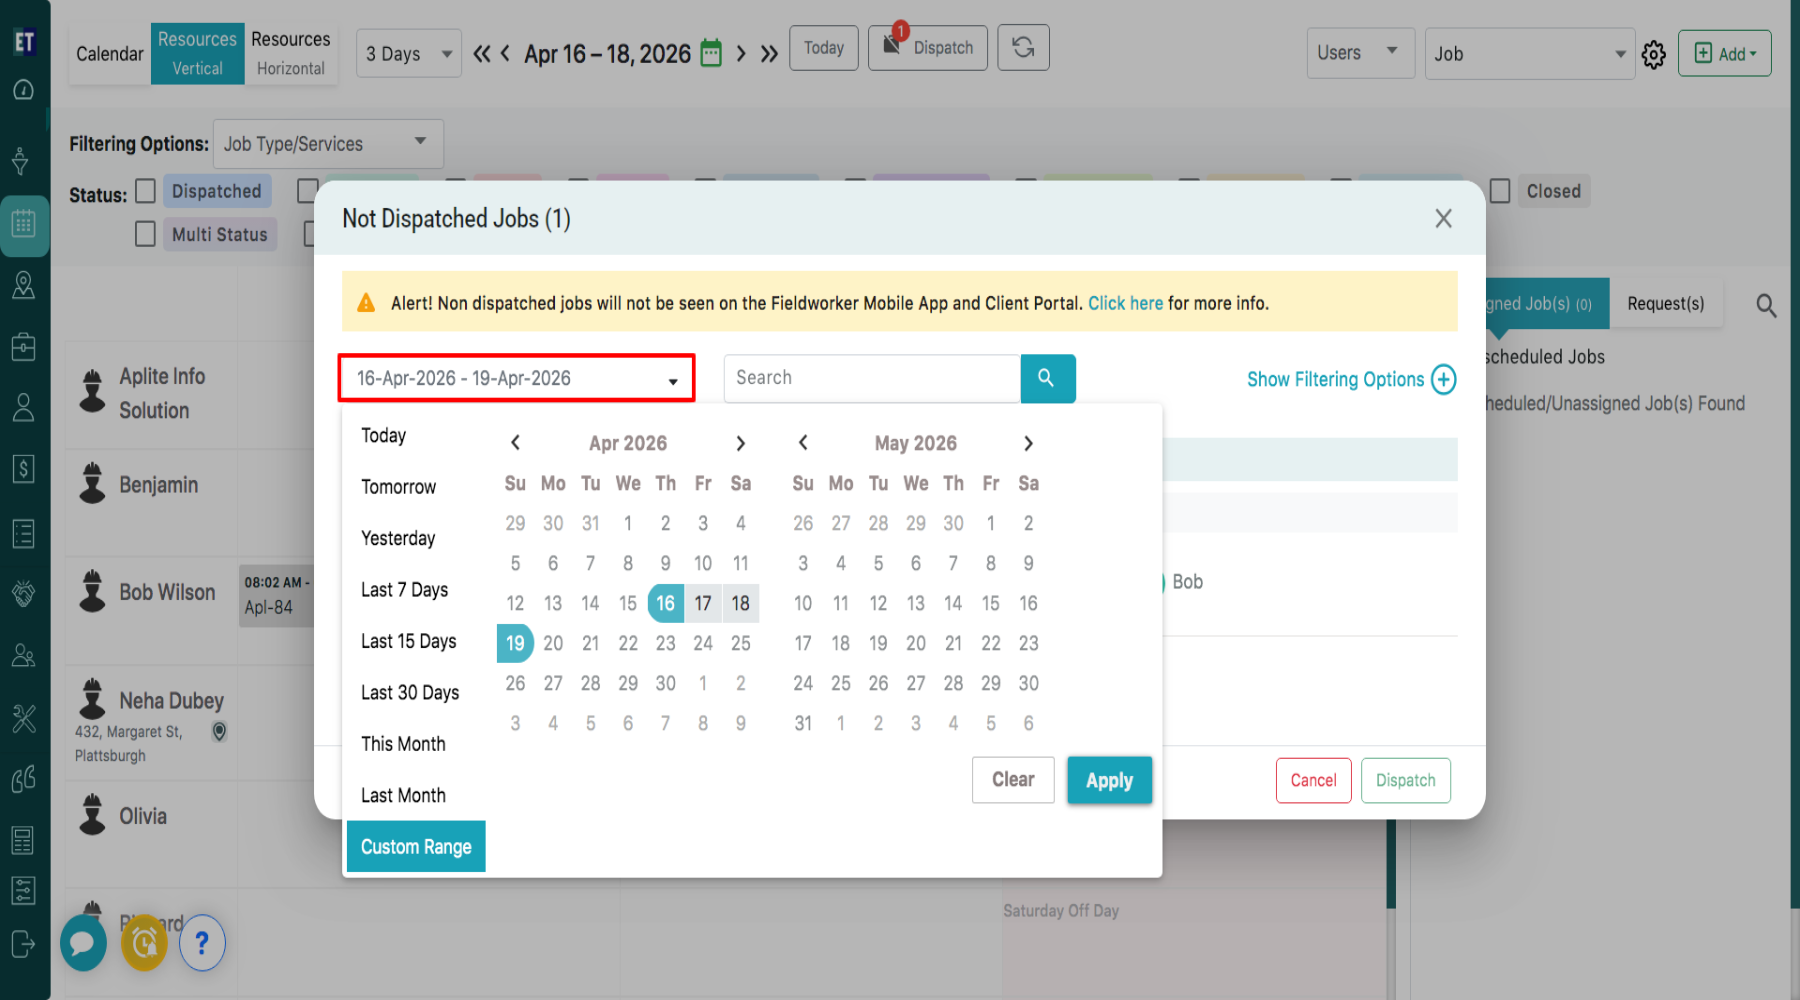
 Use the date range dropdown to select a specific time period. Choose predefined ranges such as : Today, Yesterday, Tomorrow Last 7 Days, Last 15 Days, Last 30 Days, This Month, Last Month or select a custom date range and Click “Apply” after selecting dates.
 You can search for any undispatched jobs using the available search option.
 Click on “Show Filtering Options” to refine the list.
 You can apply filters based on Priority by selecting from High, Medium or Low, and then click on ‘Apply Filters’ to view the filtered results.
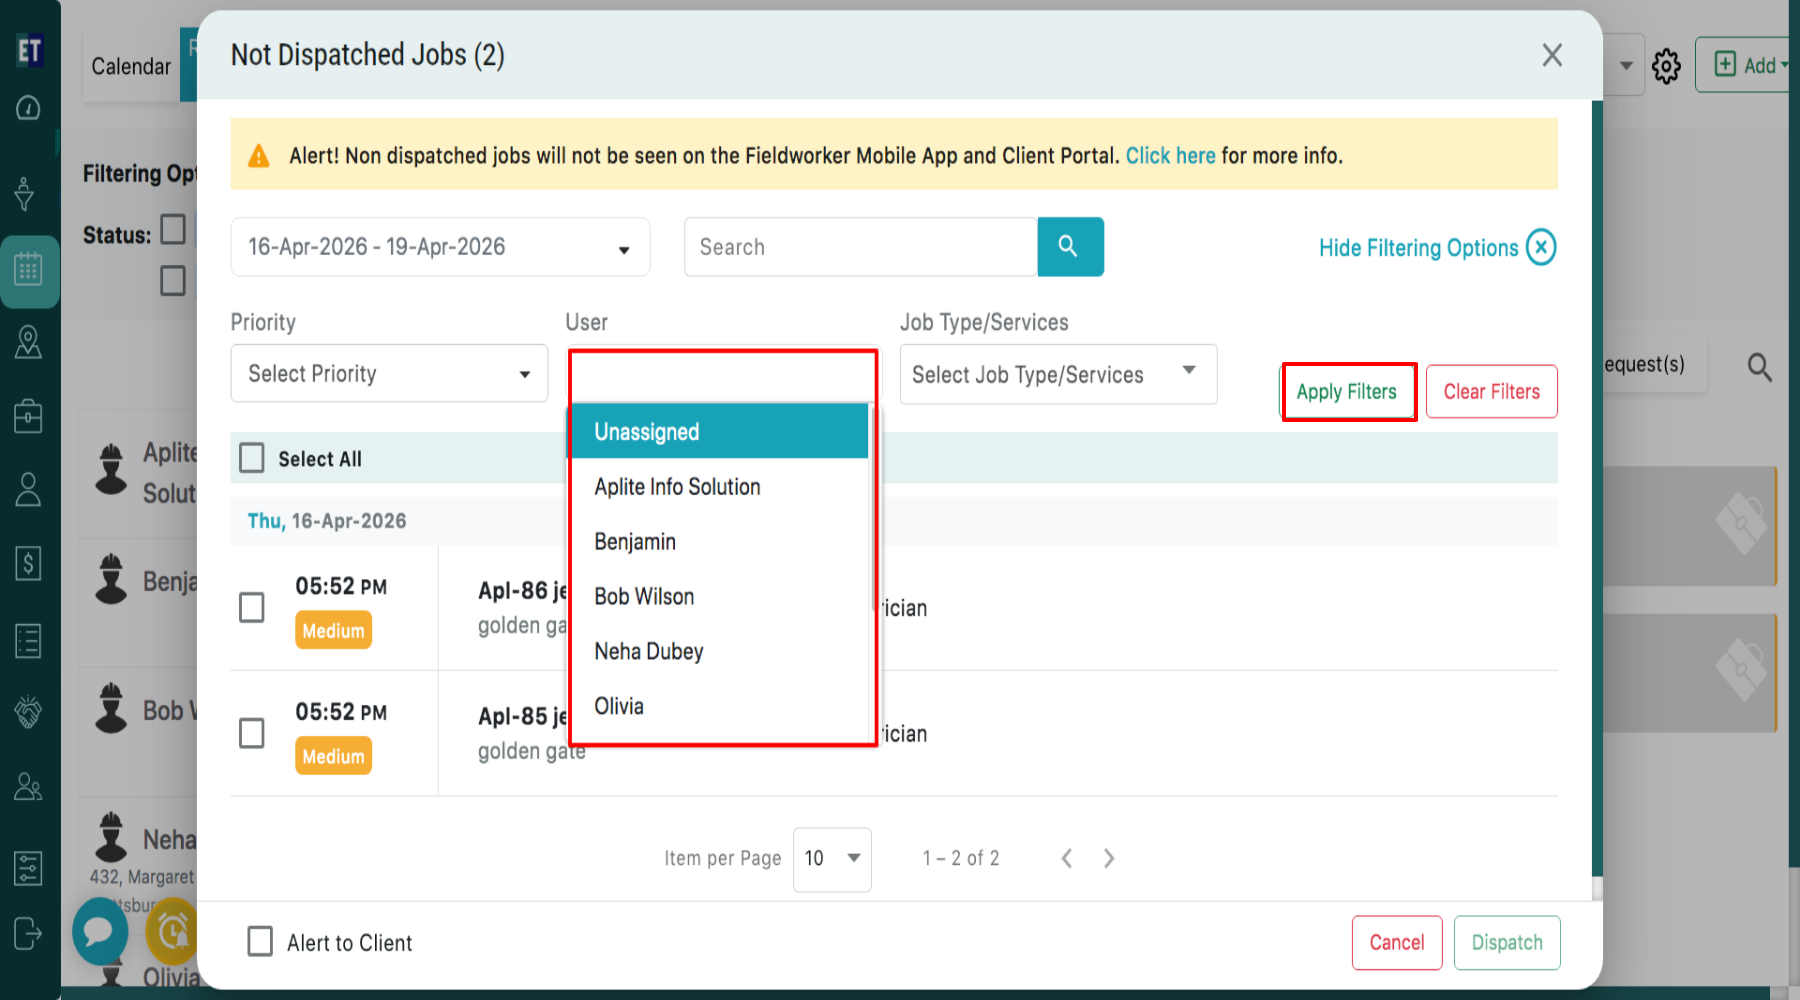
 You can apply filters based on Users and then click on ‘Apply Filters’ to view the filtered results.
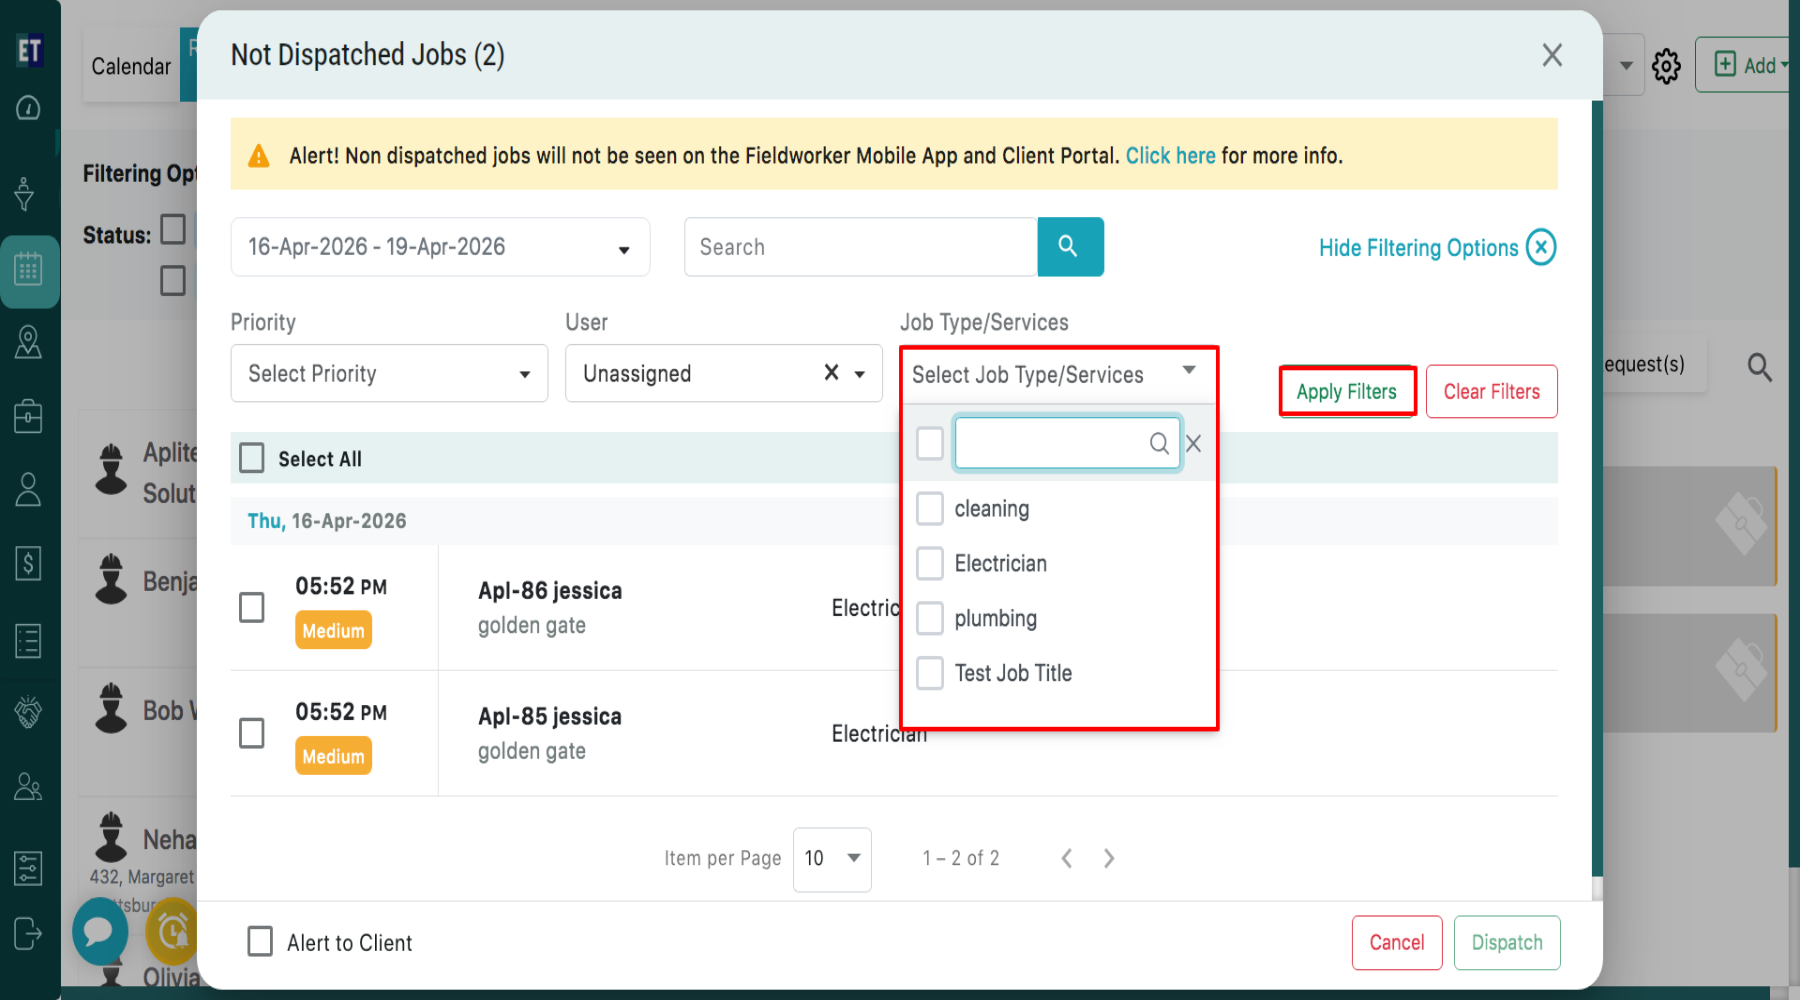
 You can apply filters based on Job Type/Services and then click on ‘Apply Filters’ to view the filtered results. Use “Clear Filters” to reset the filters.
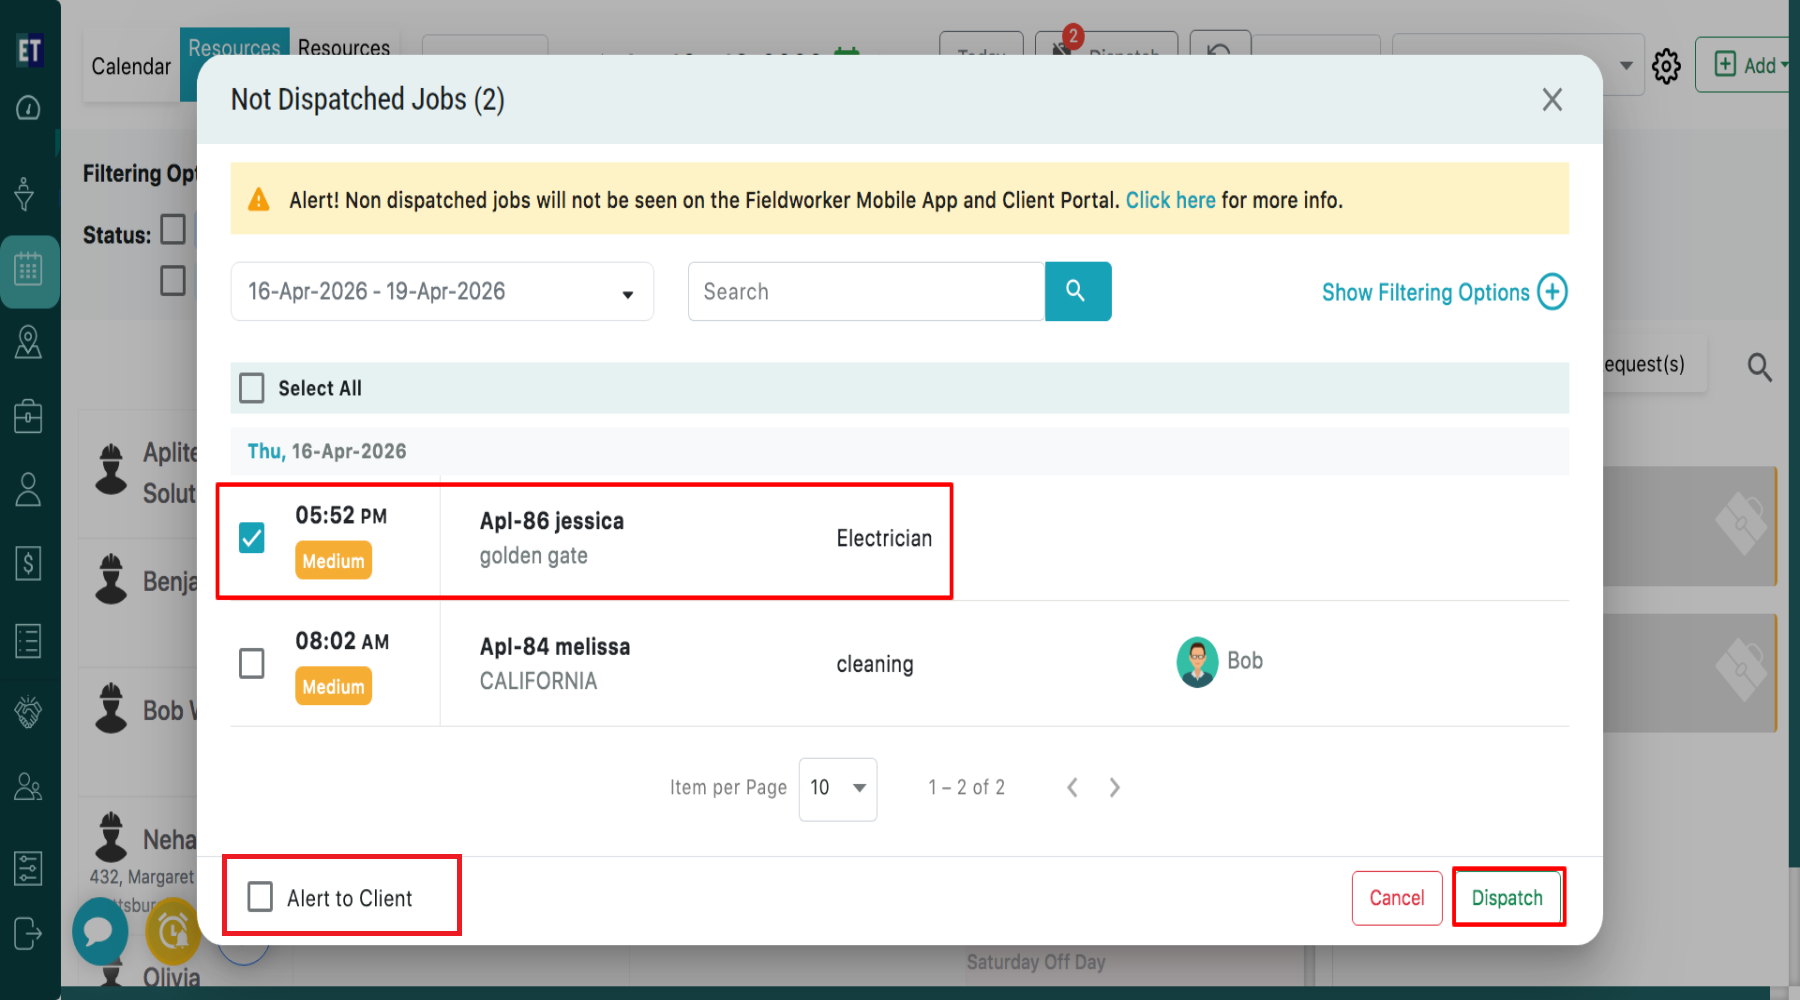
 Select individual jobs by checking the checkbox next to each job. Alternatively, use “Select All” to choose all listed jobs. Check the “Alert to Client” option if you want to notify the client about the dispatch and then click on Dispatch button at the bottom.
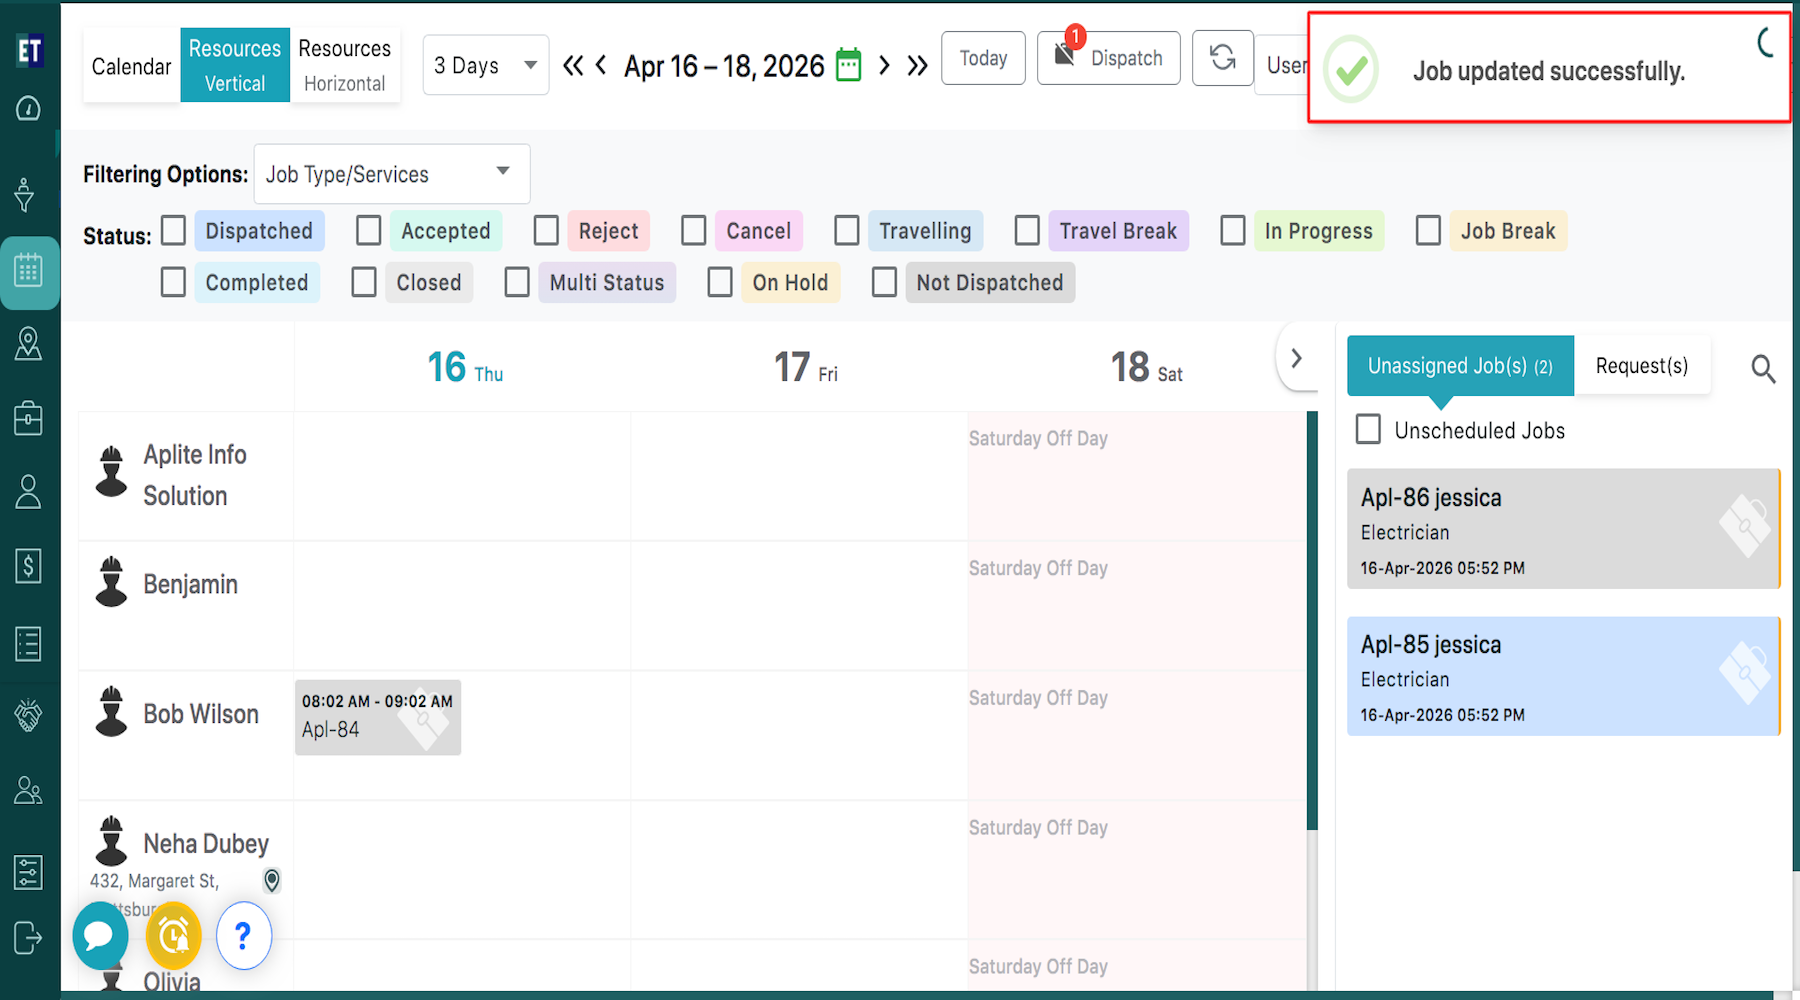
 Clicking on the Dispatch button will display a success alert popup “Job updated successfully” at the right corner of the screen.
At the top of the screen, click on the “Dispatch” button.
A pop-up window titled “Not Dispatched Jobs” will appear. The system will display all jobs that are not yet dispatched. You will see job details such as: Time, Job Name, Location, Job Type/Service, Assigned User.
Use the date range dropdown to select a specific time period. Choose predefined ranges such as : Today, Yesterday, Tomorrow Last 7 Days, Last 15 Days, Last 30 Days, This Month, Last Month or select a custom date range and Click “Apply” after selecting dates.
You can search for any undispatched jobs using the available search option.
Click on “Show Filtering Options” to refine the list.
You can apply filters based on Priority by selecting from High, Medium or Low, and then click on ‘Apply Filters’ to view the filtered results.
You can apply filters based on Users and then click on ‘Apply Filters’ to view the filtered results.
You can apply filters based on Job Type/Services and then click on ‘Apply Filters’ to view the filtered results. Use “Clear Filters” to reset the filters.
Select individual jobs by checking the checkbox next to each job. Alternatively, use “Select All” to choose all listed jobs. Check the “Alert to Client” option if you want to notify the client about the dispatch and then click on Dispatch button at the bottom.
Clicking on the Dispatch button will display a success alert popup “Job updated successfully” at the right corner of the screen.